Refresh
this page because I am probably still making changes
to it.
In this lesson we'll learn about PHP and what it does, a brief history
of PHP's development, and how to code with PHP. You should make
note of the following resources:
What's great about the manual is that almost every page has
user-contributed notes with extra information, examples, hints,
and lots of other valuable information.
Pay attention to the votes on the user-contributed notes:
items with negative votes have been down-voted by
other developers because of bad practices or incorrect information.
PHP, a recursive acronym that stands for "PHP: Hypertext Preprocessor", was born in
1995 from a set of tools developed by a Danish-Canadian software developer named Rasmus Lerdorf.
He used Perl/CGI to create some scripts that kept track of visitors to his on-line
resumé - basically a guest book for visitors to sign and a counter that
displayed the number of visits to the page.
This was a new idea in the 90's and this technology had not previously existed, so many
other web developers were interested in Lerdorf's tools. He packaged them together as
"Personal Home Page tools" and gave them freely to anyone else who wanted to use them.
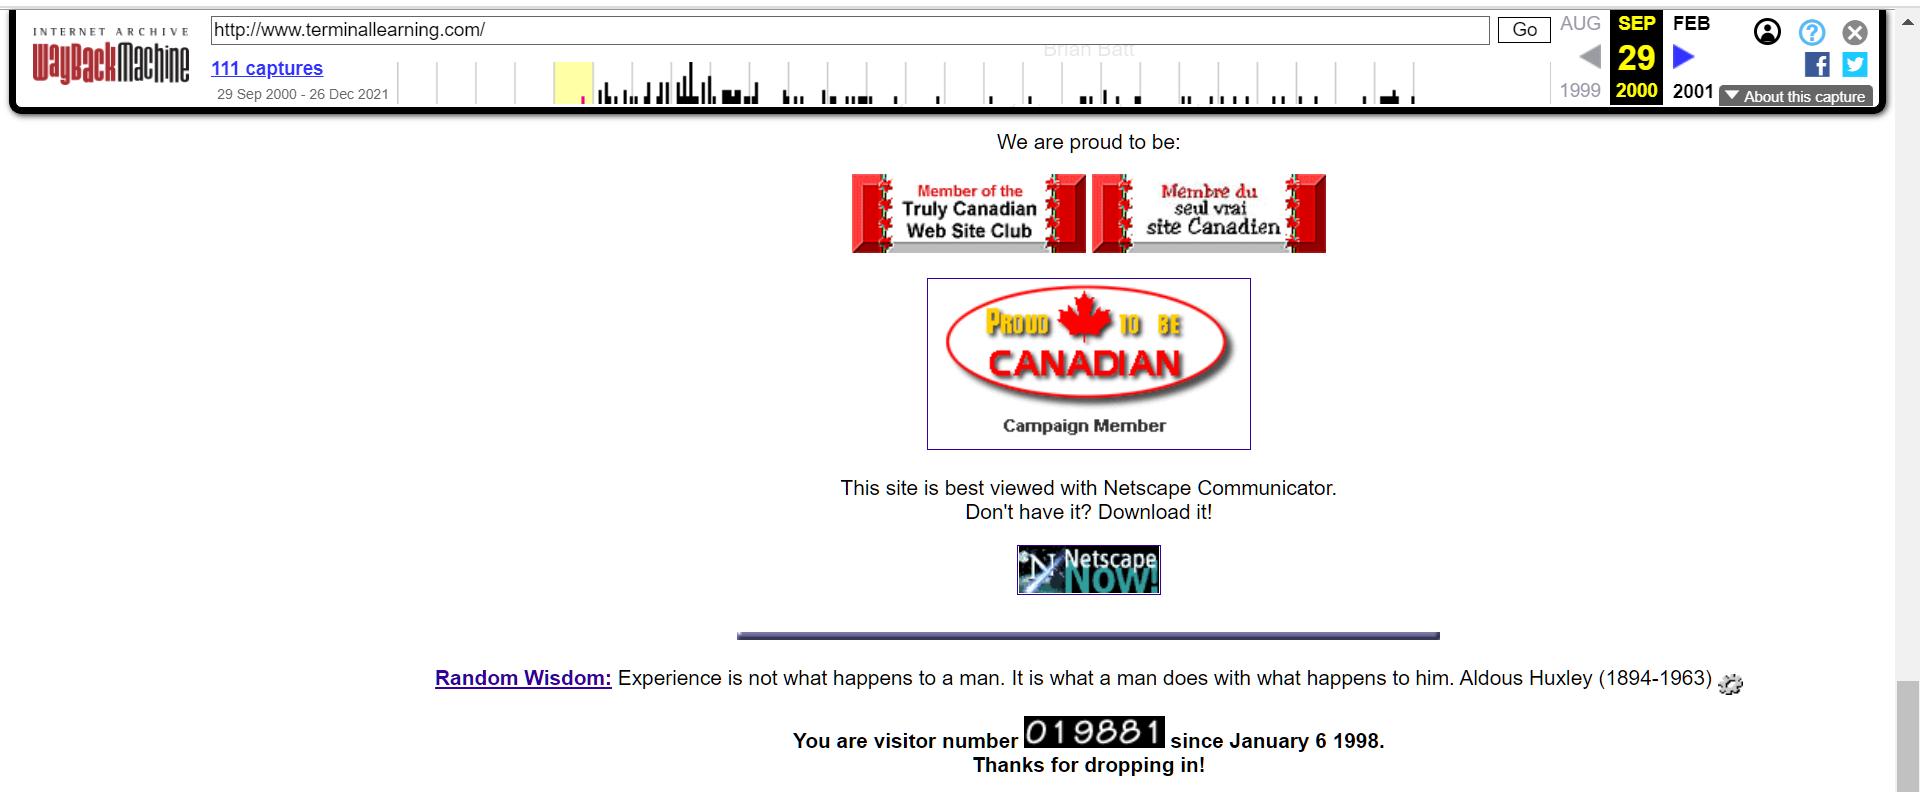
I've been around computers and web development enough to remember these tools, and how
exciting it was to have that little visitor counter at the bottom of the page!
A very early Terminal Learning archived on Wayback Machine showing the visitor counter at the bottom of the page.
Over a couple of years, Lerdorf continued to add on to his tools (although he
switched from Perl to C), including some code that would process form data.
This became PHP-FI (Personal Home Page - Form Interpreter). Lerdorf was later
joined by developers Zeev Suraski and Andi Gutmans, and PHP 3.0 was released in
1998 (at this time, the name was changed to PHP: Hypertext Preprocessor).
In 2000, PHP 4.0 was released with a new parser (part of the compiler) called
the Zend Engine, developed by Suraski and Gutmans, who founded
Zend Technologies in 1997
(today they are simply called "Zend").
Zend is now responsible for developing tools for developers of PHP programs.
PHP 4.0 included some object-oriented functionality, better encryption algorithms,
support for Java object binding, and a powerful regular expression library.
PHP 4.0 also performed much more efficiently than previous versions of PHP,
which only helped to increase its popularity.
PHP 5.0 was released in 2004 with many new features and improvements,
including much more support for object-oriented coding, exception handling,
better string processing capabilities, and support for XML and web services.
PHP 6.0 was never released: it was supposed to include better support
for multi-language and unicode characters, however several delays and
problems resulted in bits and pieces of it being released in later
versions of PHP 5. Eventually PHP release 6.0 was abandoned.
PHP 7.0 was released in 2015
and included several performance improvements and some new language
features, mostly in how function parameters and return types are
defined/declared.
PHP 8.0 was released in in 2020 and is the current major
version of PHP; the current version is 8.1, although 8.2 is
slated for release in November 2022. PHP 8.x has some significant
changes to previous iterations of PHP such as JIT compiling,
match expressions, enumerations, changes to data types, and some changes to
syntax.
Why use PHP?
PHP is a server-side language, so it can be used in addition to
client-side technologies like JavaScript to perform tasks on the
server side. Key points about PHP:
PHP is a server-side language that allows you to create dynamic web pages, manage
sessions, use files and databases, and process web forms.
PHP commands and functions can be intermixed with standard HTML coding,
similar to JavaScript, but because the code is processed server-side, it
has no negative effect on accessibility and progressive enhancement.
PHP pages reside in the same directories as HTML pages.
You can use PHP to write procedural programs or object-oriented programs.
Advantages and Strengths of PHP:
PHP is free!!
PHP is very fast, especially with the new performance changes in the more
recent versions.
PHP runs on most operating systems.
PHP has a Perl/C/Java style of syntax.
PHP is a weakly-typed language, which means you don't have to declare
and destroy variables, memory is freed up automatically, and you can store
different types of data in the same variables.
PHP can be used to write procedural programs or object-oriented programs.
PHP contains many useful libraries that provide support or allow you to work
with a variety of database products, images, LDAP (Lightweight
Directory Access Protocol - a protocol used for accessing information
directories on the Internet), email protocols (so you can easily
write code that allows your application to send emails),
PFD files, and a number of other technologies.
PHP contains powerful string processing functions and support for
regular expression formats.
Has an active developer community that makes many scripts available via the web.
How Write PHP Programs
Let's jump right in with a demonstration: Create a new project and
add a file called index.php. Add this simple line of code to your
file and then save the file. In a moment, we'll talk about what
this statement does, don't worry. Note that all your PHP programs
should have the .php extension (even though they will
often contain HTML also, they should still have the .php extension).
<?php phpinfo(); ?>
PHP is a server-side language:
it is executed on the server, not on the
client machine (i.e. not in the browser). When you code a PHP program,
you have to upload your code to the server. Unlike client-side code
such as HTML or JavaScript, you can't test or run your PHP by opening
the file in the browser... if you do that, you'll only see PHP code!
Your browser does not have a compiler or a virtual machine that compiles
and runs PHP, so it treats your file as plain text.
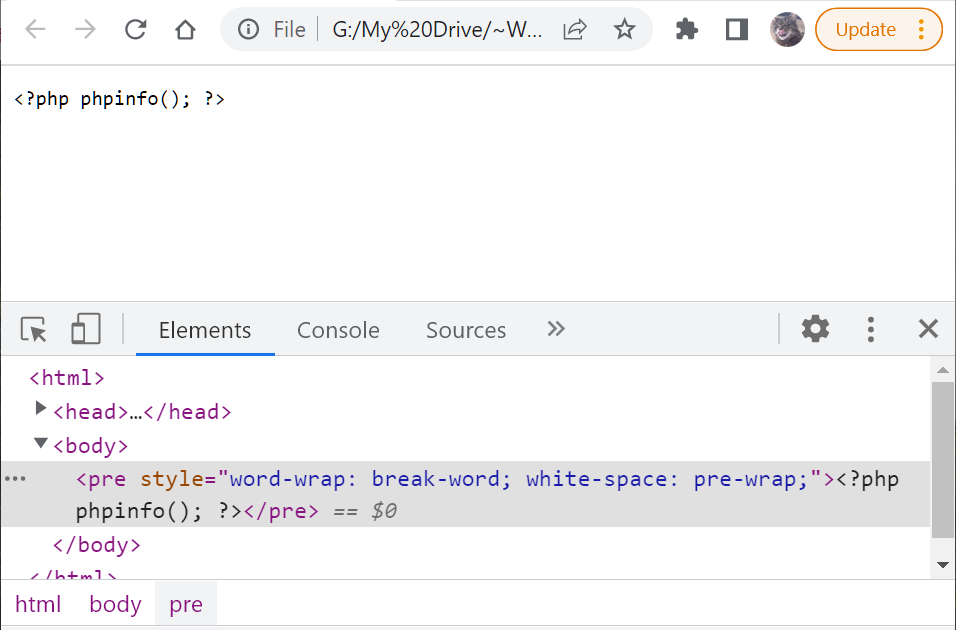
You can try it if you want to: open your file in your preferred
browser - you'll simply see your code. Note that if you right-click
and Inspect your page, you'll still see some of the minimal HTML
because your browser adds minimal DOM.
If you load a PHP file into a browser, you'll only see the code.
To run a PHP file, you must upload it to a server. Assuming you have
access to a web server that runs PHP, you then only need to use a
regular URL to run your program. For example,
https://terminallearning.com/devPhp/sample.php loads
and executes a file called sample.php that displays "Hello, World!"
If you load the above sample PHP file, and then right-click/Inspect it,
you won't see any actual PHP code. That's because the PHP code is executed
on the server: when your browser requests the PHP file, the server
receives the request, finds the file, and then executes all the PHP
code inside the file. The output of the PHP program is plain text and HTML
code. That output is then send as the response back to the client machine.
The client machine retrieves the response and renders it in the browser.
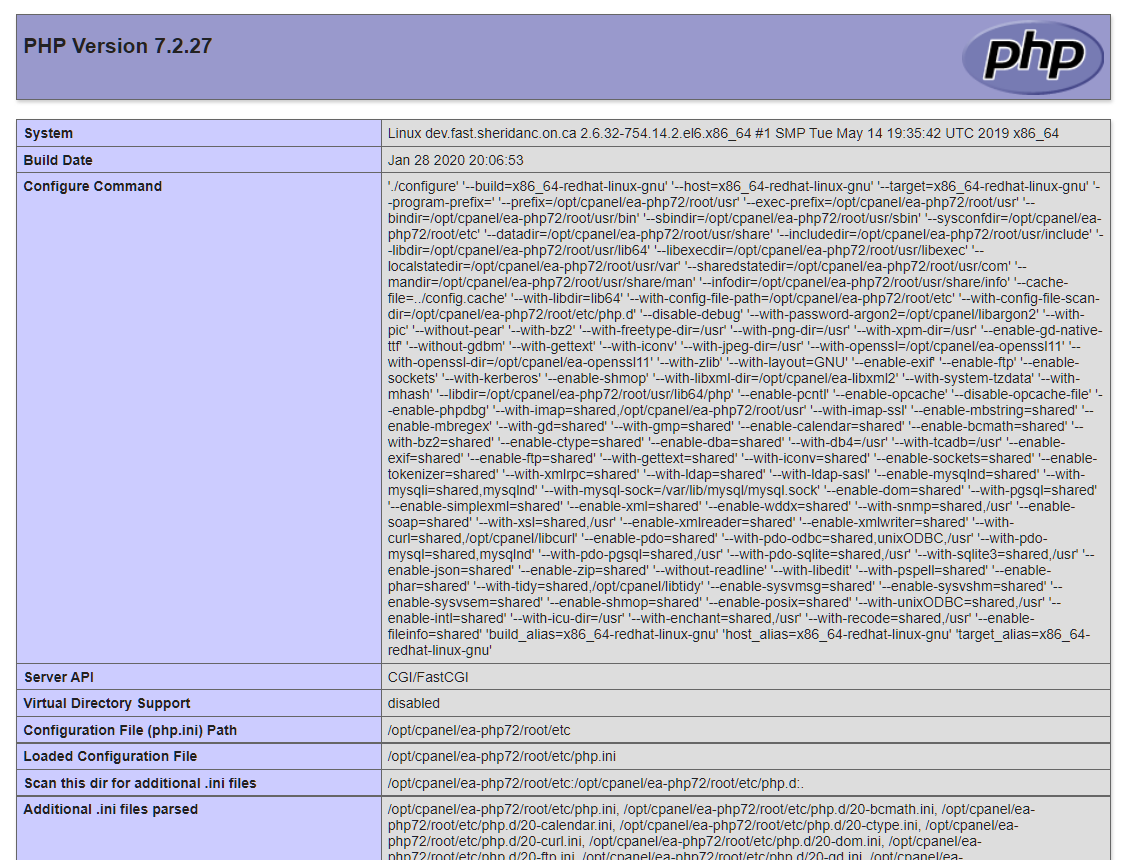
When you load your index.php file from its URL, you'll see a huge
amount of information in nicely formatted tables: all this output
from one line of code!
Upload your PHP file to a server and then load it in the browser via its URL.
What you're looking at is information about the PHP installation on your
server: This is a list of all the properties and their values. This
page is handy to have when you are working with a server that's not
your own: you can load phpinfo() whenever you want to need to answer
questions like, "What version of PHP am I using?", "Can I use HTTPS?",
and "What is the context root of this project directory?"
Structure of a PHP File
As I've already hinted, we often mix our PHP code in with our HTML
code. You've probably learned with JavaScript that it's not a good
practice to mix your JavaScript code with your HTML because it
doesn't lend itself to good program design (e.g. SOLID principles,
progressive enhancement). With PHP, this is not an issue. PHP
code is never compiled and run in the browser so it will not interfere
with specialized devices and screen readers that can only read
text/HTML. A PHP web application returns plain text and HTML back
to the browser, which is supported by specialized devices and
screen readers.
When you insert PHP anywhere inside an HTML document, you use
special tags. These tags communicate to the server that the contents
of the tags contain PHP code and should be parsed and executed
before the page is sent along in the response back to the client.
There are three different PHP tags:
<?php ... ?> is the standard PHP tag.
Any contents of this tag is executed by the server and the
output of that execution replaces the tag. Statements inside this
tag should end with a semi-colon (although you can usually get away
with omitting the semi-colon on the last line of a PHP block).
<?= ... ?> is the "short echo tag", which is a
shortcut for writing <?php echo "thing to output"; ?>. The
echo statement outputs a String. This type
of tag contains an expression, not a full statement, so line
terminators (semi-colons) are not required.
<? ... ?> is the short PHP tag and is just a
shorter version of <?php ... ?>. Some programmers state that
you should only use it for single lines of PHP code but this
isn't a standard best practice, just a simple shortcut. Therefore,
statements inside this tag should end with a semi-colon.
Note that the short PHP tag is only supported if your server has the
short_open_tag configuration flag is enabled.
You can use the output of phpinfo() to check and see if short_open_tag
is enabled on your server.
This means you can easily mix your PHP and HTML, which is
a very common way of coding PHP pages:
Notice the different areas where the PHP code has been embedded
within the HTML code. The actual details of the code aren't Important
yet, but you're probably curious so here are some general details.
At the top of the document: This code sets the values of a couple
of variables: one comes from some form input and the other
comes from a function (the function is accepting a session variable
as one of its arguments). There are two full, executing statements
so they go inside a standard <?php ?> tag, although you could
have used the shortened version <? ?> if the server supports
it.
In the <header> element: This quick PHP echo tag inserts the
contents of a $petName variable in front of " Patient Record"
inside the <h2> element. This is a simple expression so it
can be placed inside the <?= ?> tag. This is equivalent to the
code <?php echo $petName; ?>.
Under the <header> element is a block of code using the short
php tag <? ?>. You could have also used <?php ?> if your
server doesn't support the shorter tag (the server this page
resided on supports the short version). This segment of code
is an if statement that prints a notice about the customer's
outstanding balance if that balance amount is more than 0
dollars. The variable $record is an associative array or
hash array, where the indexes are unique strings. Likely,
this $record array was populated from a database query or
a data file of patient information.
You can easily see that mixing your PHP code within your HTML
code does make parts of the page harder to read, so make sure you
use caution and pay attention to details when you are coding
with PHP.
Mixing PHP with your HTML code does not interfere with accessibility
and progressive enhancement: PHP is executed on the server side and
the response that is returned to the client is still in plain
text and HTML, with no actual PHP embedded within the HTML
code.
It is a common practice to mix PHP and HTML this way,
although may developers who are more familiar with
Soc and patterns
like MVC will want
to find a way to have more separation of PHP and HTML.
This can easily be done by using your HTML file to create a template
or "view", and then using your PHP file to contain the variables
and other data, functions, logic, etc. Here is a very basic
example (and I mean really basic, we can see more examples
as we learn more about PHP):
First you start with an HTML template file. This is just HTML
code with PHP tags where you want dynamic content to go.
Then you create your PHP file, which contains constants, variables,
functions/methods, and all the stuff that will contain/return the
values you want to display in the template page:
<?php
    ini_set('display_errors', 1);
    ini_set('display_startup_errors', 1);
    error_reporting(E_ALL);

	// get the pet name from the name input field
	$petName = isset($_POST["petName"]) ? htmlspecialchars($_POST["petName"]) : "";
	$record = getPatientRecord($petName, $_SESSION("custId");

	function getPetInformation($record)
		/*  code that creates HTML elements containing information
		    about the pet patient */
		return htmlText;
	}

	require("index.template.html");
?>
index.php
Notice that index.php is our main page. At the end of the code, you can
see the require() function. This is
one of several functions you can use to load any file into another file.
It's a lot like an include:
this statement copies the contents of the
index.template.html file and places it into the index.php file. Remember
that index.php will be the file that is requested by the browser: when
the server processes the request, it will execute all the PHP code and
load all the functions. Then it will retrieve the index.template.html file
and "fill in the blanks", or fill all the PHP tags with their appropriate
values from the PHP that was already executed.
There are four methods you can use to include a file in a PHP file:
Loads the specified file and executes any code that isn't defined inside
a function (including variable declarations and constant definitions).
Functions defined in file.php will be global (available to be called inside the
page that includes file.php, or inside file.php itself).
Variables are given the scope defined by the location of the include
statement (for example, if the include statement is executed inside a function,
then any variables inside the included file are local to the function).
If file.php can't be found or can't be loaded, then a warning is issued by
the server, however the script that contains the include statement will continue
to execute.
Similar to include, except that file.php will only be loaded once.
If the main page is refreshed, file.php is still in memory and will
not be re-loaded from the server.
You might do this if file.php contained variables that were initialized
to certain values and you don't want to re-load the file again and cause
those variables to be declared and re-initialized all over again (overwriting
any values they might already have).
Similar to require, but it will only load file.php once, just like
include_once().
In my example I chose require() because the index.php page is useless without
the index.template.html file, so if there's a problem loading the template, we want
to know about it. For this simple example, it probably doesn't matter if you
choose require() or require_once() but I suspect that if the user refreshes or
reloads the page, we might like to re-load the template from the server, just in case.
Debugging PHP Programs
If you are encountering errors and problems with your PHP programs,
you'll find that the browser output is not very helpful. For
example, this code has an error (you'll learn more about this error
in an upcoming lesson):
<?php
    echo "Hello, World!";  // "echo" means print to the document
    $foo = "bar";  // declaring and initializing variable
    echo foo;  // error: missing the $ in front of foo
?>
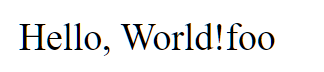
But when you load the page from the server, you don't see any error
messages, just some output that you weren't expecting:
There are no error messages.
When you're debugging, you can add a few extra lines of code to
show helpful error messages when an error or exception occurs:
The ini_set(configOption,
value) method sets the value of a specific
configuration option. The display_errors option set to a value of 1 or true will
turn on the display of errors on the page instead of hiding them from the
user. The display_startup_errors option set to a value of 1 or true will
turn on the display of any errors/exceptions that occur when the PHP code
starts: normally these errors won't appear with only display_errors set.
The error_reporting(E_ALL) method displays parsing errors on the
page. Normally the first two settings won't display compilation or syntax errors,
but this last line of code will ensure those errors appear on the page.
Adding these lines of code to the program, I now get more helpful
error messages on the screen:
<?php
ini_set('display_errors', 1);
ini_set('display_startup_errors', 1);
error_reporting(E_ALL);
echo "Hello, World!"; // "echo" means print to the document
$foo = "bar"; // declaring and initializing variable
echo foo; // error: missing the $ in front of foo
?>
Now that you've learned what PHP is and how it works, it's time to
start learning the PHP syntax
so you can write your own server-side
PHP programs!
Practice Quiz
Try this quiz to see how well you remember what you've
been learning.
Read the question and choose an answer.
Click the Check Answer button to check
your answer.
If the answer is wrong, you can try a different answer.
Answers you've already selected are highlighted.
Once you find the correct answer, or if you just want to move on,
click the Next button.
After the last question, you can start the quiz over if you want.
The questions and answers are randomized, so that you are encouraged
to use your critical thinking skills.