Overview of This Lesson
In this lesson we'll cover the following:
- Classes in Java
- Writing a Basic Main Class
- Compiling, Executing, and Running a Program
- Modifying a Program
- Dealing with Errors
- Introduction to Industry Standards
In this lesson we'll cover the following:
Everything you write in Java must be part of a class. A class is like a building block or a Lego brick: you can use classes to build larger programs just as you can use blocks/bricks to create larger things like a ship or a castle. Just as there are many types of blocks or Lego bricks to use for your creations, there are already hundreds of classes available with the Java language. Programmers use these classes to build their own, more complex classes. Then we use those classes to build even larger, more complex applications. You might use some blocks or bricks to create the Hogwarts Castle, and then use another set of blocks or bricks to build the Forbidden Forest. Then you could use your Hogwarts Castle and Forbidden Forest builds along with other builds to create the entire world of Harry Potter! We do the same thing with Java classes: We build things, and then use those things to build bigger things!
In these tutorials, we will start off by writing simple programs that are contained in a single class file. Later we will move on to object-oriented programs, which use more than one class file. When we create a basic program in Java, it's defined as a class. Everything you create in Java is part of a class.
When you learn object-oriented programming, you will create classes that model or represent real-life objects. For example, you might create a class called Book that can be used to model each book in a book store's inventory. Classes like Book define the data that would belong to those objects (e.g. a Book class might say that all book objects have an ISBN, title, author, category, and price). Classes can also define behaviours that objects can do (e.g. a Book class might say that all book objects can validate their ISBN, change the book's price, or retrieve the book's title).
For now, the classes we are writing are main classes or hollow classes. This means that these classes are programs that execute, and not classes that define objects in an object-oriented program. Main classes contain a main method, which is the starting point for any executing Java application. Object-Oriented classes don't have this "main method" because OOP classes don't execute: they're used as building blocks in other programs (and those programs probably have a Main class so those programs can execute).
So let's get right into it! Start up your editor or IDE and start a new, empty file/project. How you do this depends on the editor or IDE that you're using. I'll include instructions below for Notepad++ an IntelliJ, to get you started.
In the File menu, select New.
You should see something similar to the image below:
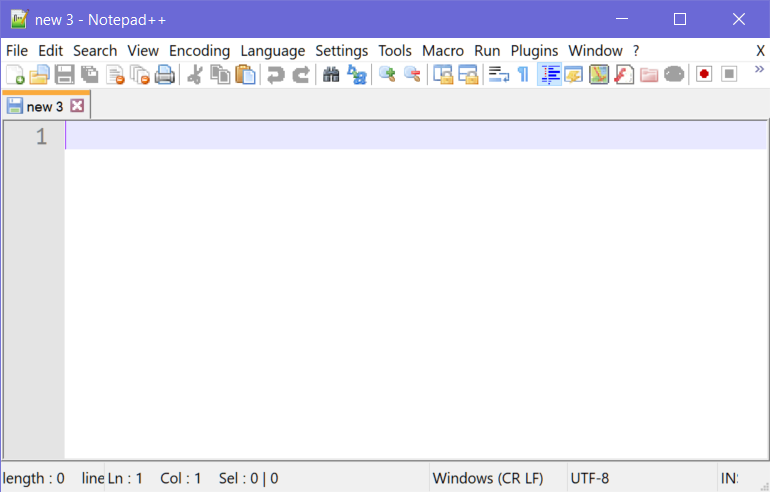
Each new file you create is displayed in its own tab, so you can have several files open at once. Each tab will display the file name, except for new, unsaved files which will just say "new x" where "x" is a sequential number. Yours probably says "new 1" but notice in the screen shot mine says "new 3" because before I took this screen shot, I created 2 other new files before this one (I use Notepad++ for lots of other things besides Java).
Regardless, if you're now seeing a nice, fresh, blank file in the editor window, you're all set and ready to start coding! Go ahead and start creating your first class.
On the first line, type public class MyFirstProgram {.
Press enter a few times to add a couple of blank lines.
We need to close our block of code that defines/contains our program, so add a closing brace ( } ) on line 4.
public class MyFirstProgram {


}When you use an IDE like IntelliJ, you're working with a project rather than a single file. The difference is a bit difficult to get into if you've never programmed before, but think of a Java project as the set of files that make up the application, which might also include data files and images. A project-based IDE like IntelliJ makes it easier to manage the many files that make up a single project.
Each project you create goes inside its own directory/folder. For example, if you create a project called "MyFirstProject", and you store it in your Documents/projects folder, your project files will be located in the directory Documents/projects/MyFirstProject directory.
If you don't already have one open, create a new project. If you can't recall how, you can review your notes from the lesson where you installed IntelliJ.
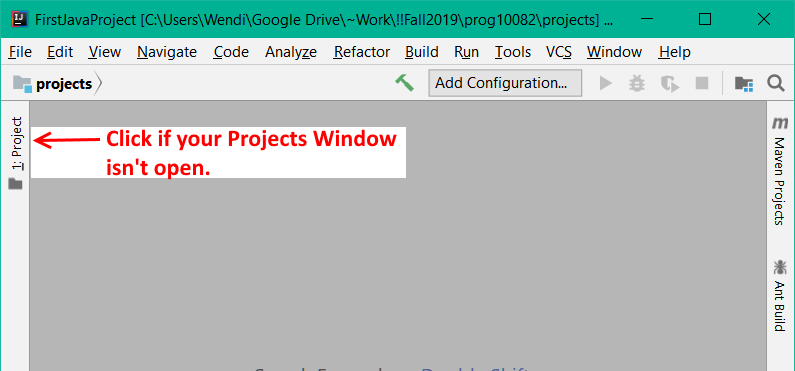
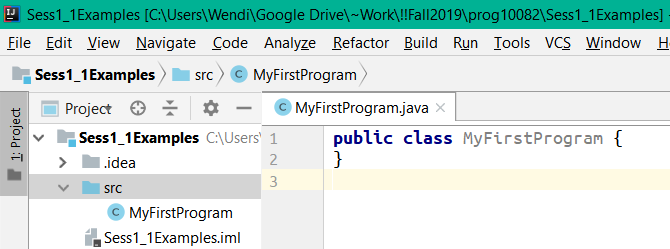
When you first encounter a new project in IntelliJ IDEA, you'll see an empty area of the screen and a Projects Window on the left side (if you don't see the projects window, it's probably collapsed. You should see a little sideways tab on the left side below the menu bars that says "Projects" - click that to expand the projects window. If you don't see any of those things, go to the View menu and choose Tool Windows > Project.
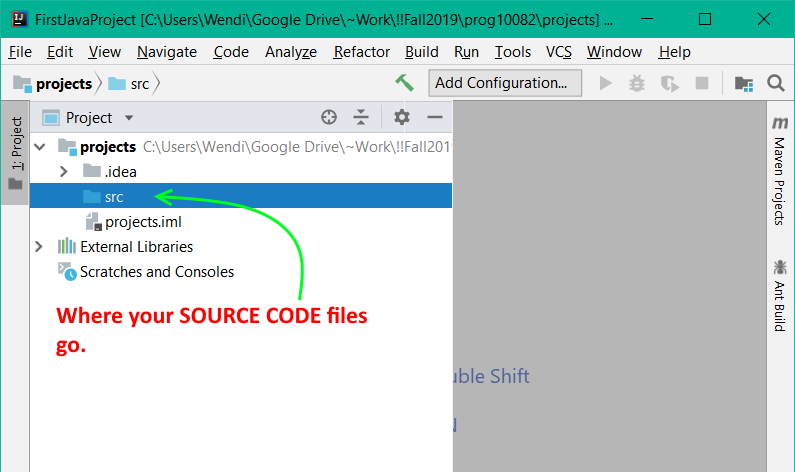
In the projects window, you'll see nodes representing the structure of your project. This is the logical structure of your project, not necessarily the physical structure of your project (the phyisical structure are the actual files and directories, but the logical structure shows how your project components are related to each other).
Inside your project, you'll see a node called "src". "src" is short for "source" or "source code". In the SRC node is where all of the .java files will go (the ones that you write yourself).
Once you create your first class and run it, you'll see another node appear, and we'll go over that later.
To start programming, we need to add a new class to our project. Right-click on the SRC node and select New > Java Class.
A dialog appears asking you for the name of your class.
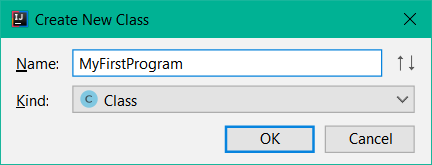
The name of the class is both the actual file name, and the name of this particular building block (you'll see it appear later in the class header). The name of your class has to follow certain rules that we'll look at later. For now, type in "MyFirstProgram" (without the quotes).
The type of class for now should just be set to "Class". We'll learn about other types of building blocks in your second semester course (but if you're curious and want to look ahead, feel free to examine the other options and do a web search for those terms!)
Once you've typed in the MyFirstProgram class name and made sure "Class" is selected, press the OK button.
You should now see a file open in the main editor window of your screen. You should also notice that, in your Projects window, a MyFirstProgram node has been added to your SRC node.
If you're using a different editor, that's fine. Do whatever you need to do to start up a new project and add a new Java class (many editors will give you a default class to start with, so that's great!)
At very minimum, you should have a class called MyFirstProgram stored as MyFirstProgram.java with the following code:
public class MyFirstProgram {

}
If you also have the public static void main()... that's ok.
Before you can do anything else, you should save your source file that you just created, assuming your editor hasn't done that for you.
A Java program's source code file must have the same name as its class.
Therefore, in this example, you must call
your file "MyFirstProgram.java". So if you have a class defined as
public class FooBar { ... } then the source file must be
called FooBar.java (not foobar.java, not Foobar.java -- the root part of the
file name to the left of the period must match the class name EXACTLY.)
If you're using an IDE like IntelliJ or VS Code, the IDE has likely already saved your source file with the correct name and file extension. So you don't have to worry about it.
In Notepad++, you will have to save your source file manually. Click the Save button (the third button on the button bar) or choose Save from the File menu. Type in the file name as MyFirstProgram.java
What is the block of code public class MyFirstProgram {} that we now have in our new file? Let's examine each piece in detail. Don't worry if you don't grasp everything right away: some of these things will take a few weeks to fully understand, especially if you've never programmed before.
public class MyFirstProgram {


}MyFirstProgram. This name will be
different for each program you create. Class names must always start with an
upper case letter and is usually a noun (thing).
We now have the framework for a Java program. All of your programs for these tutorials are going to start in pretty much the same way: you'll just give them different class names each time.
Now, let's add some code that actually does something!
Every program must have a starting point. In Java, the starting point of any program is the main() method. A "method" is a block of code that performs a task. The word "main" is the special name for the Java method that starts a program, so almost all of your programs in this course will have the main() method. Notice that when I type "main() method", I put empty brackets/parentheses after the word "main". This is how you know I'm referring to a method and not something else like a program name or a variable name.
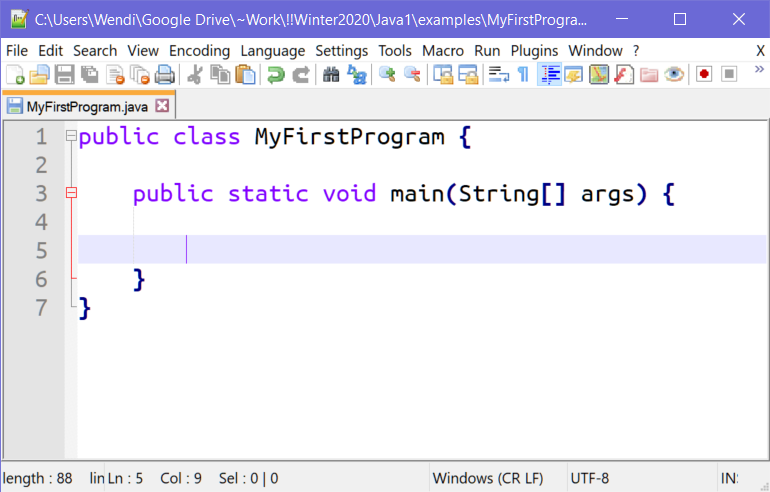
The main() method always looks the same in every program. It looks like this:
public static void main(String[] args) {
// code that executes goes here
}
Notice that it has its own set of matching braces. This is another block of code. Everything that your main() method does will be contained inside those braces. Also notice there are a lot more of those Java keywords in that main() method header, such as "public", "static", and "void", plus this funny thing "String[] args" inside the parentheses. You'll learn a little bit about what all those things mean later, and we'll explore them in more detail as we go through the course. Don't worry if they don't all make sense today, they don't have to. Just make sure you memorize the main() method header for now (it helps to type it out every single time you make a new program).
Add the main() method to your program. It should go inside the class block, between lines 1 and 4. Also, anything inside a block should always be indented with one tab. This means that when you're done, your screen should look similar to the image below:
So now we have a program called MyFirstProgram, and our program has a main() method to start with. Now we should put some code in the main() method that actually does something!
Whenever you learn a new language, the first thing you're taught is how to make a program that says "Hello, World!" so let's do that!
System.out.println("Hello, World!");
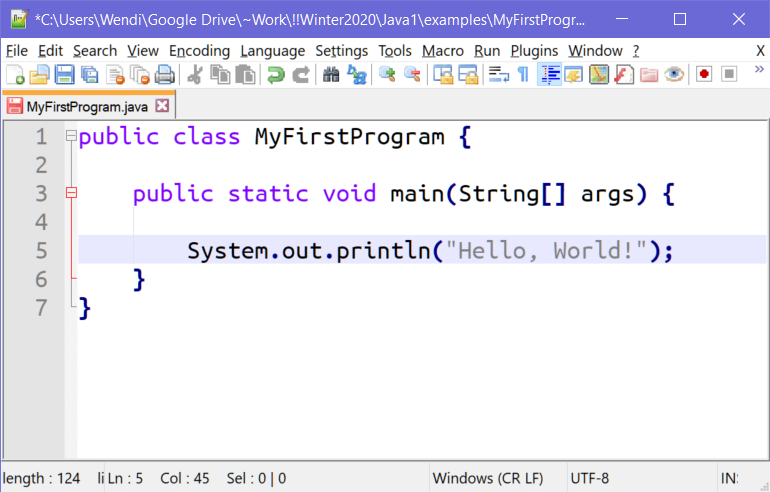
If you haven't already, save your program. You can tell if you need to save your program because the icon in the file's tab will be red instead of blue, and the title bar will include an asterisk * in front of the file path/name. You can see this in the previous image.
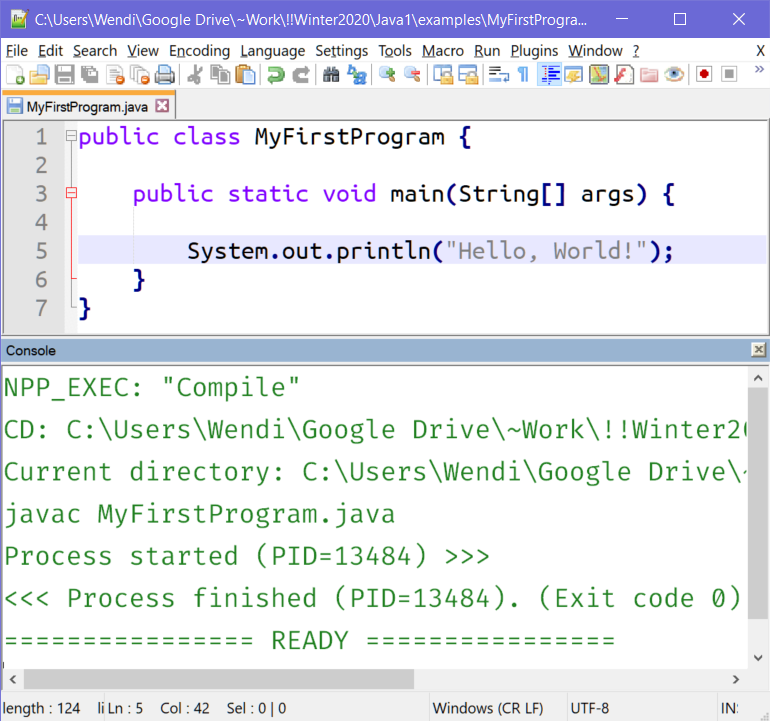
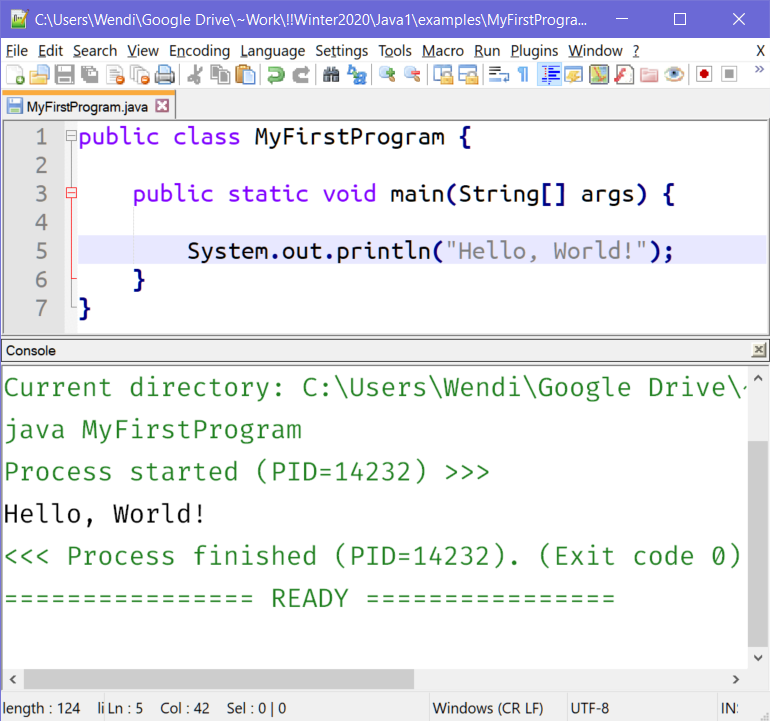
Compile the program by using the Compile Java macro you created when you installed and setup Java and Notepad++: go to the Macro menu and select "Compile Java" or use the shortcut Ctrl_Shift_C. You whould see a screen similar to that shown in the image below.
IntelliJ is a bit more advanced. It actually checks the code for syntax errors as you type. When you make an error, it will mark it with red squiggly underlines and margin markers.

Even so, you should still BUILD your application to catch other errors that might not appear automatically. "Build" is just another word for compile. Building or compiling your source code (.java) creates the bytecode file (.class):
If you get any errors, go back to your source code and fix any problems, then try to compile again.
Once you successfully compile a program with no errors, you can run it.
Run the program by using the Macro > Execute Java menu option or the shortcut Ctrl-Shift-E.
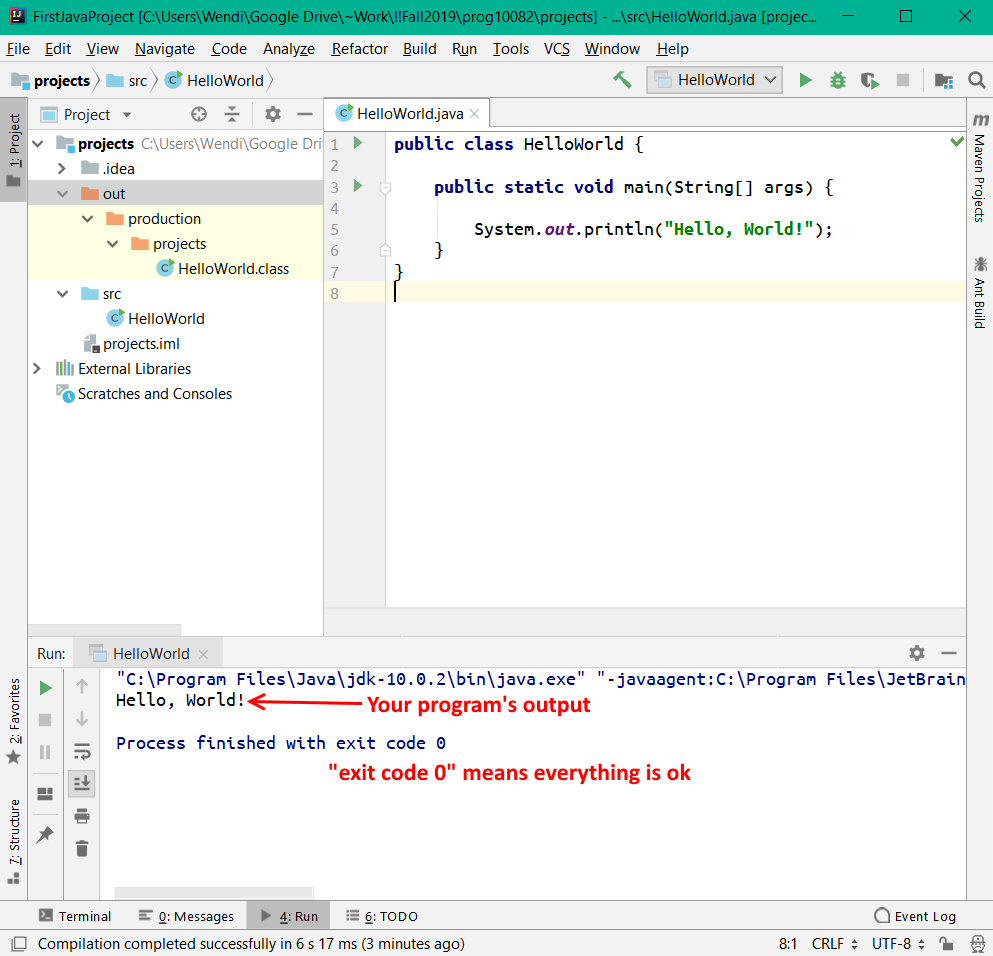
In the bottom of the editor window, you should see your program's output, just like the example below:
There are several ways to run a class/program in IntelliJ IDEA:
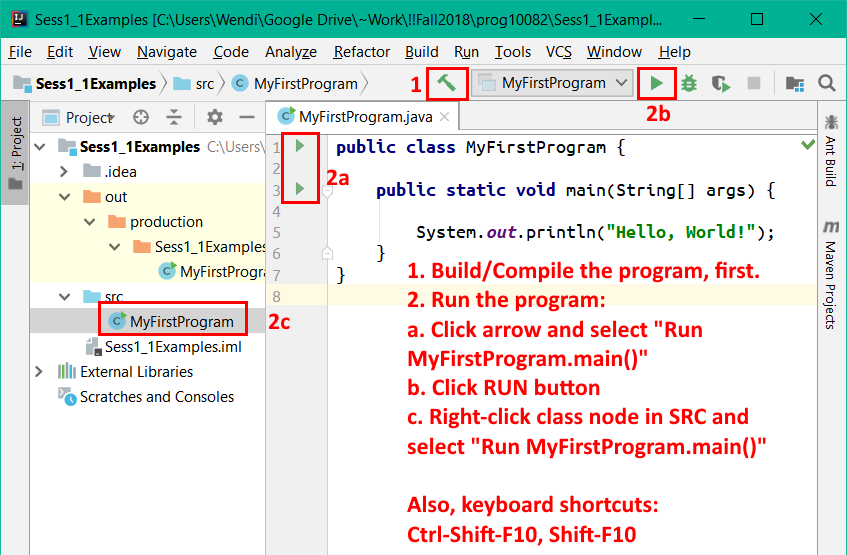
You'll see the output and results of your run in the Run window at the bottom of the screen.
Now let's examine our Hello World program piece by piece.
public class MyFirstProgram {

    public static void main(String[] args) {

        System.out.println("Hello, World!");
    }
}
Line 5 is a print statement. The words "System.out" are referring to the console or screen on your computer. "println()" (pronounced "print line") is a method. As mentioned previously, methods are blocks of code that perform a task. The println() method will print something, but you have to tell it what to print. To give it a value to print or display, you place that value inside the brackets; in this case we've given println() the value "Hello World!". We say that "Hello World!" is an argument. Many methods require arguments, but not all do.
The println() method can work with the screen, files, and other output destinations. By using the syntax "System.out.println()", we are invoking the println() method on the System.out object. We already mentioned that System.out is referring to the console screen, so in this example, println() is being invoked or executed on the console screen.
The statement on line 5 ends with a semi-colon (;) character. All executing statements in Java must end with such a line terminator. This is how the compiler knows where the end of the statement is. Java doesn't care about whitespace. If you wanted, you could write:
public class  MyFirstProgram{ public static
void main(String[] args){	System.out.println("Hello World!");}}
or you could write:
public class  MyFirstProgram
{
public static void main(String[] args)
{
System
.out.
println
("Hello World!")
;
}
}
Neither version is appropriate, professional, or acceptable in most programming environments, but both will compile and run just fine. In the second example, the print statement takes up 5 lines, but Java knows where it ends because of the semi-colon.