Refresh
this page because I am probably still making changes
to it.
So far you've learned how to display dyanmic data on
HTML template pages using Thymeleaf. You can have a lot
more flexibility and control over what data is displayed
and how it is displayed by using logical structures such
as if statements and loops. Thymeleaf has several attributes
that allow you to display data and elements based on certain
critera, and also to repeat parts of a template, such as the
rows of a table. In this lesson you'll learn about some
attributes that allow you to perform selections and a
very versatile attribute you can use for looping.
You can use Thymeleaf attributes to make boolean decisions and
display values or even entire elements based on
the results of those decisions. The
attributes th:if, th:unless,
and th:switch work similar standard programming
selection structures.
th:if
The th:if="" attribute will
display the element it belongs to, but only if the expression
inside the quotes is true. For example:
In this code, if the value of the variable/attribute "billAmt" is
greater than 0, then the link is rendered in the HTML.
Otherwise, the link is not rendered.
Note that th:href is used to map to a URL.
Note also that we've included the fallback href.
th:if="" attribute can
evaluate any valid boolean condition/expression. Note
also that:
any numeric expression that is non-zero as evaluated
as true, e.g. ${number * 2} will evaluate to true
assuming "number" is a number and contains a non-zero
value, otherwise it evaluates to false.
any char value that is non-zero is evaluated as true
e.g. 'a' is true but '\0' is false.
any string that isn't "false", "off" or "no" is
evaluated as true.
any non-string/char/number/boolean is evaluated as true
e.g. if the expression ${inv} was referring to an
Inventory object, it's evaluated as true
the keyword null or any expression that evaluates
to null is considered false, e.g. if ${inv} was referring
to a null-object reference, then it's evaluated as false
th:unless
The th:unless="" attribute
does the exact opposite of th:if="":
the element does render if the expression evaluates as
false. For example:
<a href="calculate.html" th:href="@{/tools/calcTip}"
    th:unless="${billAmt le 0}">Calculate Tip</a>
In this example, the anchor element is rendered UNLESS the
billAmt value is 0 or less.
th:switch (and th:case)
The th:switch=""
and th:case="" attributes
can be used just like a Java switch-statement:
<div th:switch="${user.role}">
  <p th:case="admin">User is an Administrator</p>
  <p th:case="manager">User is a Manager</p>
  <p th:case="guest">This is a Guest User</p>
  <p th:case="*">This is some other User</p>
</div>
As soon as the true case is found, the rest of the cases are
ignored (the structure exits). To add a default clause
use wildcard case as the case value, as shown in the example.
When a case is true, the element is rendered, and none of the
other elements: only the true element is rendered on the page.
Exercises
1. Add a form to your current project on a new HTML page called inventory.html.
Add input fields for the inventory id, inventory item name, and quantity.
If you're stuck for time, you can use this
form.
Form submission should be mapped to a handler method in your controller.
The form's handler method should receive the three parameters and use them
to construct an inventory object. Store the inventory object in the model.
The handler method should also load an output page called "invOutput.html".
Add an output page called "invOutput.html". Add code to this page to
display a message "You need to order more [item name]!" if the quantity
of the inventory item is 0 or less. (replace "[item name]" with the actual
inventory item name. For example, if the inventory item name was
"Kibble for Cat, Tuna Flavour", your page would display:
You need to order more Kibble for Cat, Tuna Flavour!
Regardless of the quantity value, the page should display the inventory item
id, name, and quantity.
2. Add the latest version of your Book bean to the project.
In your controller, construct a new instance of the Book bean and add
some values for isbn, title, author, price, and genre. On your output
page, display the genre name according to the following chart:
Quantity
Message
1
Arts
2
Biography
3
History
4
Media
5
Psychology
6
Sociology
7
Technology
any other number
Undefined
Iteration
You can use Thymeleaf to iterate through a collection of objects
or values. Iteration is easy using the
th:each attribute.
The syntax of the th:each attribute
is th:each="item : array" where
array is any array, List, or other class
that implements java.util.Iterable or java.util.Enumeration (anything
not one of those things is treated like a List that has exactly
one element). item contains the
current element or object for the current iteration. The
item is only visible inside the
element in which it's used (so it's local to the element and any
elements nested inside). It's basically
exactly like a Java for-each loop.
<div th:each="inv : ${inventoryList}"
    th:text="|${inv.itemName}: ${inv.quantity}|">item and quantity</div>
The code above will iterate through a collection called "inventoryList", where
the inventory object in each iteration is referenced by the variable "inv".
A DIV element for each inventory object in the list is created, displaying the
item name and quantity. So one DIV will be rendered for each
inventory object in the inventoryList.
There's also a loop status variable you can use if you want the current
iteration's count or index: th:each="item,status : array"
adds a variable status that has the following
properties:
index - the current 0-based index
count - the current 1-based index
size - the number of elements in the list
current - the current element
even, odd - boolean properties indicating whether the current
iteration is an even one or odd one
first, last - boolean properties indicating whether
the current iteration is the first or last one
In the code above, we are iterating through inventoryList. Each object in an iteration
is referenced by the variable "inv" and the status variable is called "stat".
We are displaying an unordered list with a list item
for each inventory object in the inventoryList.
Each list item's text is the 1-based index
followed by the inventory item name. Also, each odd list item's CSS
class is set to "highlight".
Exercise
Add a handler method to your controller that creates a List<Book>
object and adds several books to it. You can use the Lombok version
of your Book bean, and perhaps it will be easier if you add
an all-args constructor to it, if you haven't already.
Add an output page where you display the entire list of
books in an HTML table with columns for each Book data member.
TIP: Create your table element and the row of heading
elements with the column headings. Then create the row element
with your th:each attribute. Inside the row, you can use
th:text for each table-data element.
Exercises
1. Create a new project and add the
Container class to
an appropriate package.
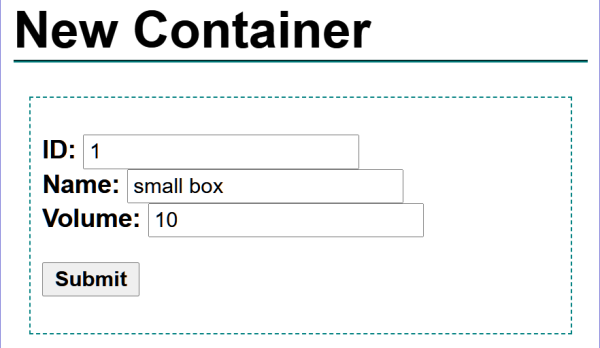
Create a form that allows a user to enter the name
and volume of a container.
Style your form as follows with an external stylesheet:
Choose a border for the form element, and add 10
pixels of space around the outside of the border,
and 7 pixels of space inside the boundaries of
the form.
Label elements and the submit button text should be bold.
Style your page's level-1 heading with a bottom border
of your choice.
Add any other styling you like.
New Container Form
Create a handler method that takes the form inputs and uses them to
construct a new Container object.
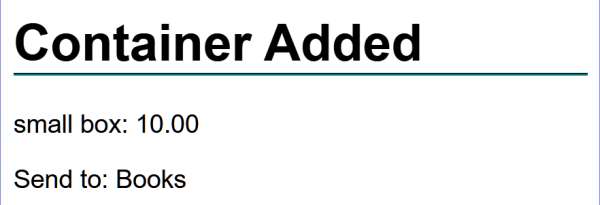
Create an output page that receives the Container object
and displays it on the screen along with the department that
should receive the container. The department is determined by
the volume of the container:
If the container's volume is 10 or less, the container
goes to the Books department.
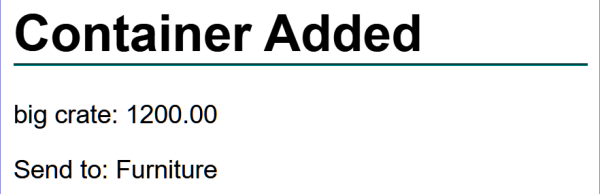
If the container's volume is more than 10 but 50 or
less, the container goes to the Electronics department.
If the container's volume is more than 50, it should
go to the Furniture department if the name of the container
contains the word "crate", otherwise it should go to the Bedding
department.
Output Example 1 Output Example 2
Style your output page in a manner consistent with your form,
using an external stylesheet.
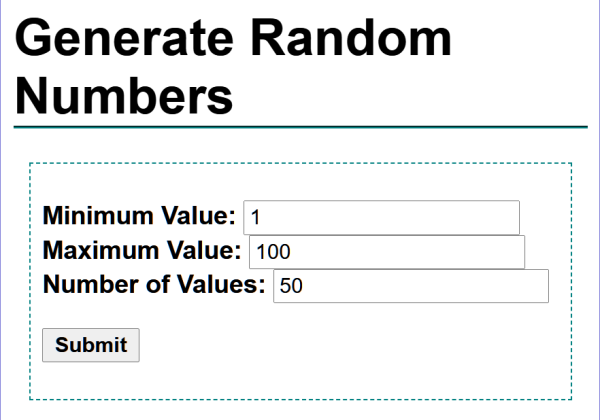
2. Create a form that allows a user to
generate a list of random numbers between a minimum
and maximum value. There should be an input field
for the minimum value, a field for the maximum value,
and a field for the number of values the user wants
to generate.
Generate Random Numbers form
Create a handler method for your form that retrieves
the 3 user inputs, creates an integer array,
and then generates random numbers between
the minimum and maximum to populate the array.
The user must specify a minimum and a maximum, but
if they don't specify how many values, use 50
as the default.
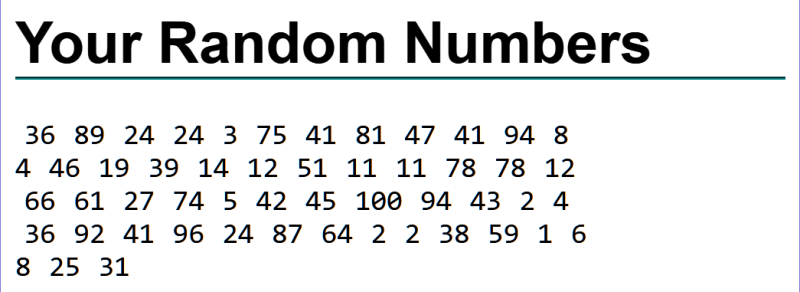
On the output page, display the random numbers
in a monospaced font (font-family: monospace) with a space between
each number.
Output Example for Random Numbers
Style both your form and output page using an external
stylesheet.
In your adoption handler method, remove the
HttpServletRequest parameter and replace it
with a Model parameter. Change the method's
return type to String.
Remove the code that sends the output to
the response body.
After constructing the animal object and adding it
to the list of pets, store the list in the model
so it can be accessed on an output page ("adopt.html").
Also, store the adopter name in the model so it can be
accessed on the output page.
Make sure your handler returns the adoption output
page, also.
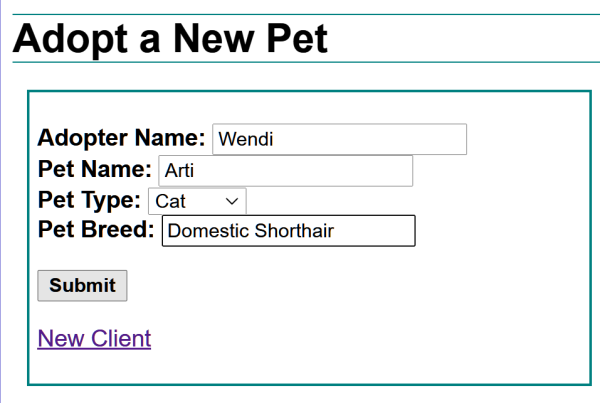
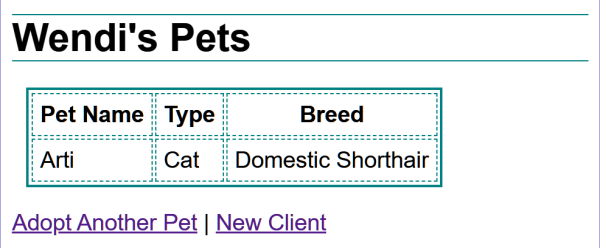
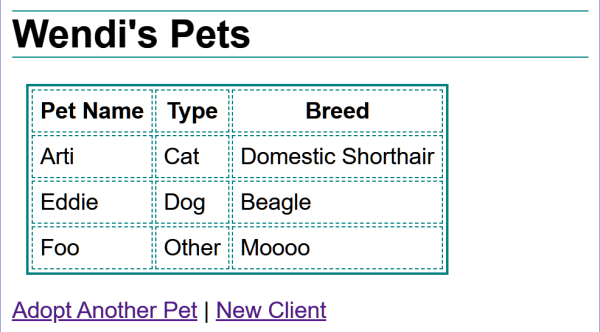
Add the "adopt.html" page to your project. Display
a heading that says either "Foo's Pets" (where "Foo"
is actually the adopter's name) or the fallback
text of "Your Pets". Under the heading,
display the client's pets in an HTML table with the layout shown
below.
Output Example 1 Output Example 2
Below the table, include a link to "/" so the
user can quickly click the link to do another
adoption for the same client.
Add a link to both the main form page and the adoption
output page that maps to a handler method that
resets everything for a new client: The method
should reset the pet parent list (there are a
few different ways to do this, choose one that's
efficient) and then load the main adoption form again.
Format your form and your output page in a professional and
consistent manner using an external stylesheet.