This document explains how to install and setup MySQL Server on
your own computer.
Installing and Configuring MySQL Server
MySQL Server allows you to develop and test
programs that use databases. You might already have
MySQL Server installed on your system. If you're not
sure, you can check your programs list to see if you have
"MySQL".
If you have MySQL Already Installed
If you have not installed MySQL, skip
this section and go to the next section.
If you already have MySQL installed, and you installed
it recently (in the last few months) then make sure your installation
includes MySQL Workbench (it should be an item in the
MySQL programs menu).
If you have MySQL Workbench, you're all set: you
just need to make sure you know your server's root
password (you set this up during the installation
process. if you've lost your root password, you'll
need to uninstall MySQL Server and re-install it
again following the steps below.
If you installed MySQL more than a few months ago, check
the version number: the latest version of MySQL Server
Community edition is 8.0.x. If yours is older than that,
you should uninstall it and re-install the latest version
using the instructions below.
To uninstall MySql, go to Control Panel > Programs and Features and uninstall
EVERYTHING to do with MySql - even the MySql Installer.
Once you've uninstalled everything related to MySql, do a registry clean.
You'll probably need to download a program to do this, such as
AusLogics
Registry Cleaner. or
CCleaner.
Make sure that you don't install anything extra when you install a free
application - many of those installers try to trick you into installing extra
things you don't want. READ the screens!!!
After you've cleaned your registry, restart your computer, and then
proceed to install MySql Server.
If you DO NOT have MySQL Installed
If you have MySQL already installed, skip this section.
Preparing for Installation
There are 2 phases to setting up MySQL server:
Installation and Configuration. Both phases are done
in a single installation wizard. The instructions below
take you through this process step by step. Screen shots
have been included for several steps, but have not been
included for steps that don't require a lot of action
on your part.
Make sure you READ and follow the instructions
carefully!!
If you encounter any problems during the installation and
setup, ask your professor in class or during email (if
emailing, be sure to send a screen shot and full description
of the problem).
Click the "Go to Download Page" button.
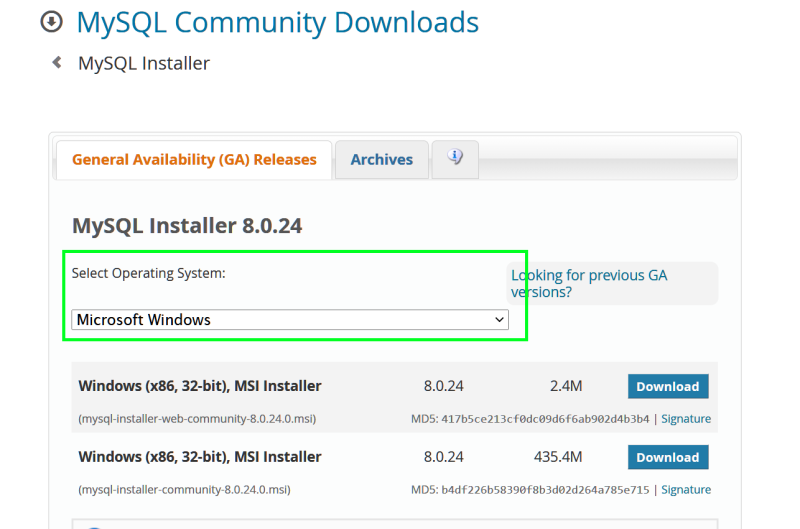
Scroll down to select your operating system.
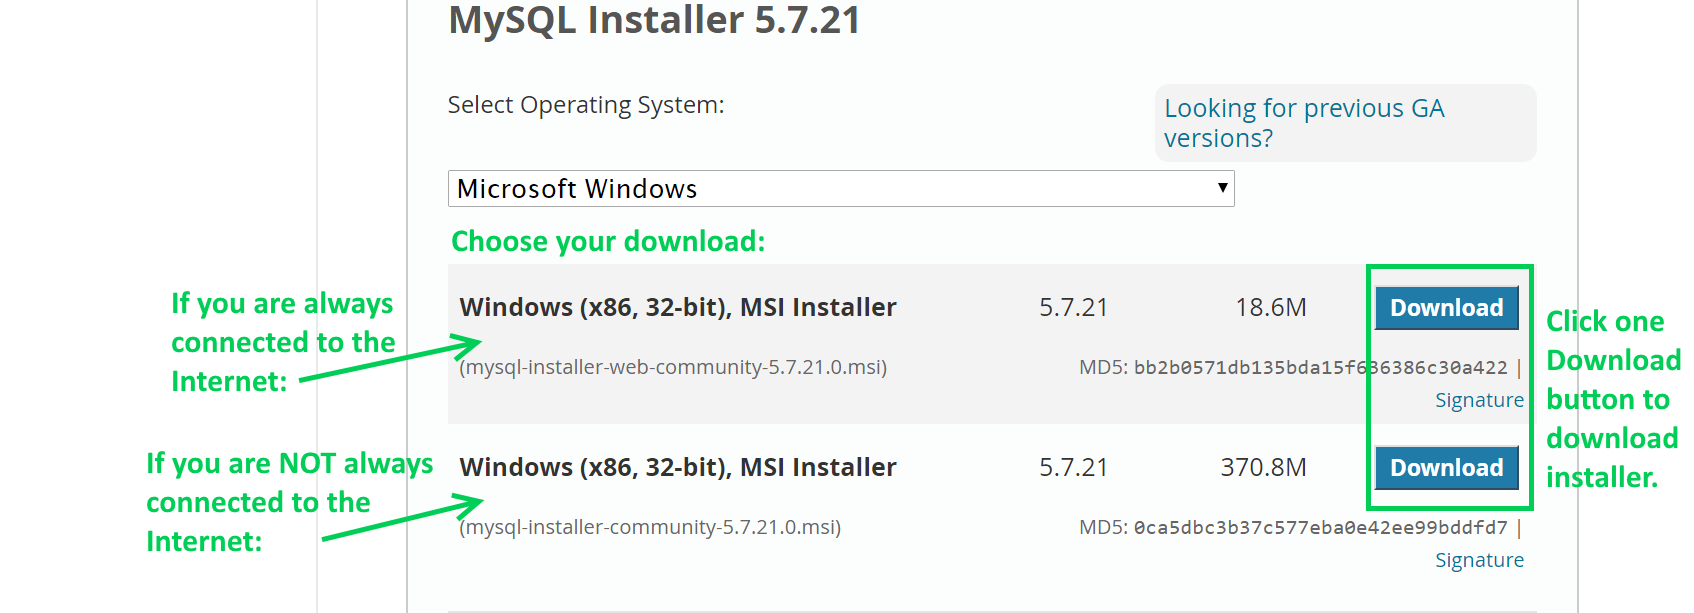
Scroll down to the MySQL Installer downloads and
select the version you want:
Choose the mysql-installer-web-community
version if you are always connected to the Internet
Choose the mysql-installer-community
version if you are not always connected to the Internet
Select your preferred installer.
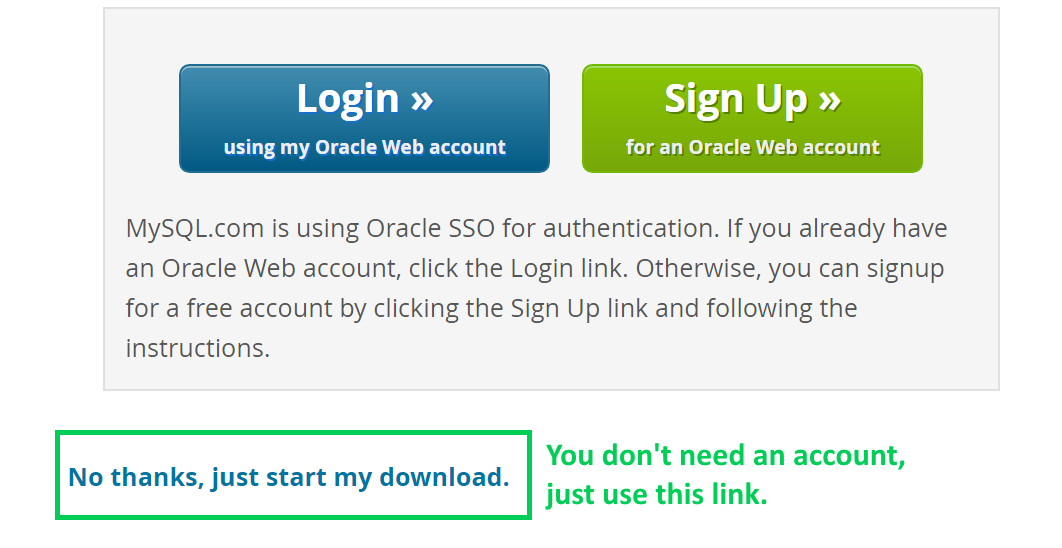
Next page asks you to log in or sign up: you don't need to, just look farther
down and click the "No thanks, just start my download" link.
Click the link, don't worry about
logging in or signing up.
Save the file to your computer.
The Installation Phase
Go find the file you just downloaded and run it. This begins the
installation of MySQL Server.
When prompted, accept the license agreement and click the NEXT button.
Choosing a Setup Type screen: select "Custom" and then click
the NEXT button. Select the Developer Default
installation.
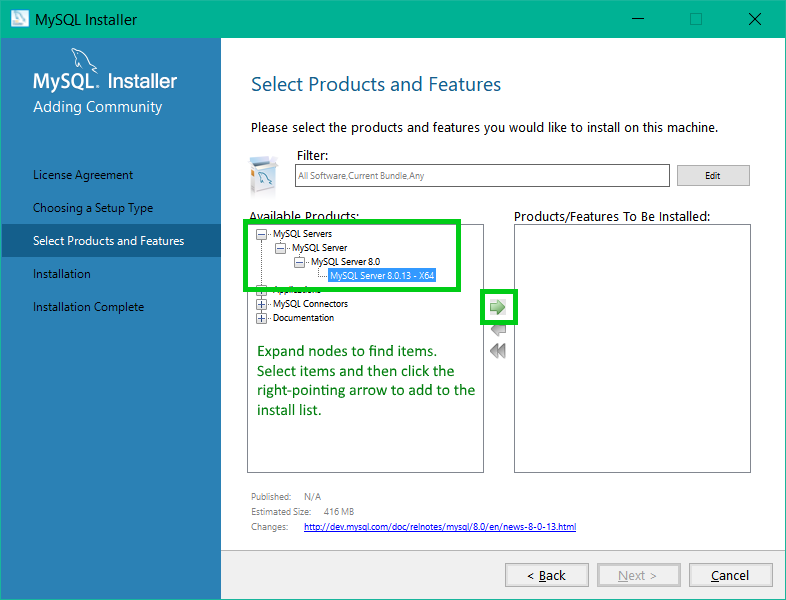
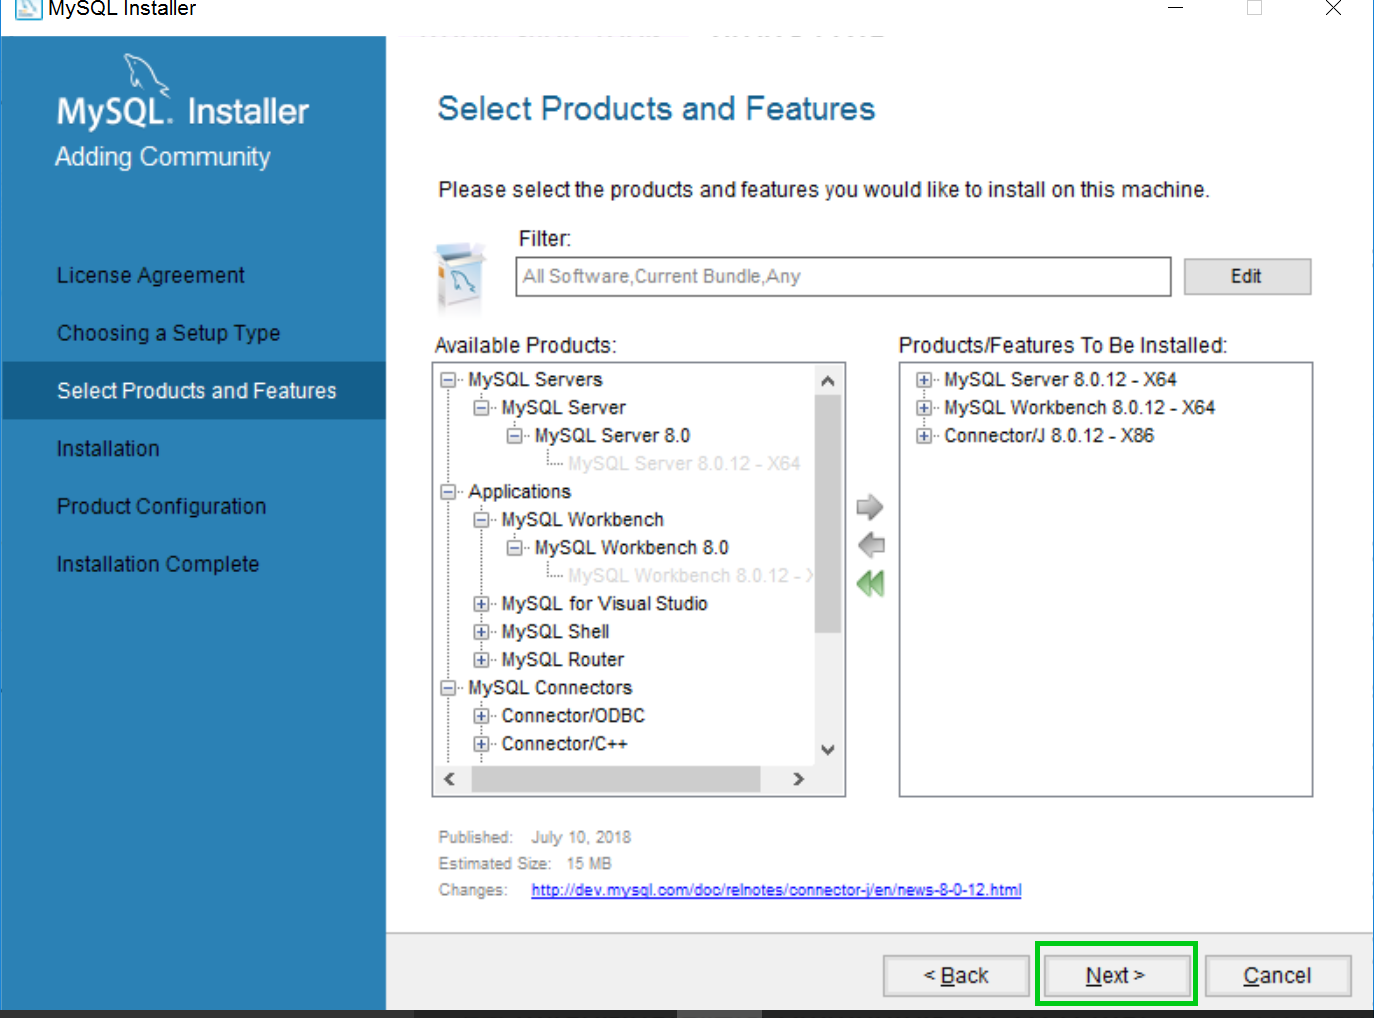
The next screen asks you to select the products and features you
wish to install. Items are categorized inside expandable nodes.
To locate an item to install, you simply expand the nodes until
you find it (e.g. to find the server program, expand "MySQL Servers",
then expand "MySQL Server", then expand "MySQL Server 8.0". To add
an item to your installation, select it (e.g. MySQL Server 8.0.13)
and then click the right-pointing arrow button to move it to the
list of "Products/Features to be Installed".
Expand nodes to locate items to install. Select items
and click the right-pointing arrow button to add them to the installation
list.
Add the following to your install list:
MySQL Servers > MySQL Server > MySQL Server 8.0 >
MySQL Server 8.0.xx (xx = whatever the current update # is)
Applications > MySQL Workbench > MySQL Workbench 8.0 >
MySQL Workbench 8.0.xx
MySQL Connectors > Connector/J > Connector/J 8.0 >
Connector/J 8.0.xx
Optional: if you want, you can also add the Samples and
Examples under the Documentation node (might be useful for
doing extra practice exercises).
Add the three items listed above to your
install list.
Once you have those three items selected, click the NEXT button.
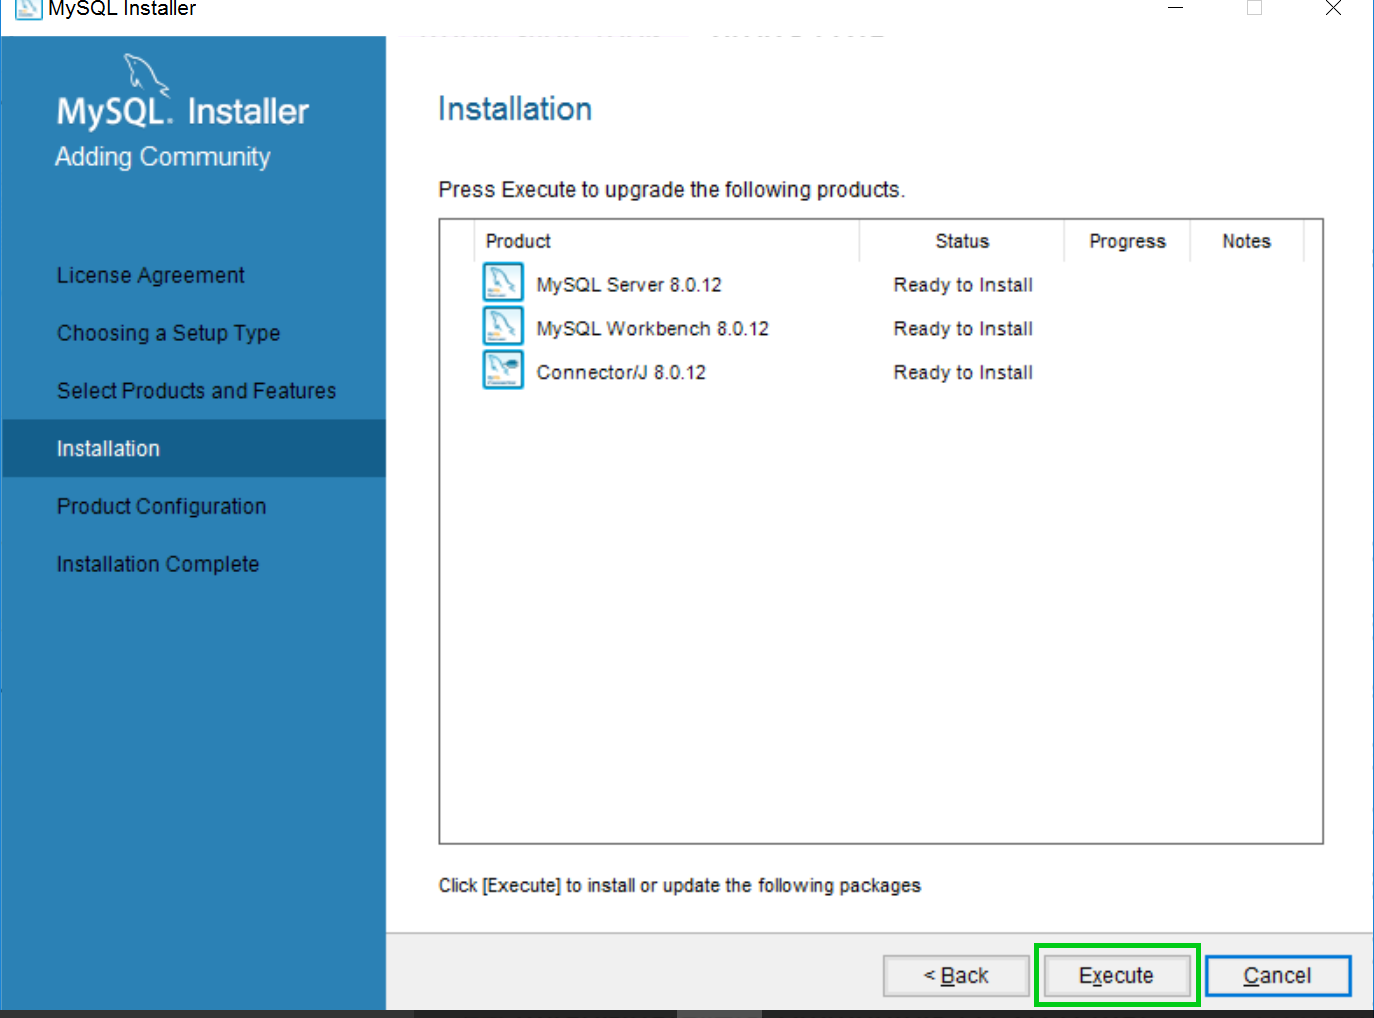
The next screen just lists all the components that are going
to be installed. Click the EXECUTE button.
A list of the items you are about to install.
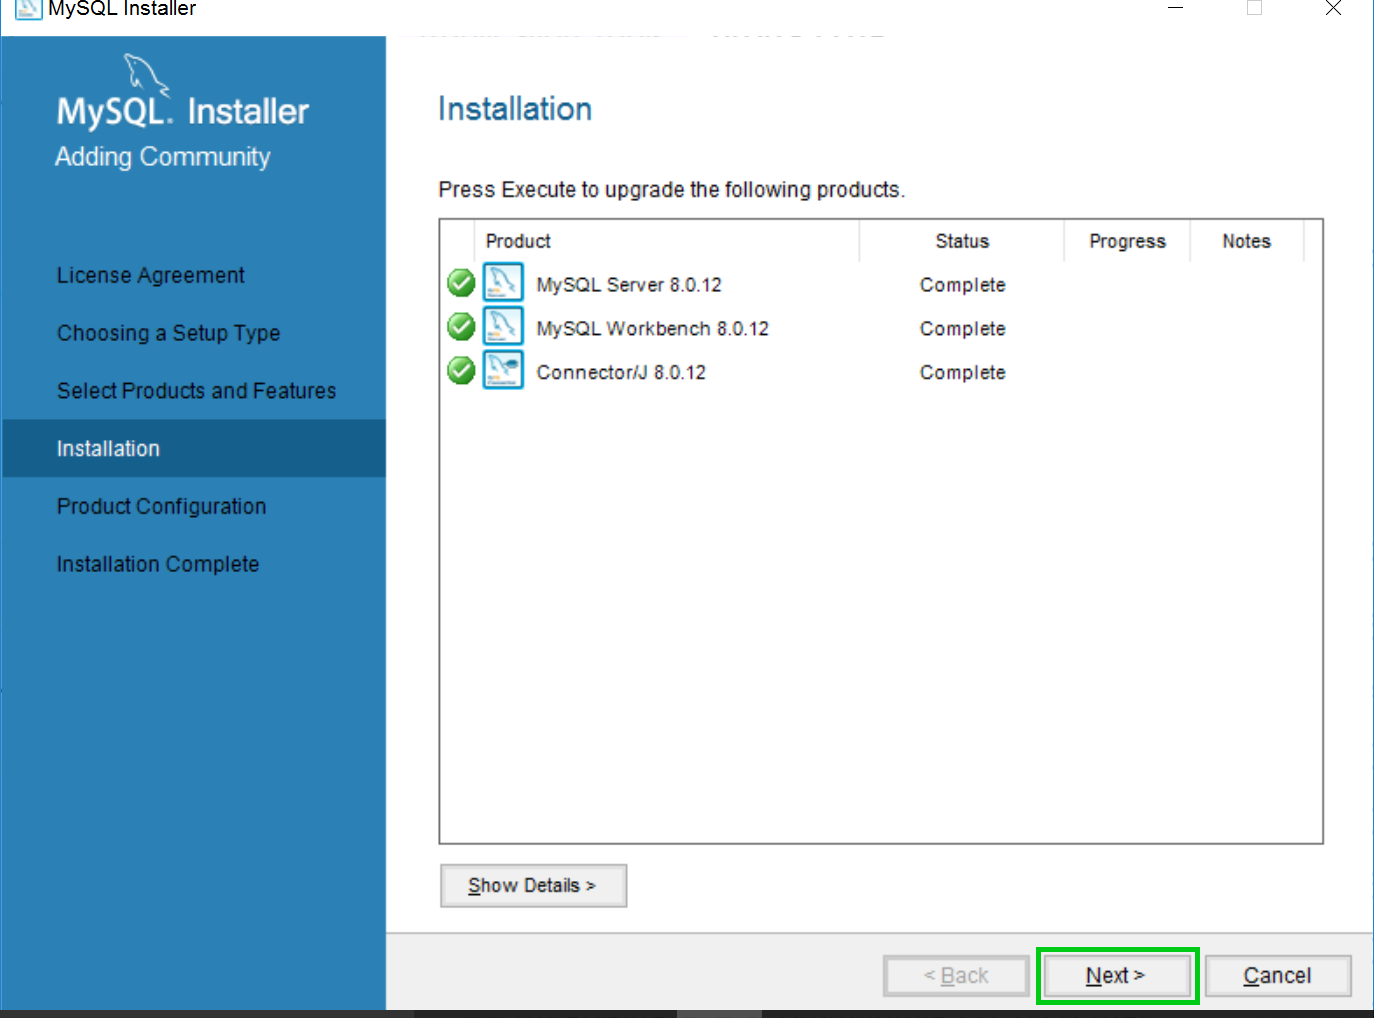
When completed, there will be green checkmarks beside each component
that was successfully installed.
A list of the successfully installed components.
Installation phase is complete.
This completes the installation phase. Click the
NEXT button to move on to the configuration phase.
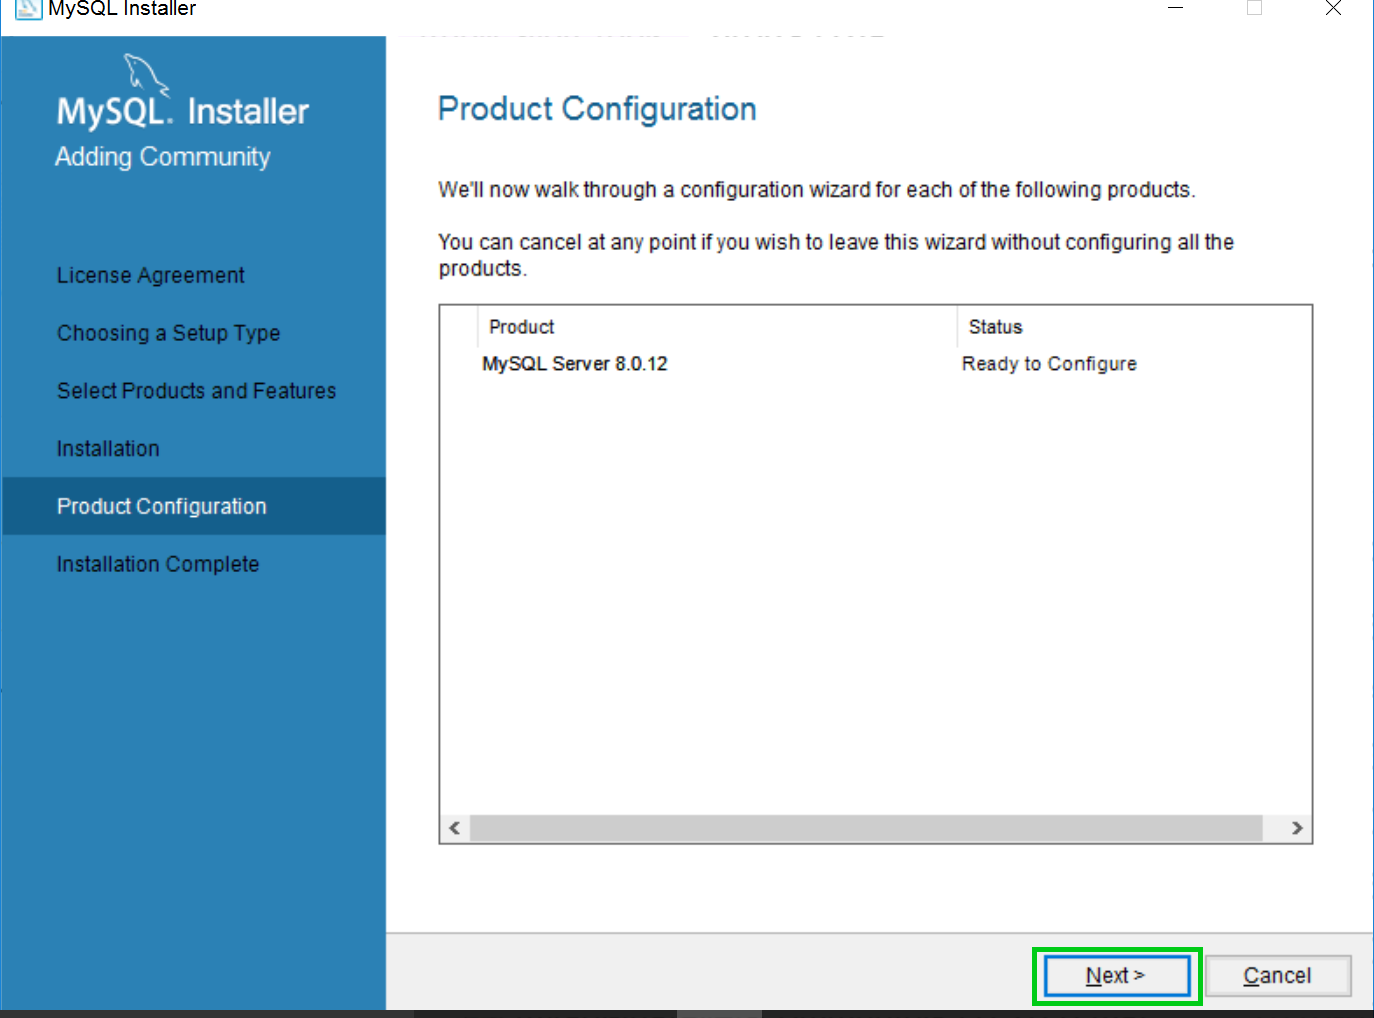
The Configuration Phase
The next set of screens take you through the configuration
phase.
The Product Configuration Screen
Click the NEXT button to begin configuring MySQL Server.
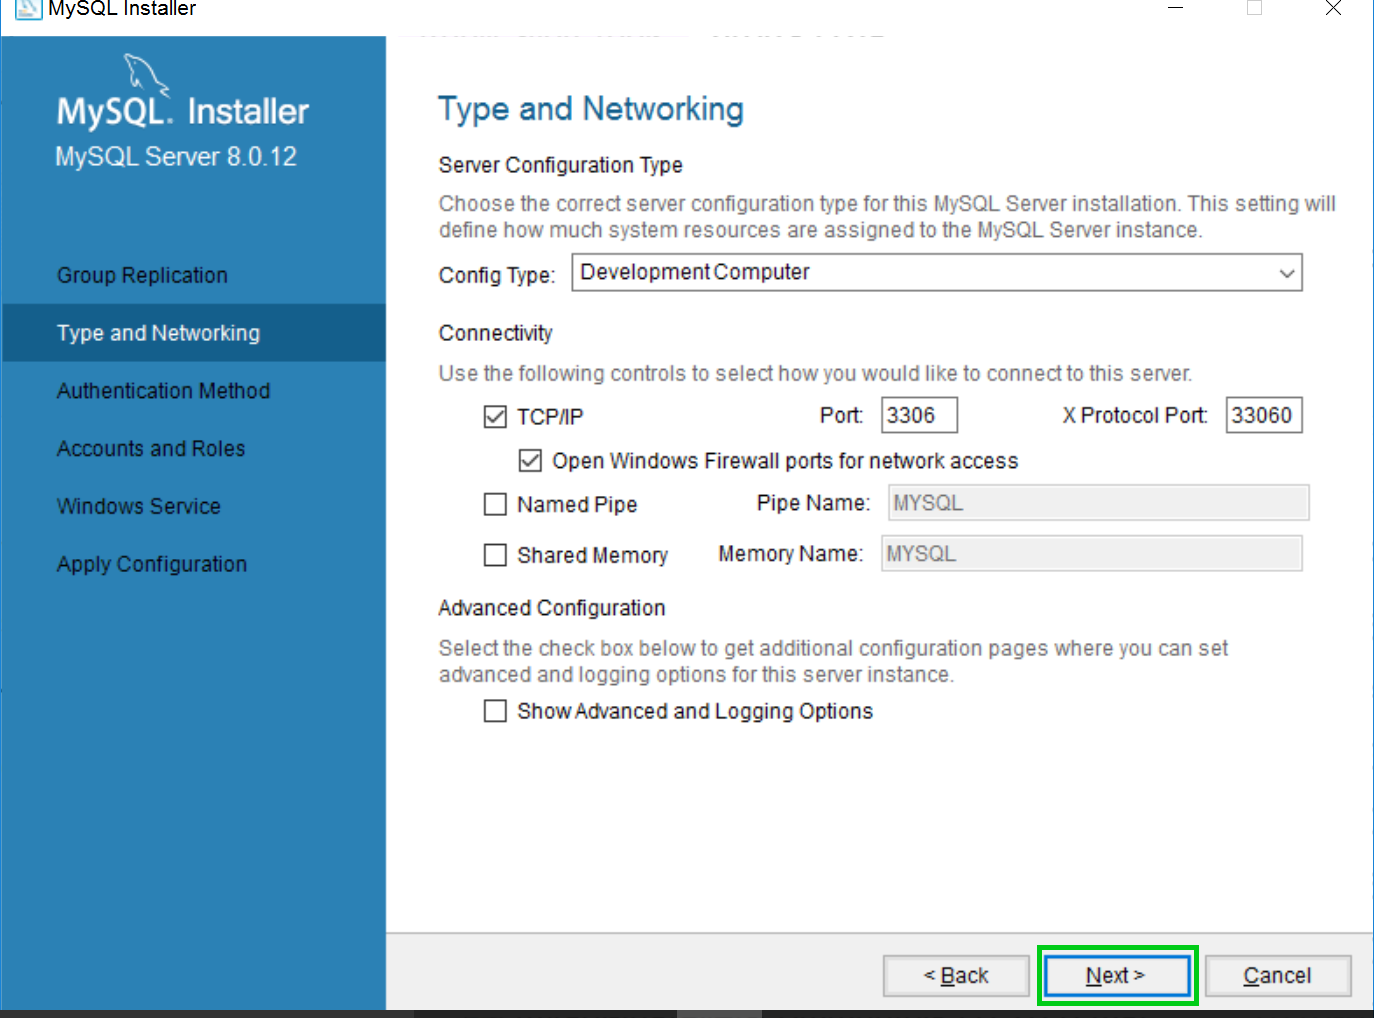
Type and Networking - second screen:
Once again, just leave the defaults as they are and click
the NEXT button. The defaults should already be set to:
Config Type: Development Machine
Connectivity: check TCP/IP and check
"Open Windows Firewall ports for network access"
Port number: 3306
Leave the defaults and click the NEXT button
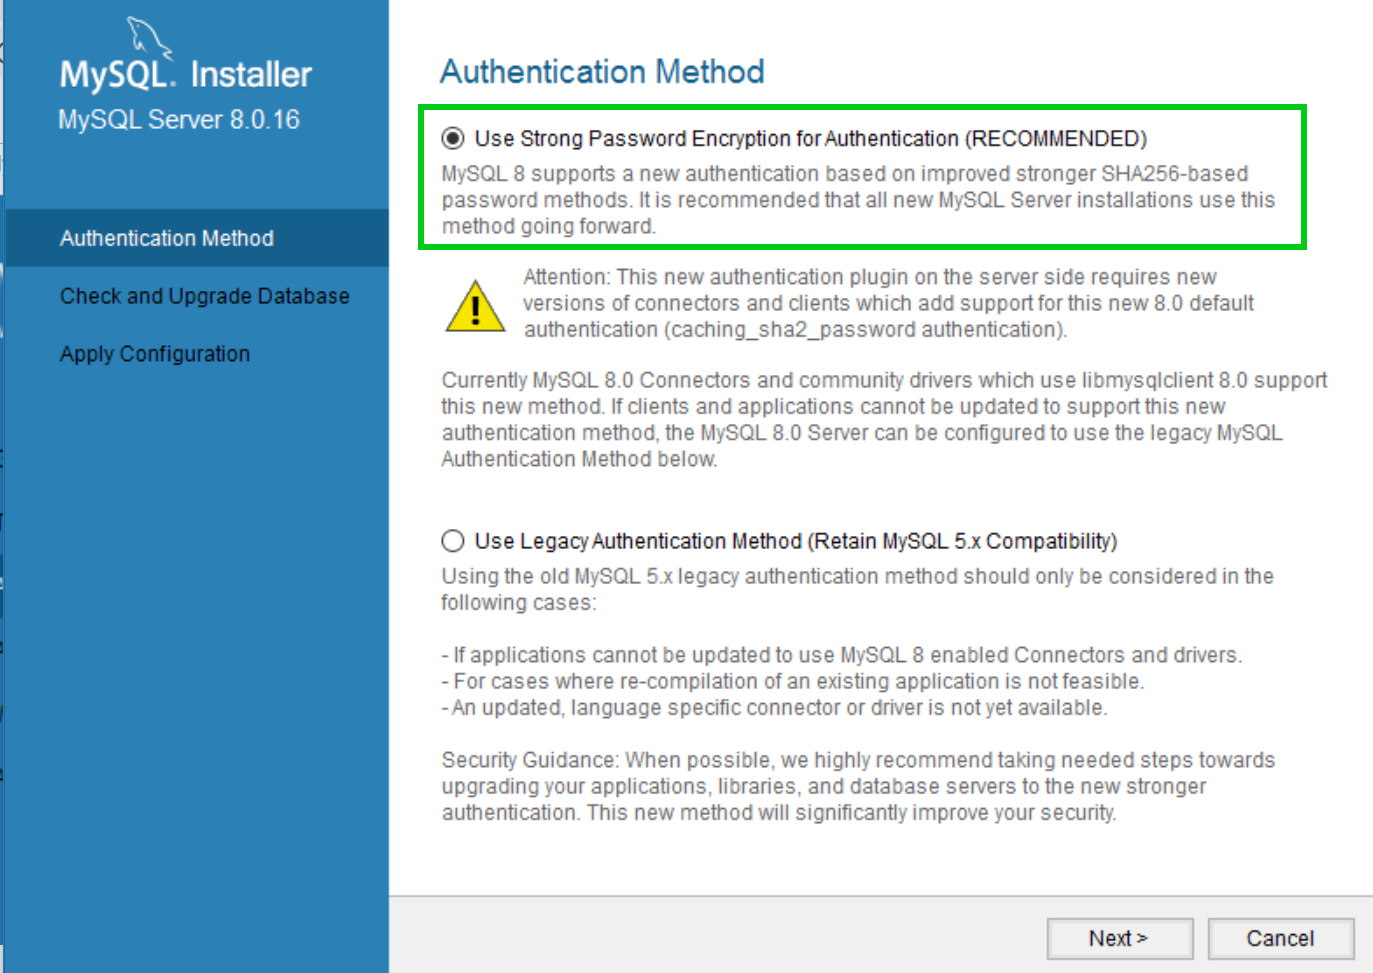
Authentication Method - On this screen,
we need to set the authentication method used to authenticate
users. The default "Use String Password Encryption..." should
already be selected (if not, select it).
Select the recommended default for authentication
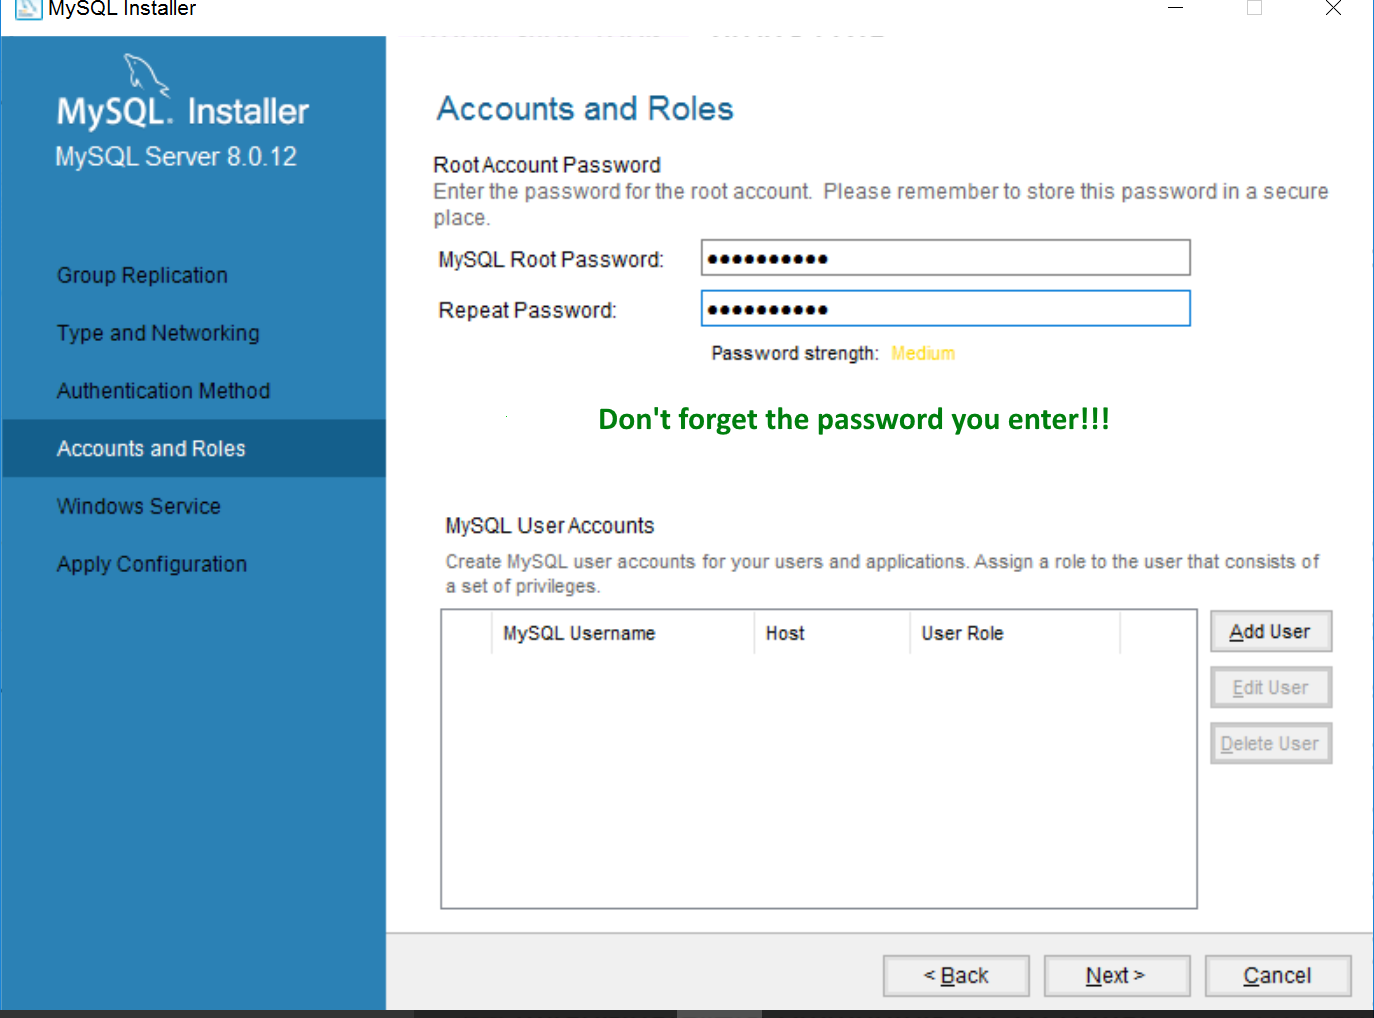
Accounts and Roles:
this screen asks you to set your root account
password and add any other accounts you might need (you can add
more accounts later, too). Here will will configure
2 accounts: a Root Account and an Admin Account.
First, you must enter a password for the
ROOT ACCOUNT. Keep this password handy and don't
lose it: you'll need it later.
If you ever forget the password, you will have
to uninstall and reinstall MySQL.
Add a password for the ROOT ACCOUNT.
Don't lose this password!
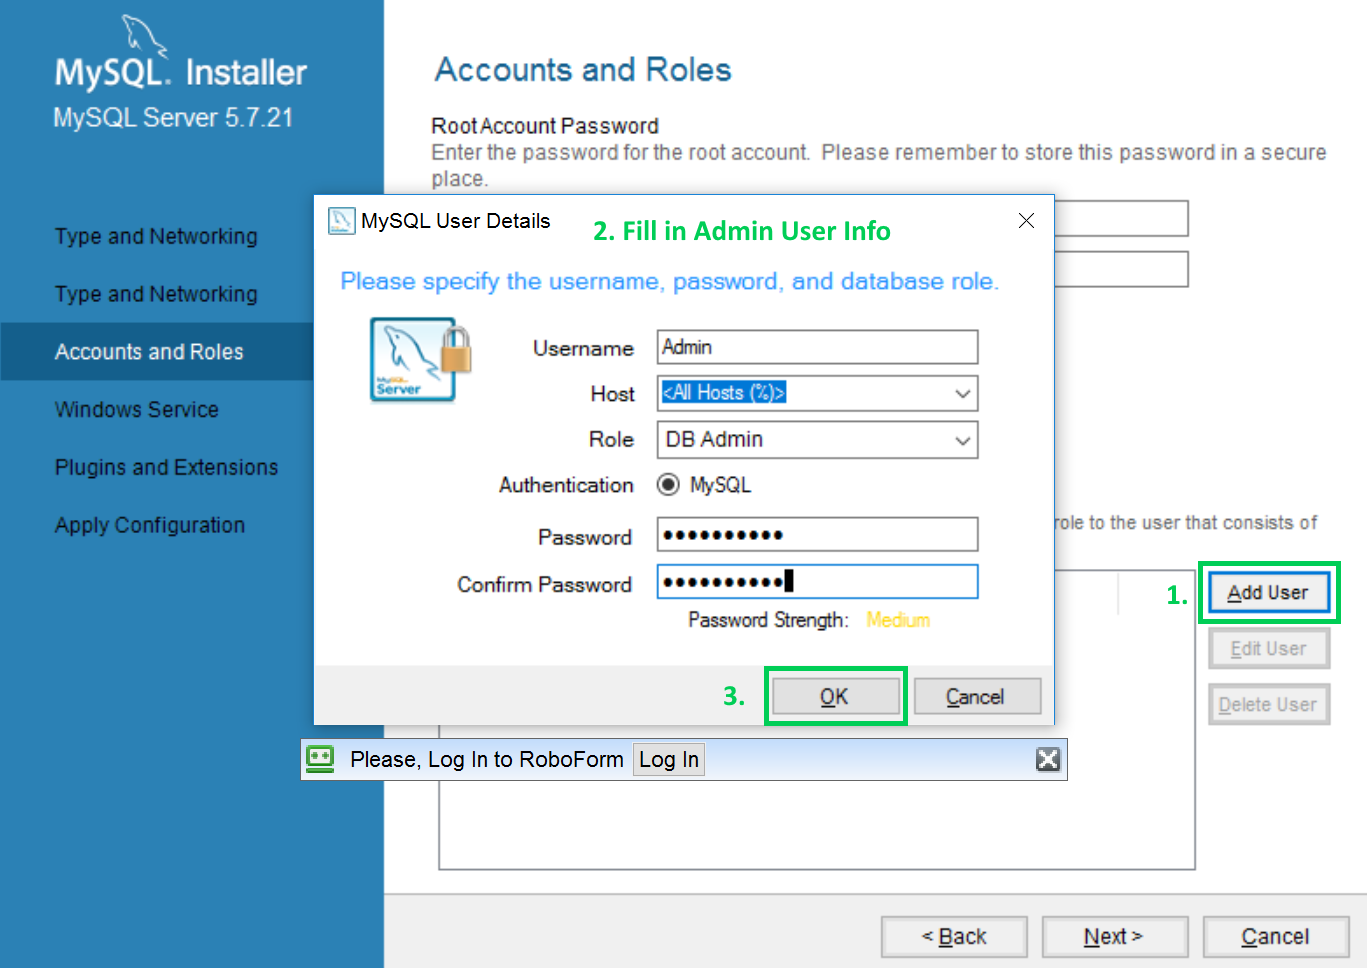
Next, we will add an Admin account that we
can use in Database applications. Click the
ADD USER button in the bottom half of the screen.
Fill in the account information for the Admin
account:
Username: Admin
Host: <All Hosts (%)>
Role: DB Admin
Password/Confirm Password: make a new password, don't forget!!
This is the password for the ADMIN ACCOUNT.
Add information for the ADMIN ACCOUNT.
Don't lose the password!
Click the OK button. You should then see your new
Admin account in the User Accounts list in the bottom
half of the screen.
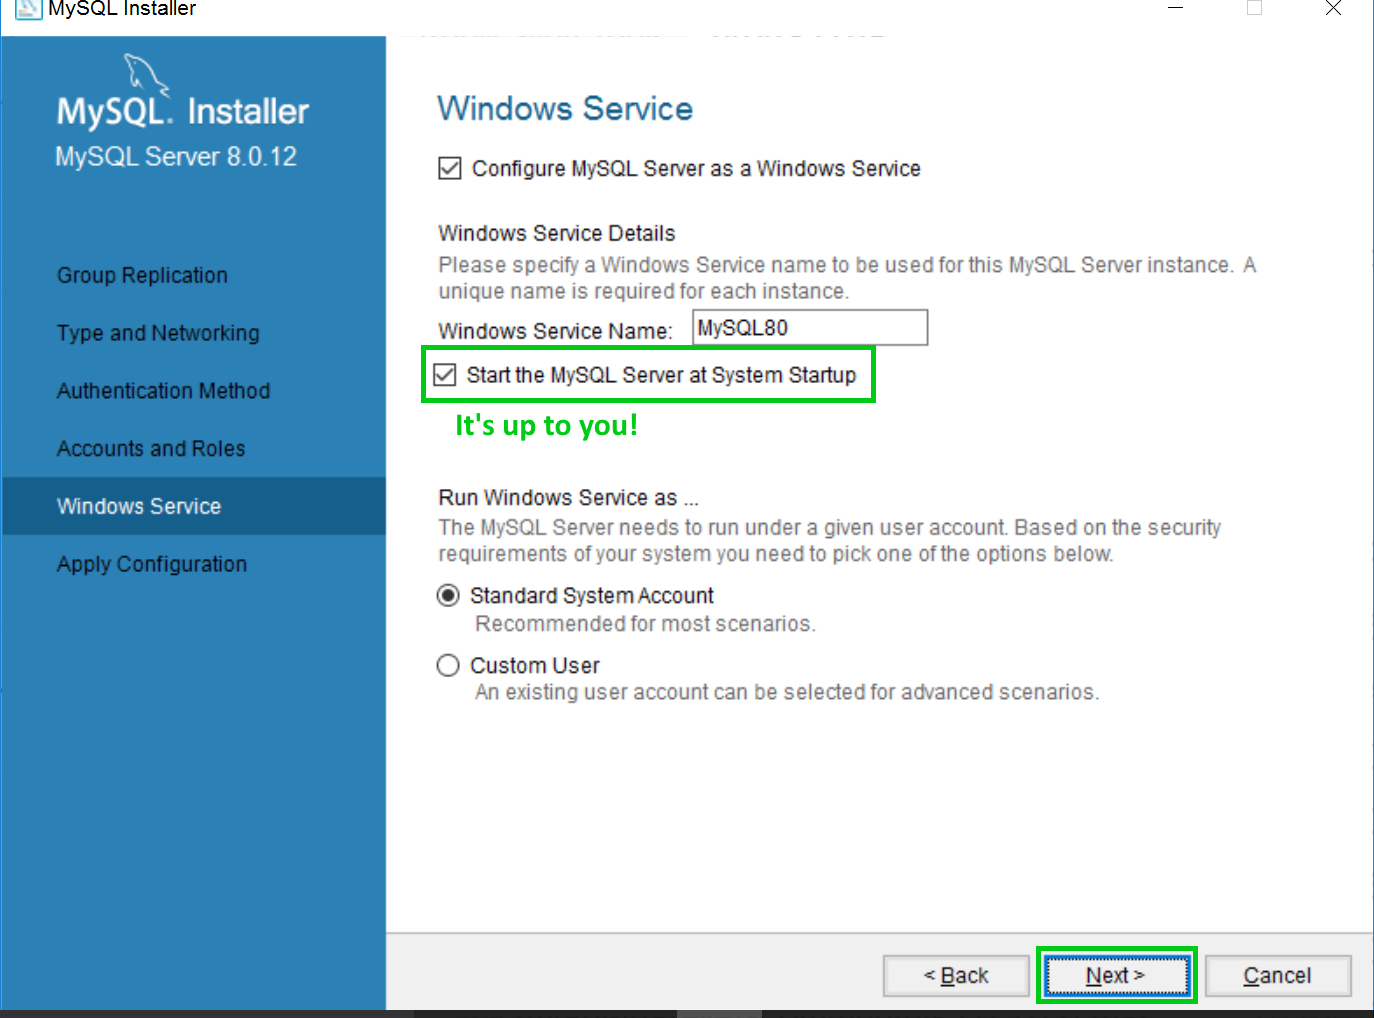
Windows Service screen: this screen
allows you to configure MySQL Server as a service.
Check "Configure MySQL Server as a Windows Service"
Windows Service Name: leave the default MySQL80
or change it if you want.
The checkbox "Start the MySQL Server at Startup" - it's up to
you if you want to check this or not.
Checked: The server will always start up when your
computer starts up. This comes in handy
if you don't want to bother always starting it up manually, but it
does take up processing power when you're not using it . If your
computer is a couple of years old or less powerful, you might want
to uncheck this.
Unchecked: you will start the server manually
whenever you need to use it. Instructions on how
to do this are further down.
Under "Run Windows Service as..." select "Standard
System Account" (if you know what this is about,
feel free to change your selection). Configure MySQL Server as a Windows
Service
Click the NEXT button.
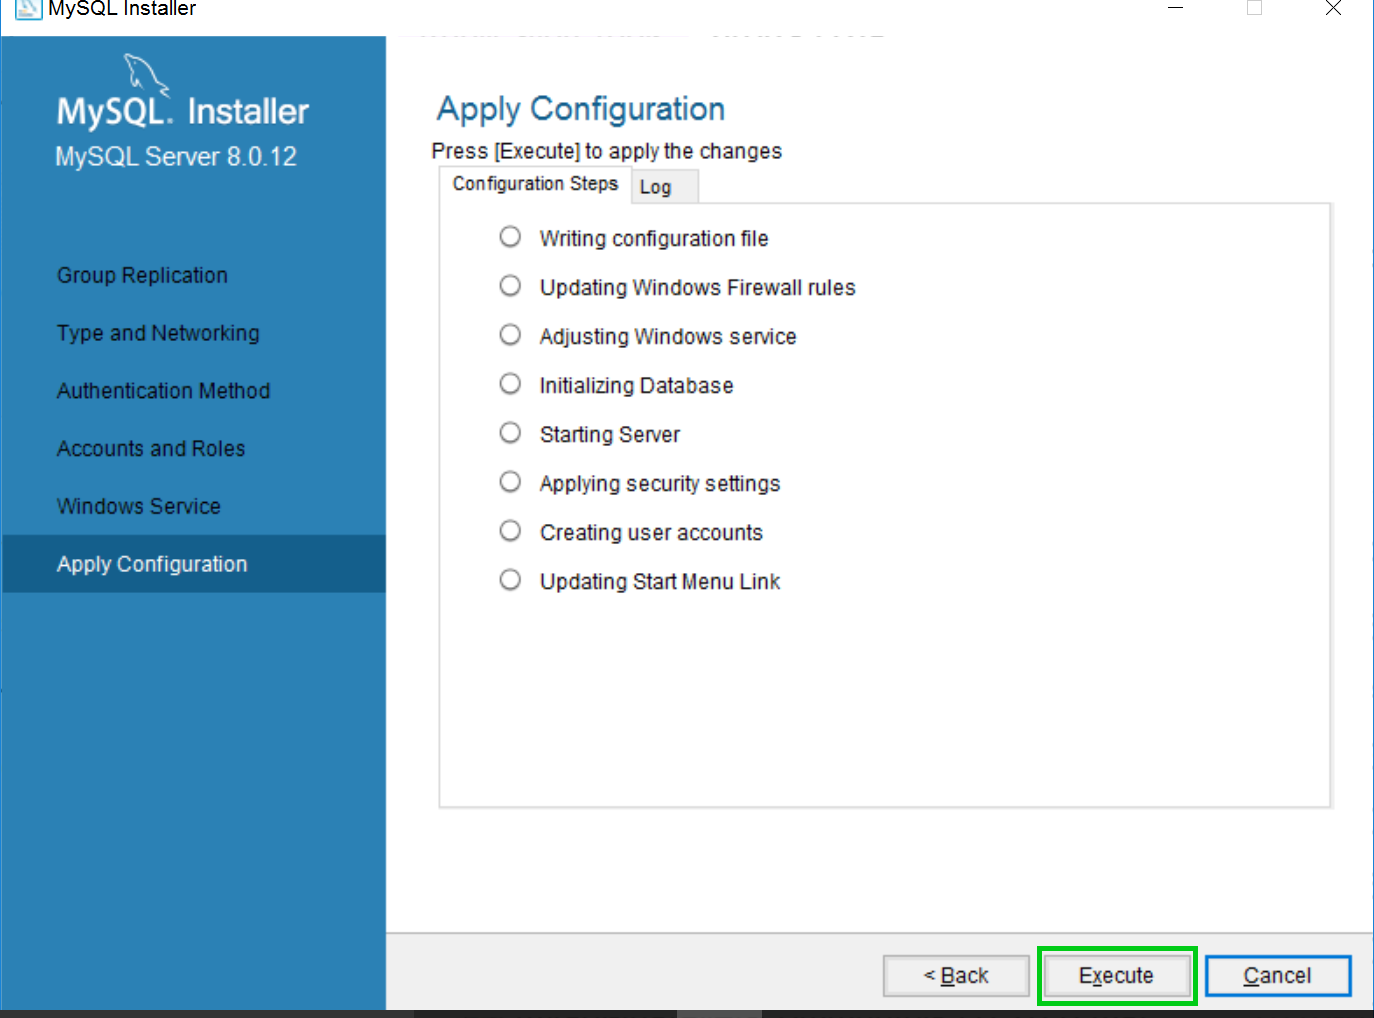
Apply Configuration screen:
This lists the series of steps the installation
program will perform in order to update your
configuration changes so far. Click the EXECUTE button.
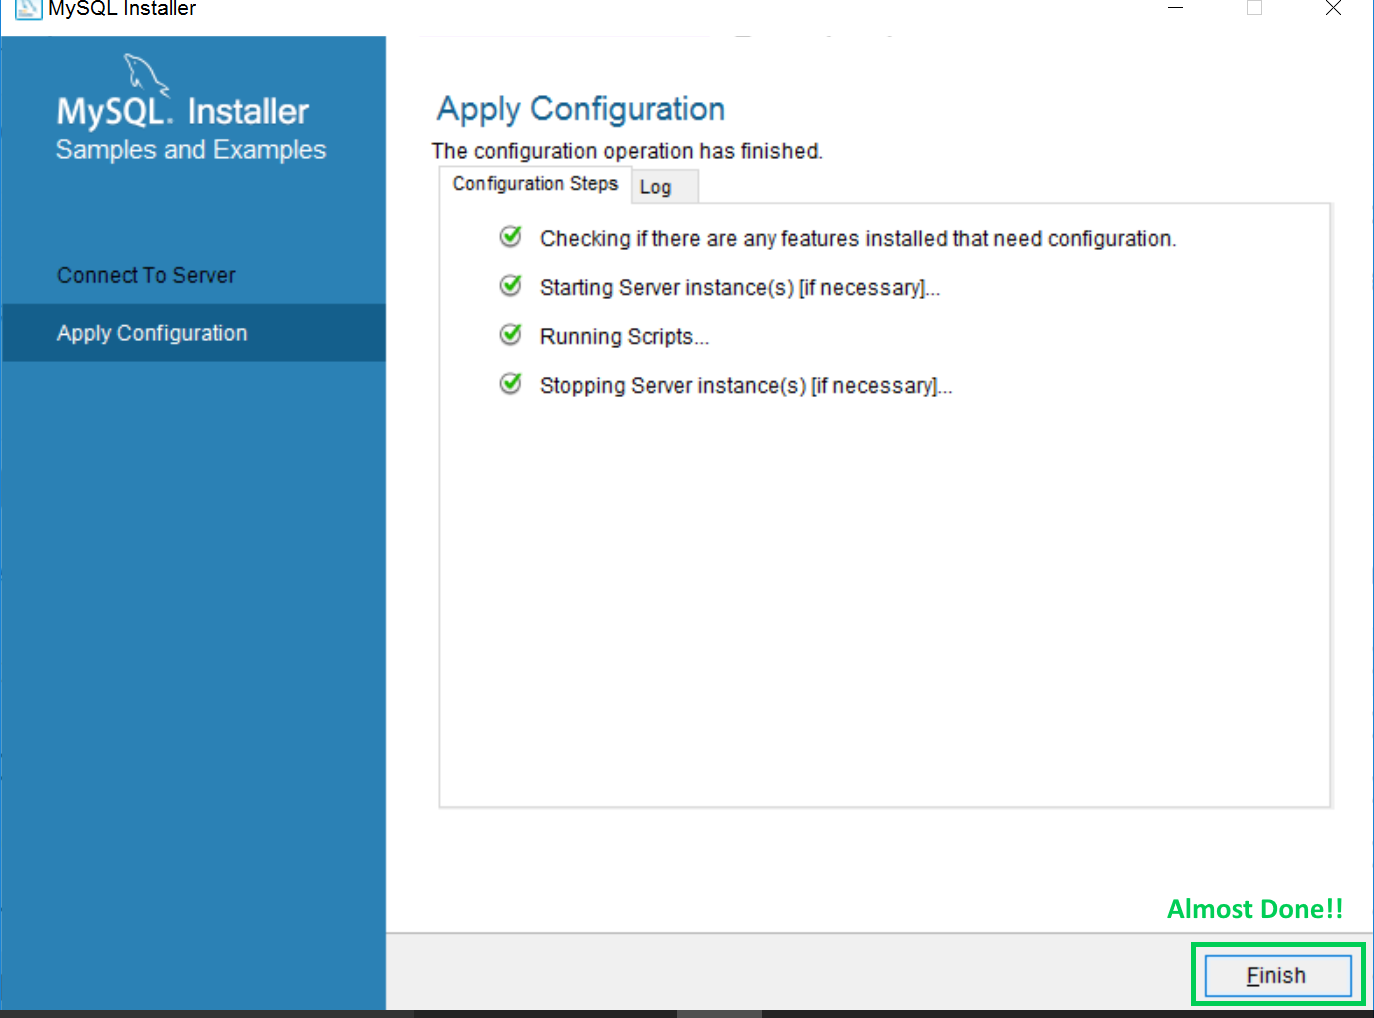
You'll see it working its way through each step, just wait
until it's finished. Once all steps have been
completed, click FINISH button. The MySQL Server configuration is complete
once all the steps have been performed.
When the configuration has completed successfully, you'll see
the list of checked-off items marked as completed.
Click the FINISH button. Once the configuration is complete,
click the FINISH button.
You might now see the Product Configuration Screen once
more. If so, click the NEXT button.
Note that if you installed the samples and examples, there
might be a couple more screens. They're straightforward, but
do ask your professor if you encounter any difficulty.
The last screen indicates that you've finally completed the installation
and configuration of MySQL Server!
Make sure the checkbox "Start MySQL Workbench after Setup"
is checked.
You're finally finished!! MySQL Server is now installed
and configured, along with several of its components.
Setting Up a Connection in Workbench
Now that you've installed MySQL Server and Workbench, Workbench
should be running. If not, start it now.
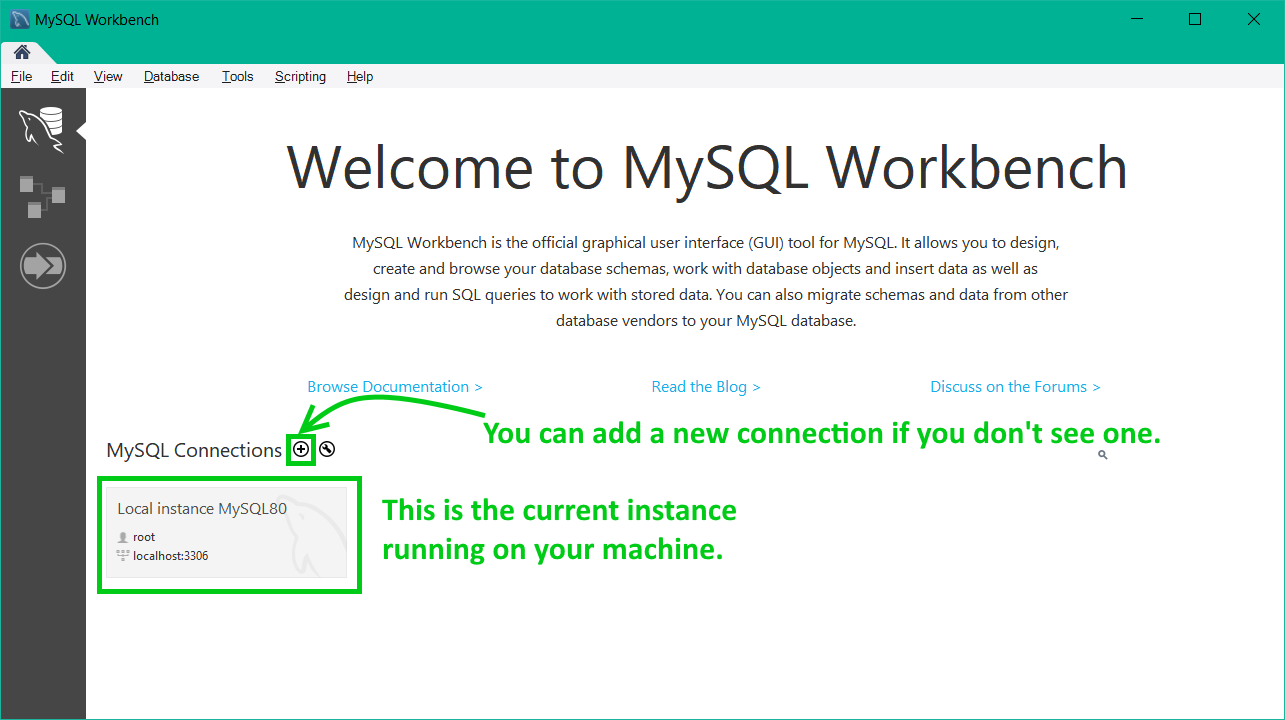
When you start Workbench for the first time, you probably
see a blank screen like the one below:
You should see the instance currently running on your
machine.
If you don't see the current instance, click the link in the middle
of the page that says "Rescan Servers". Your instance should
then appear.
If your server instance still doesn't appear, add it manually using
the instructions below.
DO NOT follow these instructions unless you do not
see a server instance already!
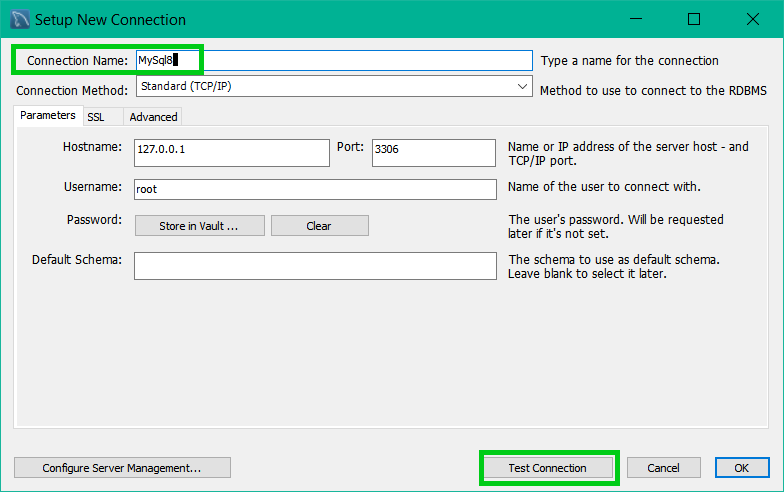
Click the plus sign icon beside the text "MySQL Connections".
In the Setup New Connection dialog box, enter a name for the
connection (e.g MySQL8) and then click the Test Connection button.
You will be prompted for your root password that you entered when
you installed MySQL Server.
Enter a name for your connection and then click the Test
Connection button before clicking OK.
Once you've entered your password,
you should see a message that the test was successful. Then
you can click the OK button in the Setup New Connection dialog.
You should now see a connection on your Workbench screen.
Using the Connection
Once you have a connection appearing on your screen, click it
to use it. You will be prompted for the root password you entered
when you installed and set up MySQL Server.
Once you've logged into your server instance, you'll see the
screen where you can add databases and tables, add/edit users,
back up your databases, etc.