The MVC
(Model View Controller) is a common design pattern used
in software development. MVC
separates the Model, View, and Controller code in order to
all us to create more modular and robust applications.
The Model refers to the data models used by the application
(objects, classes, collections); the View refers to the
user interface parts of your application that allow a user
to interact with the program; the Controller contains the
logic that performs the behind-the-scenes work, allowing the
views to update and reflect changes to the model, performing
tasks the user triggers on the view, etc.
In Node.js and Express, it's easiser to design more complex
applications using MVC.
You can phyiscally and logically separate code for your HTML
pages, routing and request processing, and your data.
In Node.js/Express application, we separate the Model, View,
and Controller code as follows:
Model: JSON
data/objects, a database schema, a class
that models (represents) various objects or a collection of
objects. Models are stored in a /models sub-directory of the
project. Examples:
A program that sells socks might have a class that models
Sock objects, with properties like colour, type, pattern, material,
and size.
A program that allows users to see the statistics for a sports
team might have a collection of players, and when the user
selects a player, a Player object with all that player's statistics
can be used to update the view (web page).
View: HTML pages where a user can enter data and view
data, where the user can interact with the application. Views
can be templates: these contain placeholders where dynamic
data can go. Views are stored in a /views sub-directory of the
project. Examples:
A web page where the user can browse the list of available
socks to purchase, the shopping cart page where they can
view or edit their cart and see how much it's going to cost before
checking out.
A page with an HTML table that allows a user to see a
player on a sports team with all of their current statistics.
The table contains placeholders for the player name, jersey
number, and all the statistics values. These placeholders are
assigned data by the controller when the request for the page
is being processed.
Controller: the code and logic that routes requests,
processes requests and builds/sends responses, behind-the-scenes
code that looks up data in collections/databases or creates
instances of objects based on user inputs. Controllers are stored
in a /controllers sub-directory of the project. Examples:
The server receives a request to add a specific pair of
socks to the user's cart: it routes the request to a function
that looks up the sock ID in the database and returns all that
item's data as a Sock object, passes that object to a function
that gets a view to display the sock information: the view
cotnains placeholders for all the sock data, so those placeholders
are replaced with all the sock object's property values.
This is then passed to a function that adds the view to the
response, sets the response headers, and then sends the response
back to the client.
The user requests the stats page for a player they
selected in a list: the program routes that request to
a function that looks up the player in a database and returns
a Player object, then a function that takes the Player object
and adds all the player's property values to placeholders in
a view, then builds a response and adds the completed view
to the response body, then sends the response.
In this lesson, we'll create a very simple MVC program to
help you learn how it all works. The views will be really
basic: we'll create more dynamic views once we learn
a template language such as
EJS
(Embedded JavaScript)
.
Creating an Express MVC Application
Let's create a very basic MVC application with Express.
Start a new project. I'm calling mine /express_mvc
Add sub-directories for /models, /views, and /controllers.
In the /views directory, add a file index.html.
You can copy and paste the following code into your
index.html file:
The controller's job is to manage the processing
behind the scenes. In this case, our controller will
simply read in the index.html file and load it into
the response body.
In your /controllers directory, add the file homeController.js.
It's common to have multiple controllers, and most developers
name the main controller either homeController.js
or mainController.js.
Add the strict mode statement to your controller.
The controller is a module, so we want to expose a function
called renderIndex that will read in the
index.html page and load it to the response body. Let's expose our
function by assigning it to exports:
exports.renderIndex = (req, res) => {

};
This module function needs the response object, so both the
request and response object have been added
as paramters. It needs the response object so it can
load the index.html file contents to the response body.
The Express Response object contains a very useful function
called sendFile(). The
sendFile() function
accepts the path and name of a resource and sends that resource
in the response body. It also examines the file extension and updates the
Content-Type response header to match the file type. The
sendFile() function assumes that the path provided is
an absolute path, not a relative path (you can change this behaviour
by adding the "root" option, which I'll cover when I talk about
Serving Static Files).
So knowing how sendFile() works, we would like to be
able to send the index.html file using the statement
res.sendFile("index.html"). However, sendFile() requires an
absolute path, so index.html will not be found in this case. But the larger
problem is that when you are testing your app on your local machine, the
absolute path of your project is different from the absolute path on your
server. Furthermore, the absolute path on your server may not match the
logical path you're using (e.g. your Base Application URL does not
usually match the exact physical path of your project files).
Additionally, a common problem with absolute paths that are used on different
systems is that many systems handle paths differently: on a Linux/Unix
environment (most web servers), path segments are separated with a
forward-slash ( / ) but on Windows systems (such as your local development
machine), path segments are separated with a back-slash ( \ ). Lastly,
absolute paths on some systems start with a drive letter and a colon
(e.g. C:), but not on others. These differences make it very difficult
to refer to a file's absolute path on the system.
Thankfully, there is a module and a global variable
we can use to deal with absolute paths in this
case. First, the the Node.js path
module. This module contains a
method join() that accepts a comma-delimited list of
path segments. It will then return a String containing an absolute path
on the system. The key feature of join() is that it will
build the absolute path string based on the operating system's preferences
- so it will use back-slashes on your local machine and forward-slashes
on the web server, for example. When you combine this with the
__dirname
Node.js global variable
(note that those are 2 underscores in front of "dirname"), you can
easily refer to the absolute path of any resource on any operating
system.
As an example, say you were in the homeController.js file and you
wanted to refer to the index.html file: The __dirname
variable would contain the absolute path to the homeController.js
file. On my Windows machine, this would be
I can then add __dirname to a join()
function like this:
// have to import the path module, first!
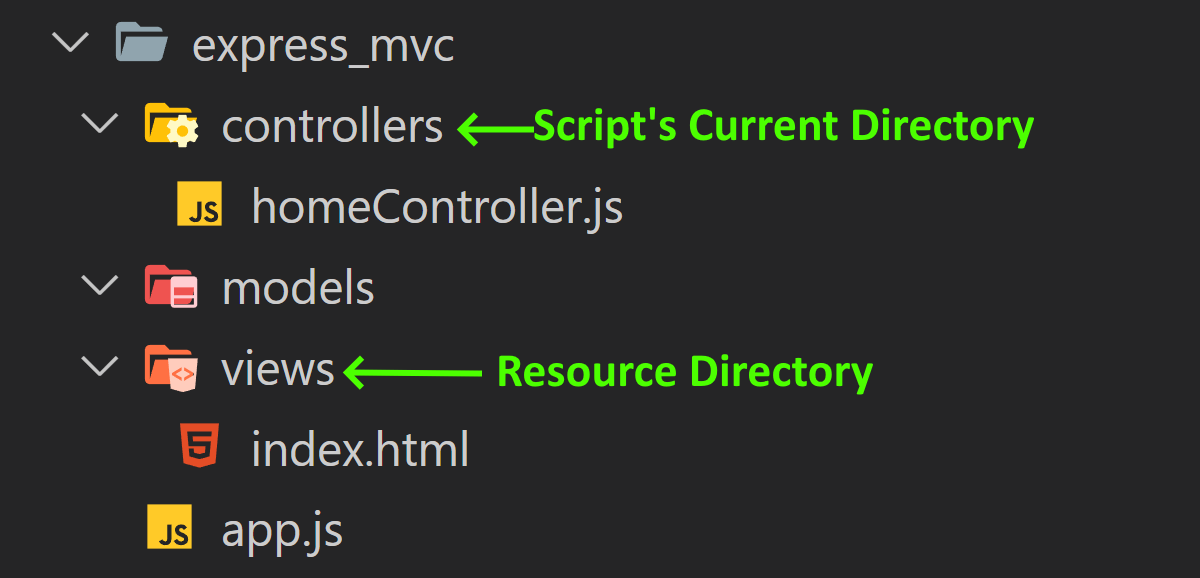
const pathToIndex = path.join(__dirname, "../", "views", "index.html");
Each argument to path.join() is a path segment as follows:
__dirname is the absolute path to the homeController.js
file (inside the express_mvc/controllers directory).
../ is notation for "up one level" in the directory tree.
The script file homeController.js is in the /controllers directory of the
project, but the resource file we want is in the /views directory, which is a
sibling directory to the /controllers directory:
Express MVC project structure
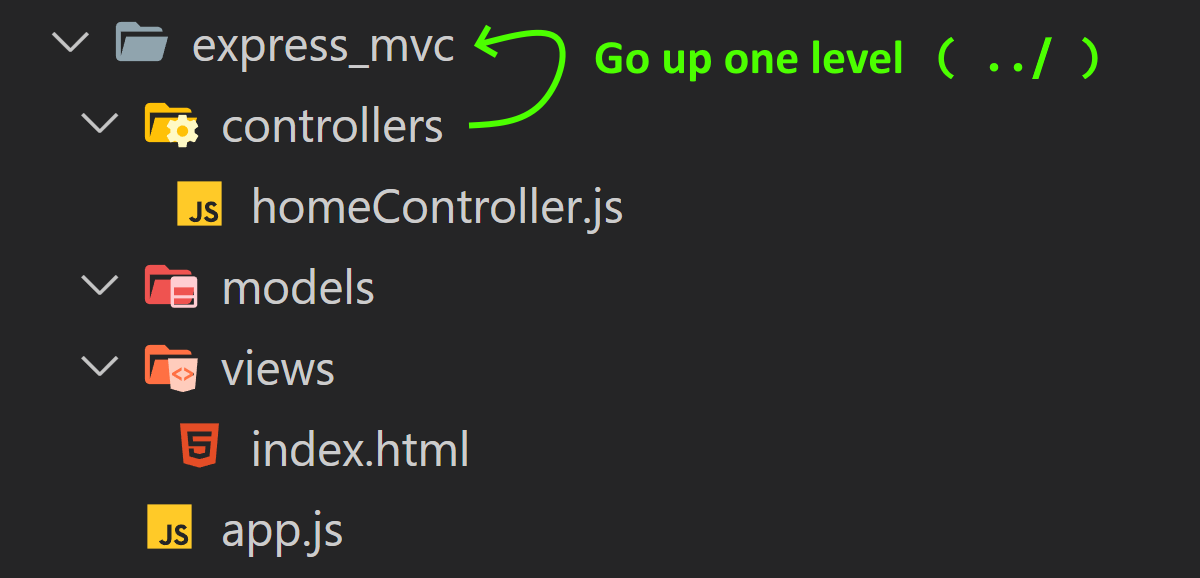
In order to get to the /views directory from inside the /controllers
directory, we first have to "go up one level" to their shared parent
directory (/express_mvc).
Express MVC project structure: ../
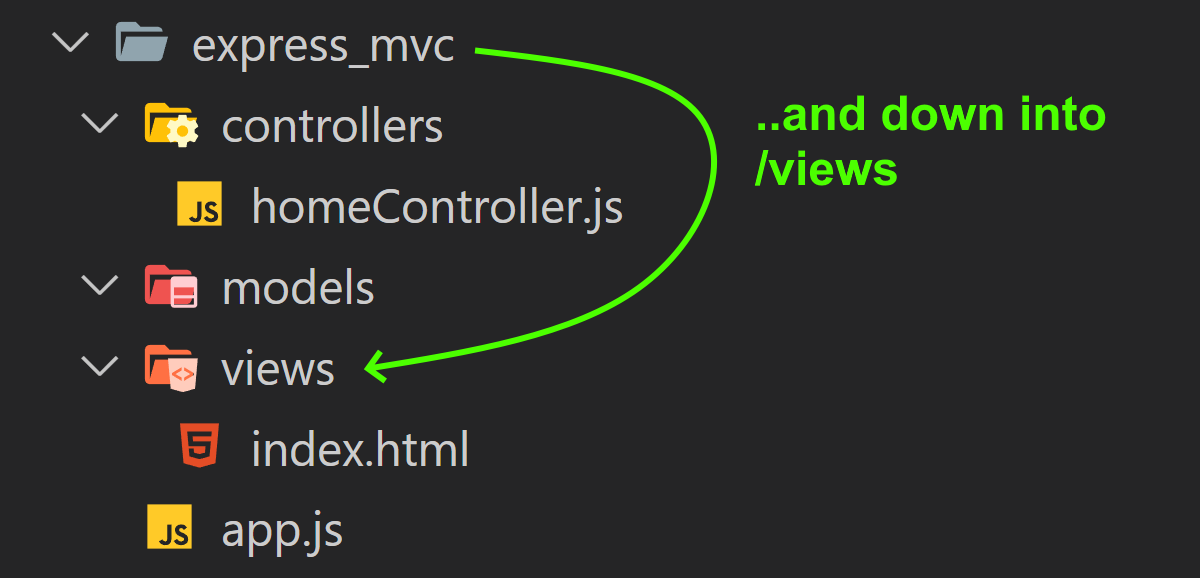
"views" is the next part of the segment - this indicates that
we now move down into the /views directory. Notice that you don't include the
slashes in the segment when you're referring to a directory name or a file
name - these are added by join() to match the operating system's
preferences.
Express MVC project structure: /views
index.html is the final segment, which is the name of the
file we want to load. Again, we don't add slashes to the string.
We can use this statement in our controller function, and even just
pass it to the sendFile() method, if you want to make it shorter:
Now we can add an app.get() to handle GET requests to
our application's root: In my version, I'm going to use the
base application path "mvc1". The callback for the app.get() is
going to be the homeController's renderIndex() function:
app.get("/mvc1", homeController.renderIndex);
Now initialize your program if you haven't done that already:
npm init
Now run npm install to install
express:
npm install express ejs -s
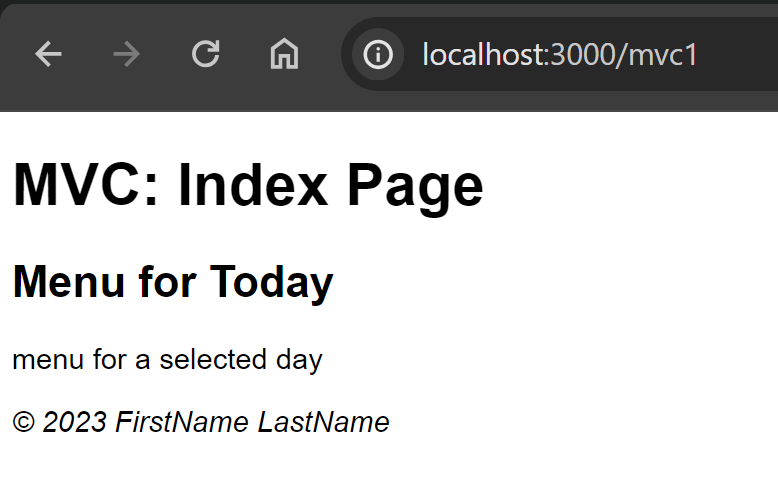
Now run your program locally, then go to your browwser and try
the URL:
localhost:3000/mvc1
If you're testing on a server, set your Base Application
URL to /mvc1. Remember to ONLY upload the
source code and the package.json file, then run the server
tool to install the dependencies. Then test it on your server:
https://your.domain.name/mvc1
Output for localhost:3000/mvc1
Now that we have a controller, let's add a more dynamic
view to our project.
Adding a Dynamic View
To add dynamic content to a view, you need to use an
additional template language inside your HTML. There are
several choices, but the easiest is
EJS (Embedded
JavaScript). In this lesson I'll only be showing you
EJS briefly, but
there's an entire lesson on
EJS coming up.
In that lesson, we'll go over the syntax in more detail
and I'll show you some of the other alternatives to
EJS.
First, using your editor, select your /views/index.html file
and change the file extension to ejs, so that your
file is now called index.ejs (In VS Code, you can
right-click "index.html" and select Rename)
Now edit the index.ejs file and change your level-2 heading
inside the <header> element:
<h2>Menu for <%=dayInput%></h2>
The <%=dayInput%> is called an output tag,
it acts as a placeholder: the EJS engine
will search for a variable or parameter called dayInput,
and it will replace <%=dayInput%> with the value of the
dayInput variable's value.
Now we have to figure out how to pass the value for the
dayInput variable into the index.ejs template.
We can do this by adding a parameter to our URL and then
capturing that in our code when we receive the request.
For example, if someone requests localhost:3000/mvc1/Tuesday,
we can capture the "Tuesday" path segment and store it
in a variable. We can then pass that variable to the index.ejs
file as dayInput.
URL Parameters
One way we can pass a value to our application is by
using a form input (such as a select box for the days of the
week - we'll do this in a later lesson).
However, that's not the only way! You can also pass
values into an application by using a URL parameter.
A URL parameter is a segment added to the URL, and the value
of that segment is the value you want to pass to your
program. For example, someone could load our application
with the URL localhost:3000/mvc1/Tuesday or
localhost:3000/mvc1/Saturday. We can grab the last segment
as a parameter and pass it to the index.ejs template.
To get the value of the URL parameter, you add a segment
to your app.use()/get()/post() URL pattern, such as
/mvc1/:day. Notice that we use a colon :
in front of the parameter's name. This adds the parameter
as part of the request. Request parameters are stored in the
req.params object. The req.params
object contains properties for any params in the URL,
e.g. req.params.day. Also, notice I'm using
"day" instead of "dayInput" - that's to avoid confusion
in our controller code - you'll see what I mean when we
get there.
We also need to make sure that our program is using the
EJS view engine.
A view engine is the application that parses syntax like the
output tag <% >> and replaces the placeholders with
variable values, expressions, and many other things
we'll learn in the next lesson. You have to require the
EJS engine in your
code by adding the following statement to your app.js file:
app.set("view engine", "ejs");
This statement sets the view engine to the
EJS view engine. By default
it's set to PUG, but we are using EJS
so we have to add this statement to change the view engine
from the default PUG to EJS.
Now replace your app.get("/mvc1") request function to the one
below that prints the day URL
parameter to the console:
Notice the URL pattern: /mvc1/:day. So this matches
any URL that starts with /mvc1/ and has a value after it.
Right now we'll assume it's a day of the week, but later you could
add some extra code for error handling.
Inside the callback, we're just printing the req.params.day
value to the console. This means we're not sending back a
response, yet - so your browser will show an error when you run the
app, and that's fine for now.
Initialize your app, then run npm install to install
ejs:
npm install ejs -s
If you haven't run your program at all yet, and haven't installed
any dependencies, you can do all your dependencies at once:
npm install express ejs -s
Now you can run your program. Go to your browser and try:
localhost:3000/mvc1/Tuesday
Try different days (you can actually use any string in place
of "Tuesday". You should see your last URL segment in the
console.
Server running on http://localhost:3000
            day: Tuesday
If everything is working, you can now udpate your controller
function that renders the index page. Instead of reading the
raw file data and sending it in the response body, we're going
to use the EJS engine
to plug the "day" path segment into the "dayInput" variable in the
index.ejs file.
Rendering the index.ejs Page
To render a template view instead of a plain HTML file, we use the
res.render() function. res.render()
accepts two arguments:
The name of the view to render. This should be a string
value, and the extension is not required (e.g. "index" for
index.ejs)
A JSON object
referred to as "locals" that contains
key-value pairs. These key-value pairs end up as variables/values
that are local to your view (hence the term "locals").
res.render() will also automatically set the
response status code, content type, and will write the final
rendered version of the template .ejs file to the response body.
Then it will send the response for you! It does a lot of the
work we usually have to do ourselves. This means replace our
renderIndex code with a render()
function call:
This takes the value of our req.params.day parameter and
assigns it to the dayInput key, which makes
dayInput a local variable
in the index.ejs file. This is essentially how you can pass
a value from your request to your controller to your EJS template
response.
Now we need to update our app.get() and set the callback back
to the renderIndex() function from the homeController:
Restart your program and test the same URL(s) you used
before: you should see the day of the week (or whatever you
typed as the last segment of the URL) in the level-2 heading!
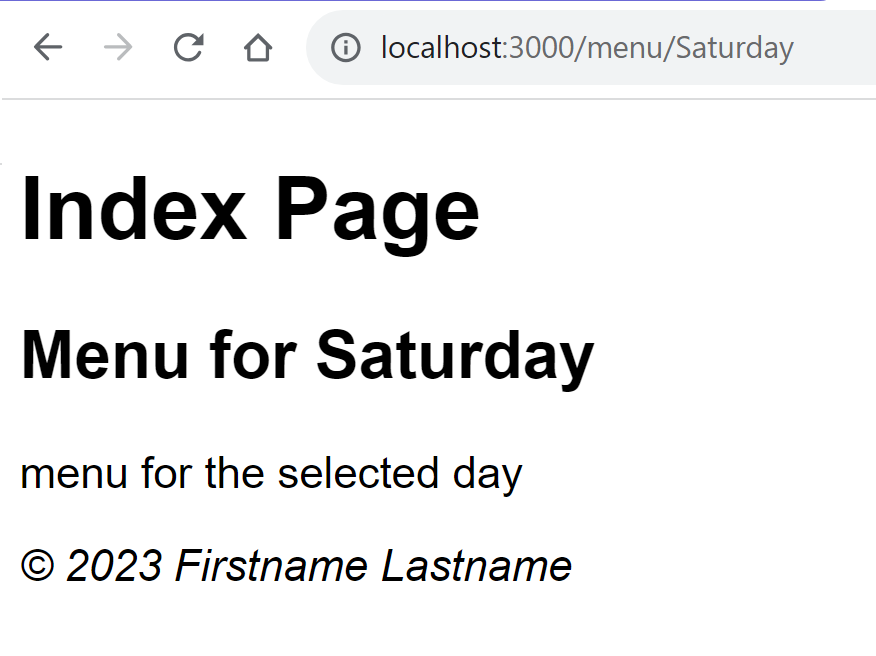
Output for localhost:3000/menu/Saturday
Now we've done an MVC
application with a Controller and a dynamic View. Let's now
add a Model.
Adding a Model
Now let's make it a true MVC program by adding a model.
Grab the menu.json file from GitHub and add it to your
project inside the /models directory.
Examine the JSON file: you'll see it's a list of objects
where each object's key is the day of the week in title case
(e.g. Tuesday, Wednesday, etc). Each object is a simple
menu for three meals: breakfast, lunch, and dinner.
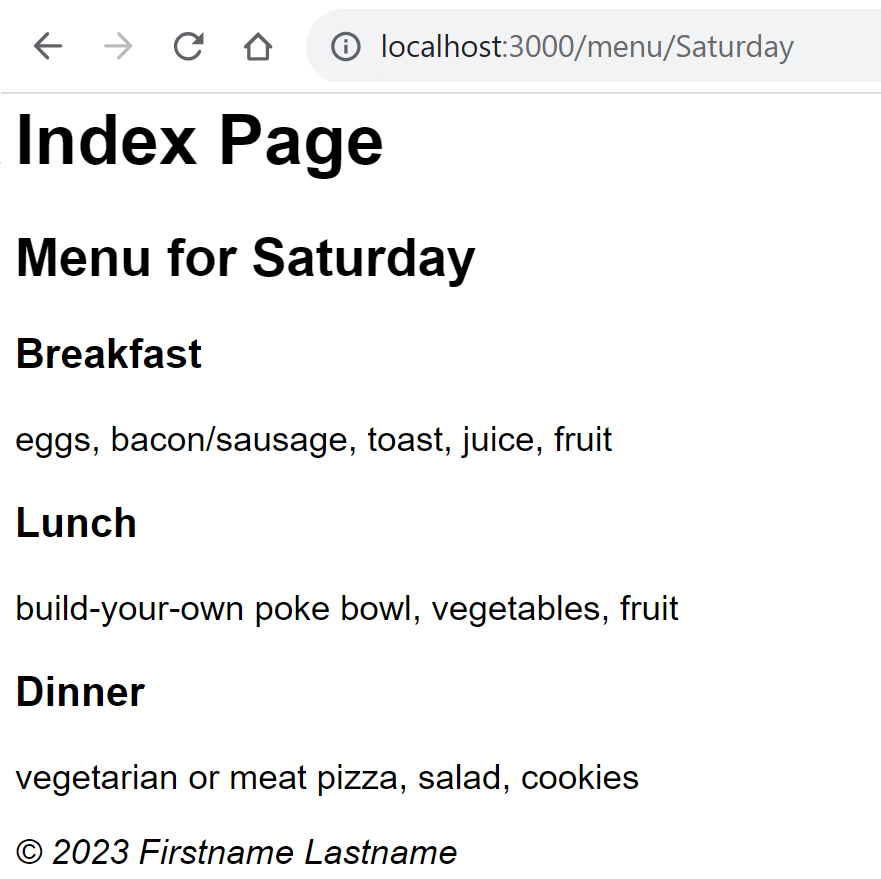
When the user visits a URL for a specific day of the week,
we will display a level-3 heading for each meal with a list
of the items, as shown in the screen shot below:
Proposed output for our MVC program
Our controller's renderIndex() function needs to know which
menu object to add to the list of locals for the index.ejs file.
To do this, we must first import the menu.json file into our
controller:
const menu = require("../models/menu.json");
Note the path: the controller is in the /express_mvc/controllers directory
but the menu.json is in the /express_mvc/models directory, so
we have to go up one level to /express_mvc, then into /models
in order to get the menu.json file. You can also use __dirname
and path.join() as shown earlier, if you prefer.
Now we can update the renderIndex() function by getting
the menu object for the specific day. The menu
variable contains the list of objects, keyed by day of the
week in title case. So we can use req.params.day
as the index to menu. For example,
menu[req.params.day]. This needs to be stored
in a "locals" variable to be sent to the index.ejs file.
This stores the inputted (via path segment) day into the dayInput
key, and the entire object with the key that matches that same day value
into the dayMenu key.
All that's left is to update the index.ejs view. Add the
code in the <main>:
<%=dayMenu.Breakfast%>
Now re-run your program and try each day of the week (make sure
you use title case). What happens if you don't enter a valid
day of the week?
Note that the ouput isn't pretty and we're only seeing the value
in the object's "Breakfast" property, but we can fix that with more
advanced EJS, which
we'll cover in the next lesson on Reading
JSON Data.
Exercises
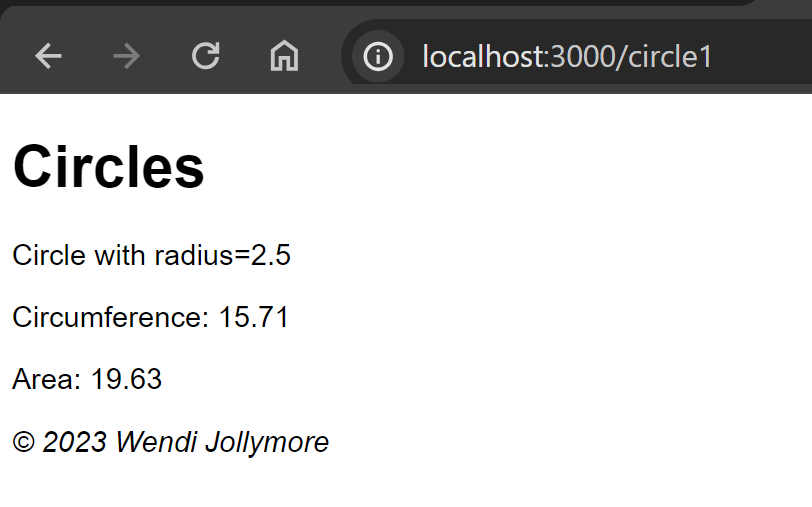
Write an MVC Express application with a Base Application
URL of "/circle" that displays
information about a circle with a specific radius. Pass
a value for radius to an index.ejs file and display your
output on the index.ejs page matching the format in the
screen shot below: My Sample Output: My circumference and area are formatted to 2 decimal places
Use a single controller with an exposed function that
renders the index.ejs page with a hard-coded radius
value of your choice (no other values should be passed
to the index page). TIP: an ouput tag can contain
expressions! For example, <%2 * Math.PI * radius%>
Modify your program: allow the user to pass the radius
in via a URL path segment. Pass that single value to your index.ejs
page instead of the hard-coded radius value.
Add the circle.js class as the model for your
application (e.g. it should go in /models). Your circle
should have a radius property, two accessor properties
circumference and area, and a toString()
function property. If the radius is not provided when someone
creates a new circle object, use a default value of 1.
The toString() returns "Circle: radius=x.x" where x.x is the
radius formatted to 1 decimal place.
Modify the controller function: use the URL parameter for
radius to construct a new circle instance. Pass that circle
instance to the index.ejs page instead of the radius value.
Modify your index.ejs to display the radius, circumference,
and area from the circle object that was passed in.
Test your circle program with no radius as the last
path segment (e.g. localhost/circle/). What happens and
why? How might you fix this?
Tip: you can make a parameter optional by adding a ? (question
mark) after it in the URL pattern e.g. "circle/:radius?". Modify
your application so that the controller sets the radius to a
default value of 1 if there is no radius URL parameter.