In this lesson you'll install Node.js on your
local machine and test it to make sure everything is
working.
Pre-Requisites
You will need to know what operating system you have,
you should be familiar with installing and running
applications, and you should be able to follow
instructions for installing software.
You should install Node.js locally on your computer
so you can code, test, and debug your applications
before uploading them to a server. Debugging on the
server can be cumbersome and difficult, but you also
don't want to increase the load of your server by using
it to test and debug an application!
Make sure you choose the download that is
most appropriate for your computer's operating
system. If you know you'll be using a container like Docker
or package manager like Volta or Chocolatey, select whatever
tool(s) are appropriate.
If you're not sure what else to install besides the
version for your operating system, you can just get the
bare minimum required for these tutorials by
scrolling down below the PowerShell image and selecting
"a prebuilt Node.js for" your operating system.
For example, here's what I selected for my Windows machine:
I chose a prebuilt installer for my Windows machine
Running the Installer
Once you've downloaded an installer, run it.
These next instructions will take you step-by-step through
the installer screens. NOTE that my screen shots are for a
Windows 10 system and I was installing version 18. Yours
may be different and this may result in slight differences
in the screen shots.
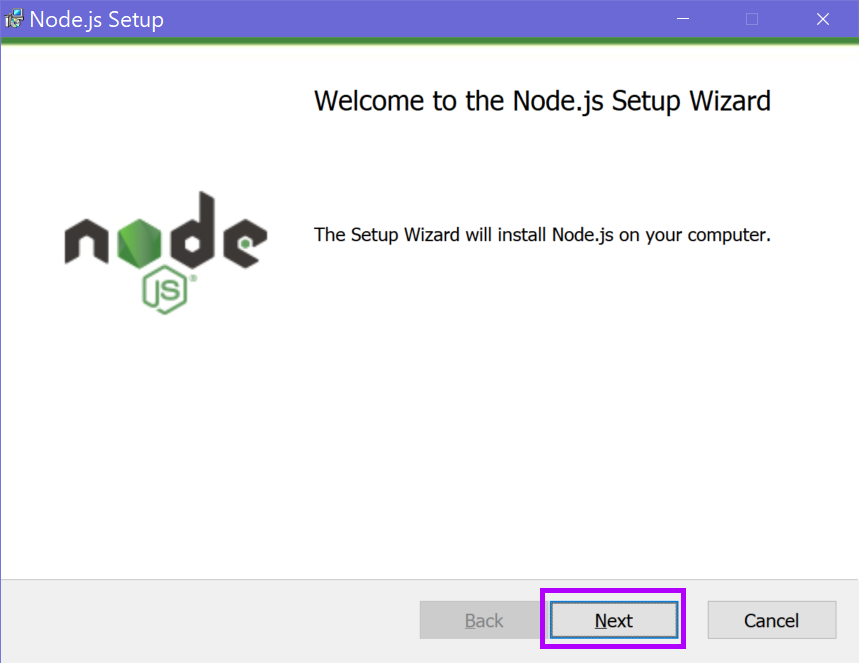
Welcome screen: click NEXT
Click NEXT on the Welcome screen
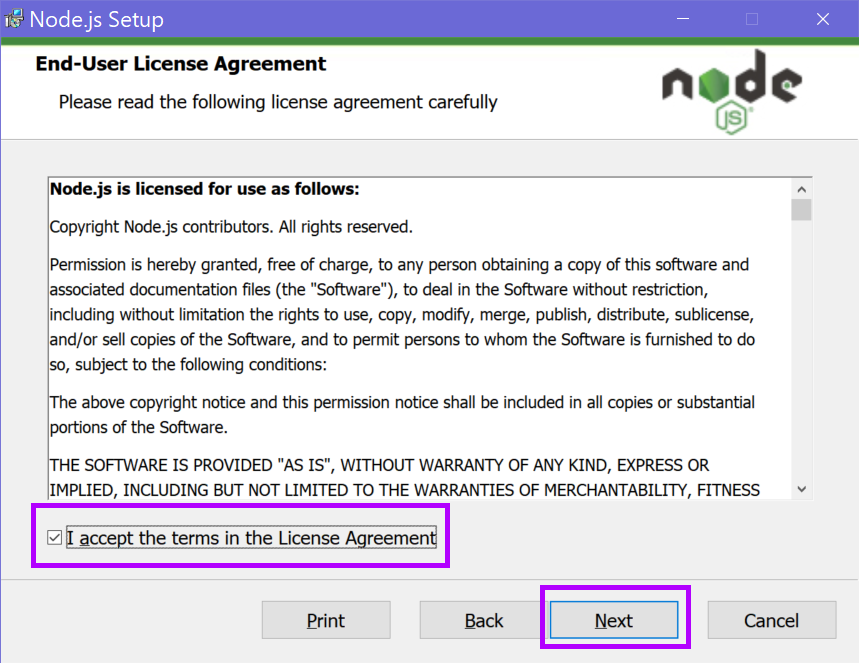
On the license screen, check the "I accept..." checkbox
and click NEXT. Accept the agreement and click NEXT
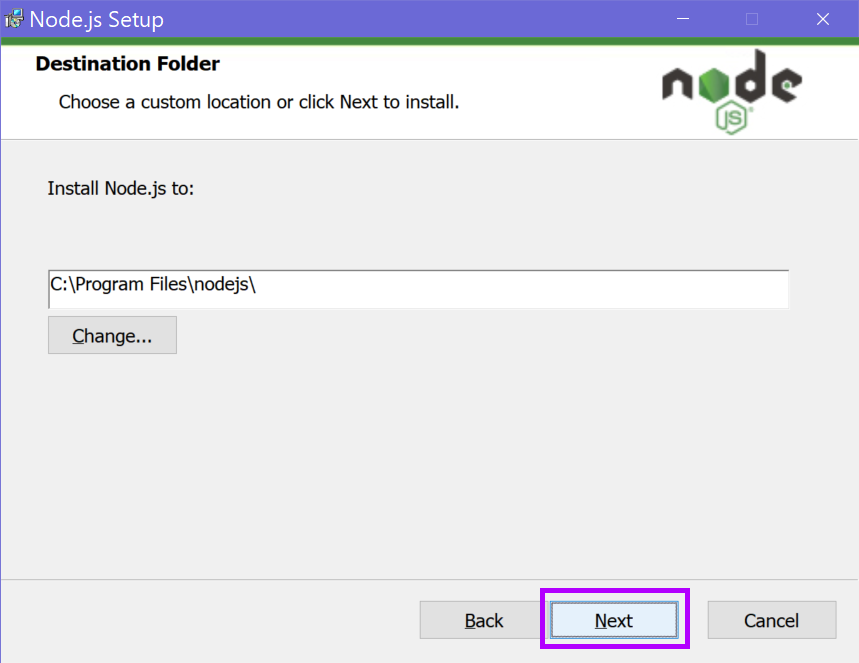
The next screen asks you to choose a destination folder for
the installation. Accept the default unless there's some specific
reason why you can't. Make note of the destination folder
location in case you need to find it later.
TIP: if you forget and need to know, type which node
in your computer's command prompt window.
Accept the default destination folder and click NEXT
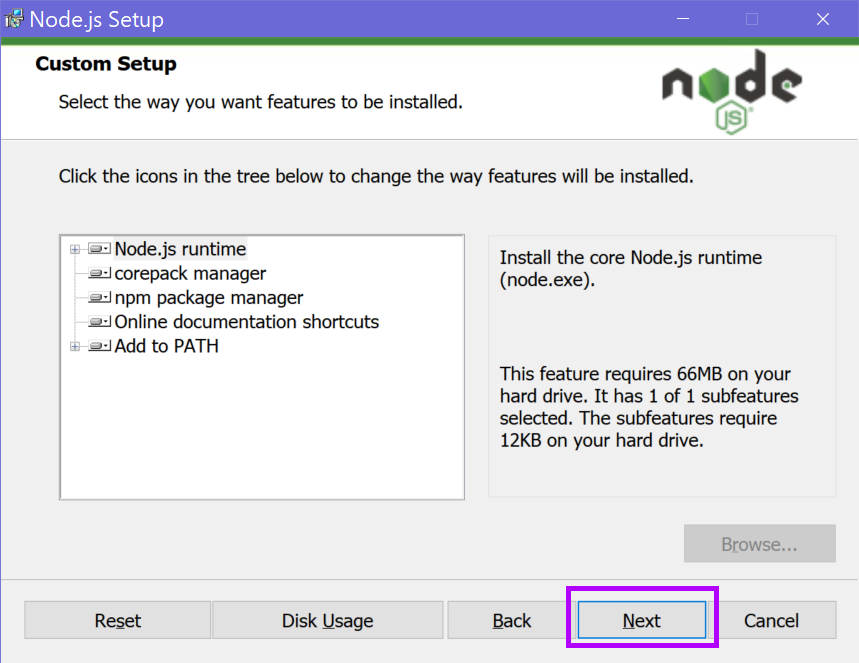
The custom setup screen can be left alone, just click NEXT
Accept the defaults and click NEXT
The Tools for Native Modules screen has a checkbox to
"Automatically install the necessary tools...". Make sure
this is CHECKED, and then click NEXT.
CHECK the checkbox and click NEXT
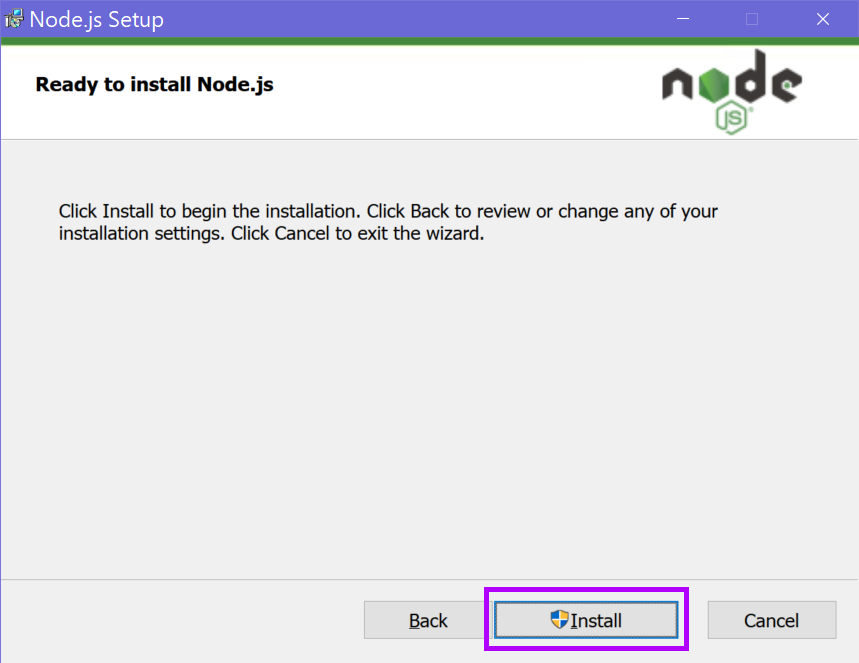
The next screen indicates that you are ready to proceed
with the installation. Click the INSTALL button.
Click INSTALL to proceed
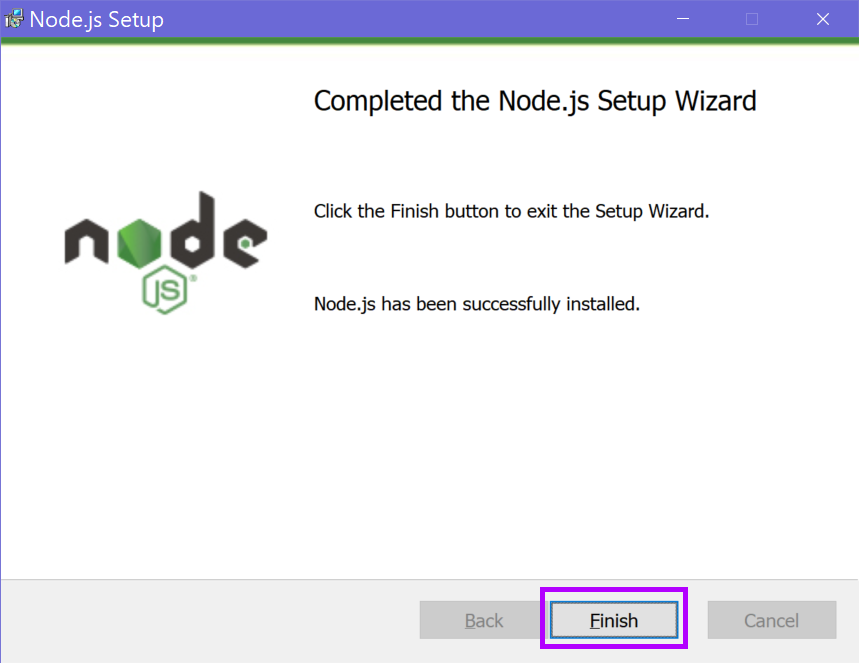
After the installation has completed, you should see
the finishing screen: click FINISH.
Click FINISH on the last screen
Now a command prompt window will open automatically
telling you that it is about to execute a script that installs
some extra tools needed to build Node.js programs.
Don't do anything yet: read the rest of these
instructions, first!!
To start installing the script
(don't do it yet!),
make sure your command prompt
window has the focus and press any key inside the
window to continue (the ENTER key doesn't seem to do
anything so choose any OTHER key - I just use the
space bar). You'll have to do this twice (I'll show
screen shots below).
The script will take some time, and you might see lots of text and
messages appear in your command prompt window.
Before starting the rest of the installation, you will
need to close all running programs that you don't need.
This will include your browser, editors, any communications
programs like Teams/Zoom/etc, anything running in the
background such as Steam, OneNote, etc. Close everything
you don't need. The more programs that are running in the
background, the slower your installation will be.
If you have any issues while the script is running,
reboot your computer and then
try running the script again by going to your Start Menu >
Node.js > Install Additional Tools for Node.js.
Once the script has finished
executing, you will need to Reboot Your Computer.
After your computer has finished rebooting,
return to this page, for the next instruction.
Now that you've read the rest of these instructions,
close all open programs, including your browser.
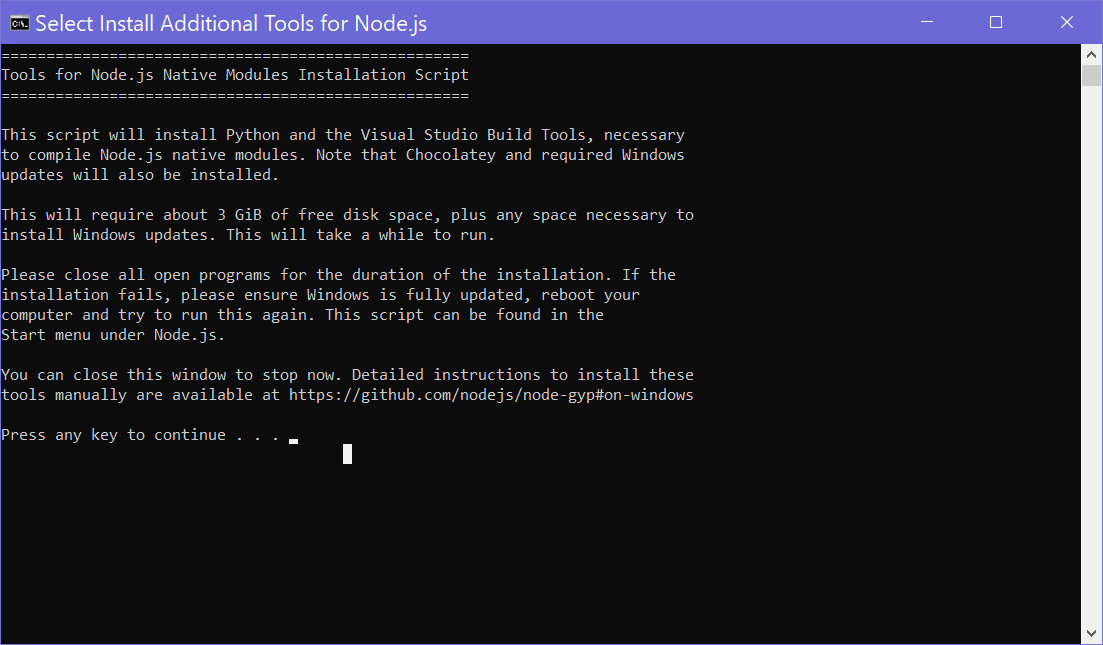
These are the two screens you will see before the
PowerShell scripts start executing:
This window says that it's going to install some tools you need for Node.js
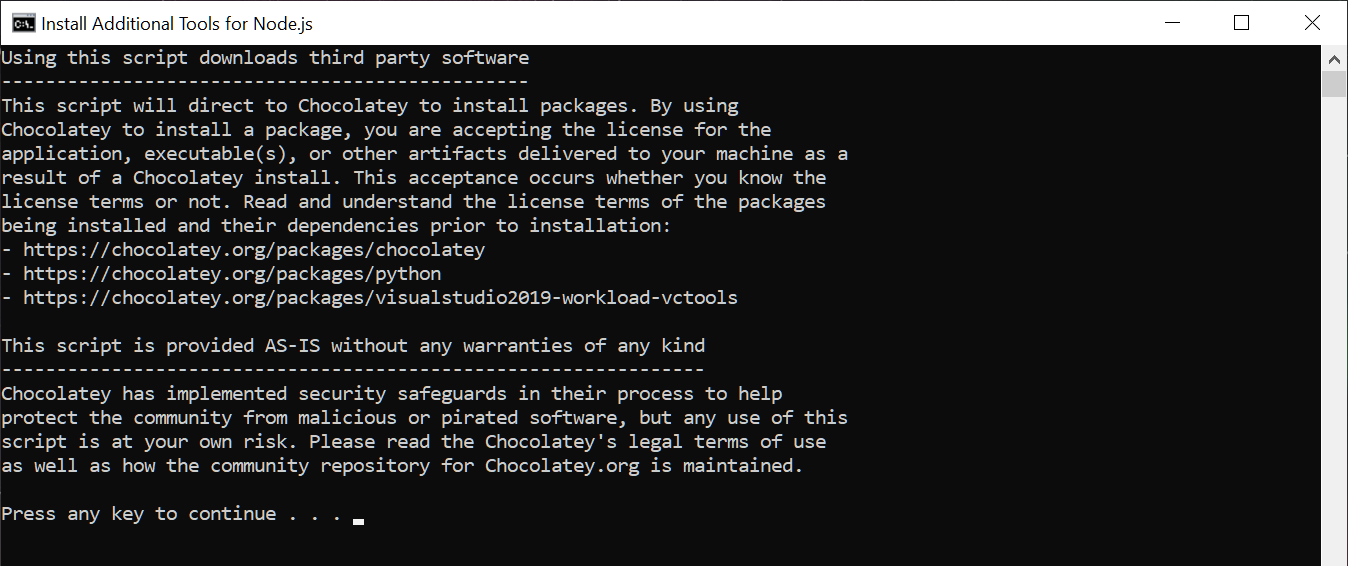
This window lets you know that it has to install Chocolately
before it can install the other tools
Test Your Installation
After you reboot your computer,
test your installation:
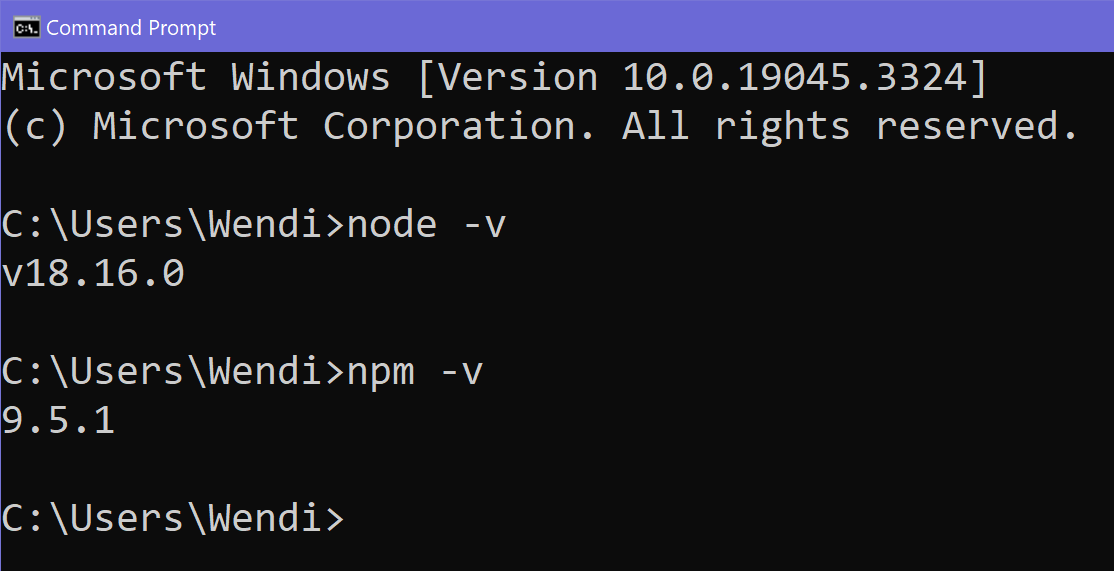
Open a Command Prompt window (e.g. search for Command Prompt
in the start menu).
A the prompt, type node -v and then press
the ENTER key. You should see the current Node.js version
appear on the screen.
If there were any problems, go back and check the installation
instructions and make sure you did everything correctly.
Also, check the Node.js installation directory and see
if there are files in it. If you have any issues that you
can't solve, ask your professor, and be sure to provide
details (error messages, screen shots, etc).
Now type npm -v and press the ENTER key.
You should see the current version of the Node Package Manager.
My current Node.js version when I took this screen
shot was 18.16.0, yours is probably newer
If there were any problems, go back and check the installation
instructions and make sure you did everything correctly.
Also, check the Node.js installation directory and see
if there are files in it. If you have any issues that you
can't solve, ask your professor, and be sure to provide
details (error messages, screen shots, etc).
Writing and Running a Test Application
Let's create a test application that we can
run. I'm using VS Code, which comes with a terminal we
can use to run Node.js programs. If your editor
doesn't have a terminal, you can simply use your
operating system's Command Prompt application.
Open up your editor and create a project directory
for this test project e.g. /testapp.
Add a new JavaScript file called app.js
and add the following code:
// app.js
"use strict";

// Load HTTP module
const http = require("http");

const hostname = "127.0.0.1";
const port = 3000;

// Create HTTP server
const server = http.createServer(function (req, res) {
  // Set the response HTTP header with HTTP status and Content type
  res.writeHead(200, {
    "Content-Type": "text/plain"
  });

  // Send the response body "Hello World"
  res.end("Hello World\n");
});

// Prints a log once the server starts listening
server.listen(port, hostname, function () {
  console.log(`Server running at http://${hostname}:${port}/`);
});
Save your app.js file and then open a Terminal
window (in VS Code, File > View > Terminal, or press and hold CTRL
and then press the ` (backtick) key).
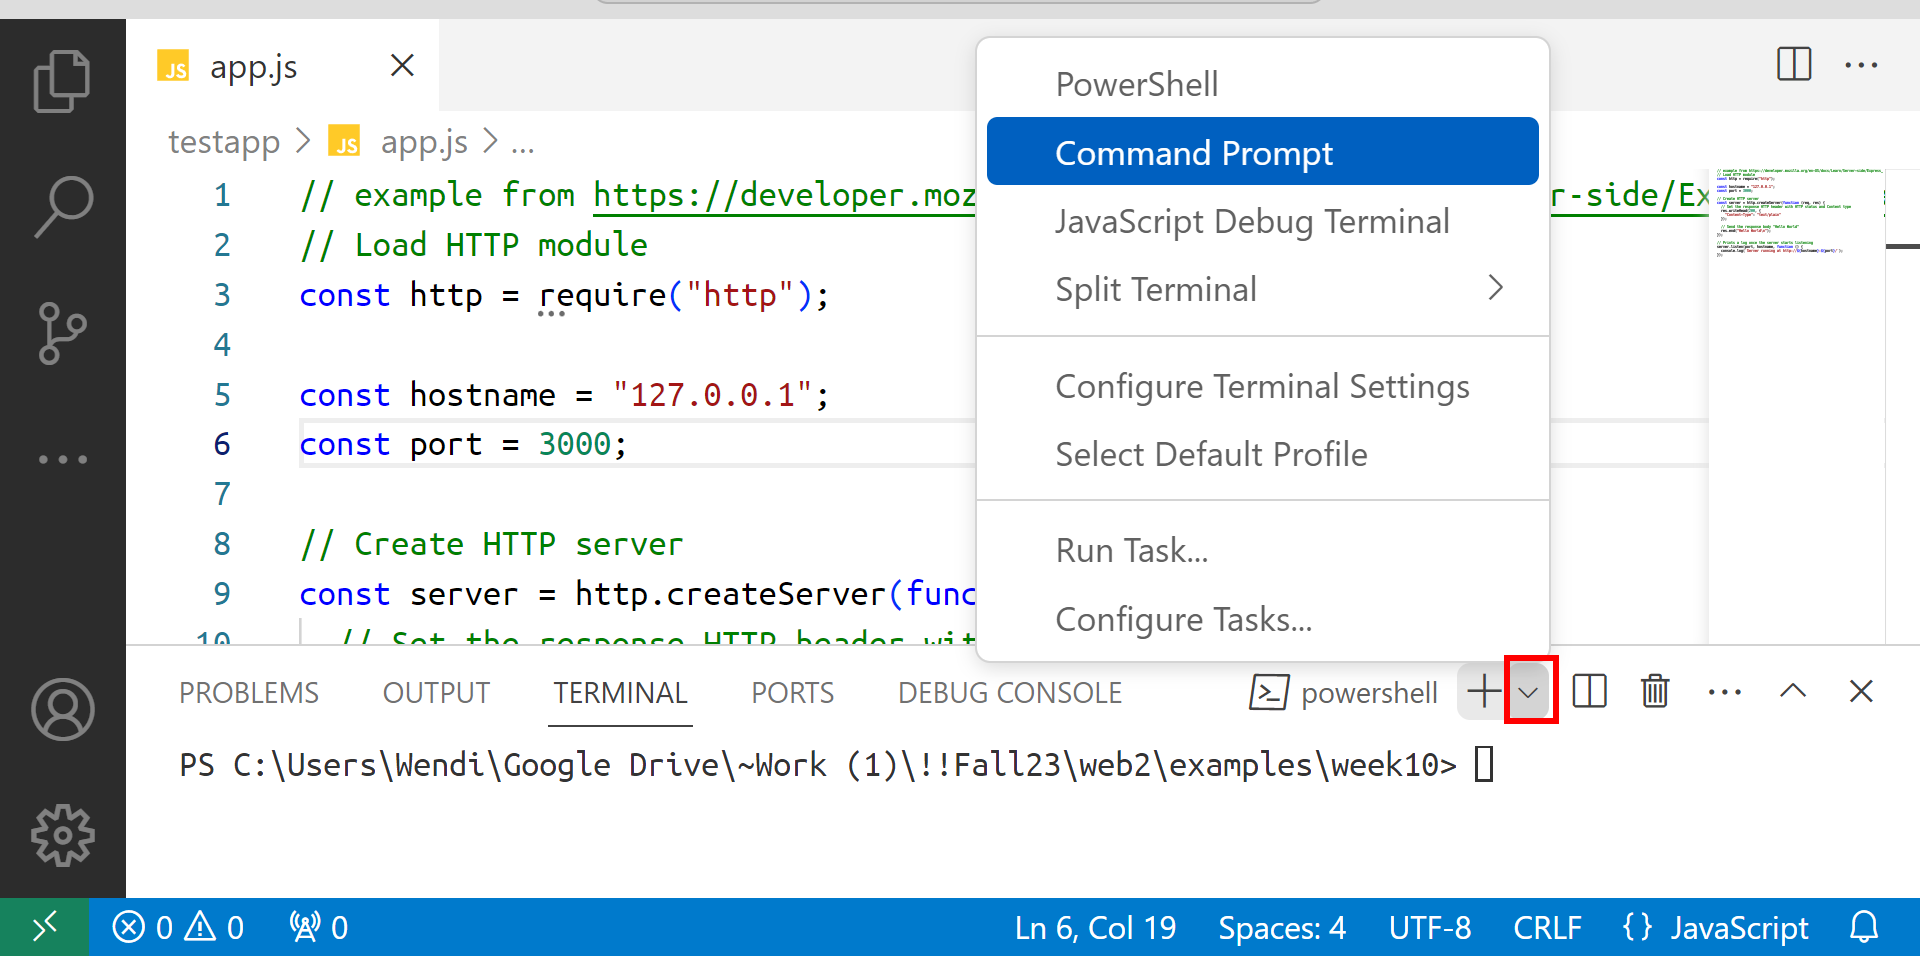
In VS Code, mine defaults to PowerShell, but we want the
Command Prompt: press the v-shaped icon button to the
right of the word "PowerShell" and then select "Command Prompt".
Open the VS Code Terminal
If you want, you can delete the PowerShell terminal window
by pressing the Delete (trash can) button on the far right,
beside the "powershell" item. Do this AFTER you have opened
a Command Prompt terminal window.
Open the VS Code Terminal
Make sure the prompt in your Command Prompt terminal window
shows the current location of the project you're working
on. If not, you can use the cd command to
change directories.
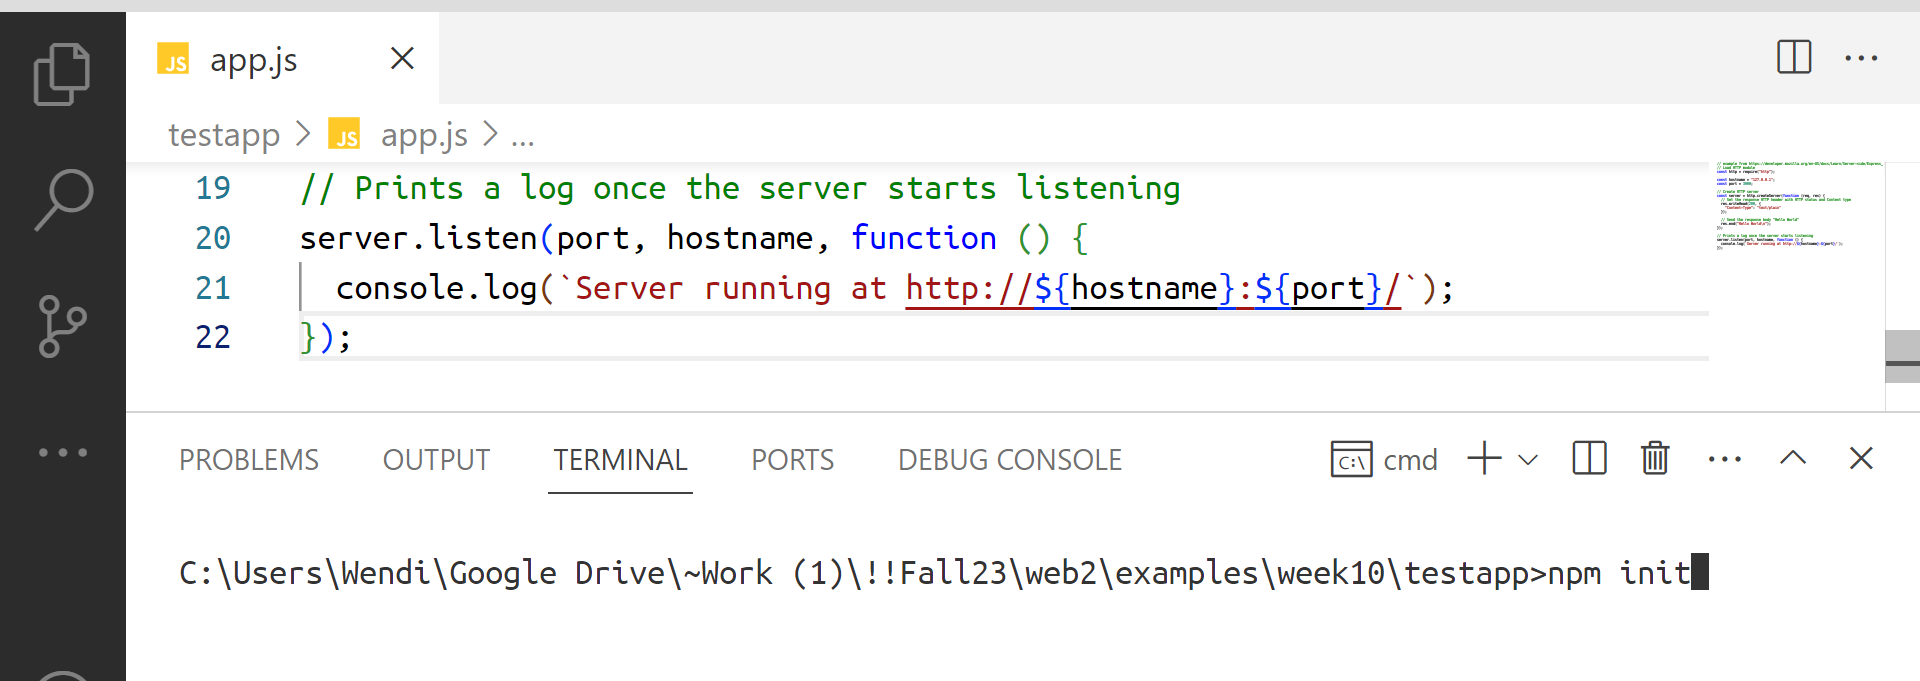
We will now use the npm init command to
initialize your application. Make sure you're in the same
directory as your app.js file.
At the prompt, type npm init
and then press the ENTER key.
Type "npm init" in your terminal window
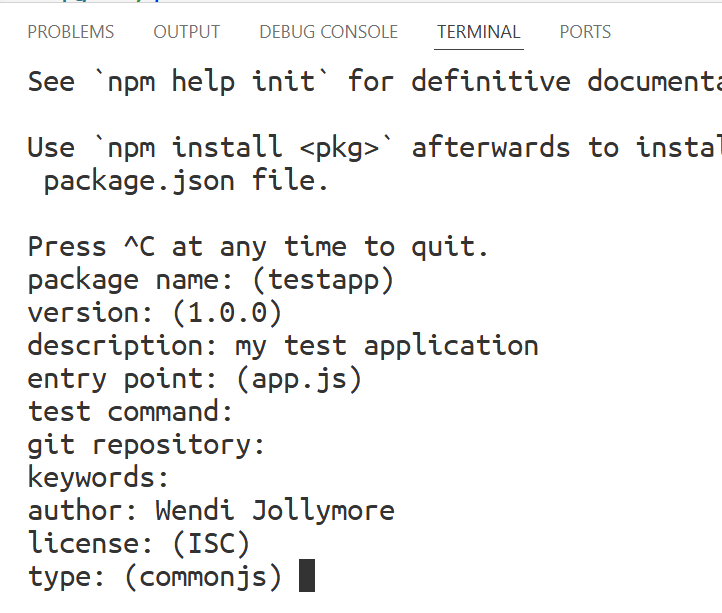
Running npm init initializes your app and sets
it up by asking you
several questions about your application. For any question,
you can press ENTER to accept default, which is displayed
with the question in parentheses.
Here's are some suggested answers for this test application:
Package name: the default is fine, change the name if you want Version: the default is fine Description:my first node.js program
(or whatever you want, or just accept the default) then press ENTER Entry point: this should default whatever you named
your JavaScript file (e.g. "app.js"); if it's something different,
make sure that it's the name of the javascript file Test Command: leave blank Git Repository: leave blank Keywords: can leave blank Author: your first and last name License: accept default type: accept default (CommonJS, which is the type of module system you want to use)
Answer the questions for your application
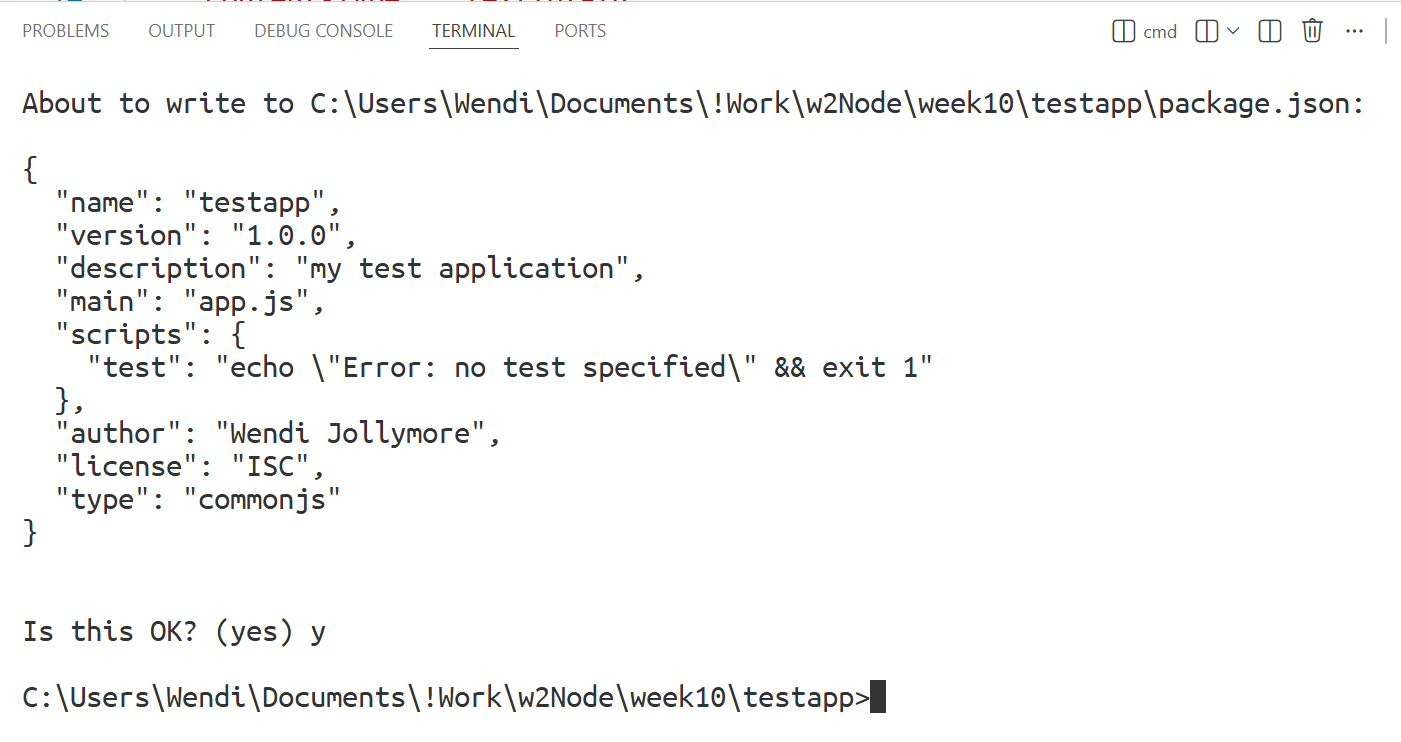
When you're done, it will show a JSON object on the screen
containing all the information you entered.
Instructions will appear in case you need to
go back and change anything (type n and then press ENTER
if you want to change anything: you'll have to restart by
typing npm init again), otherwise type y
and press ENTER to accept everything you entered.
Your answers are saved as a JSON object
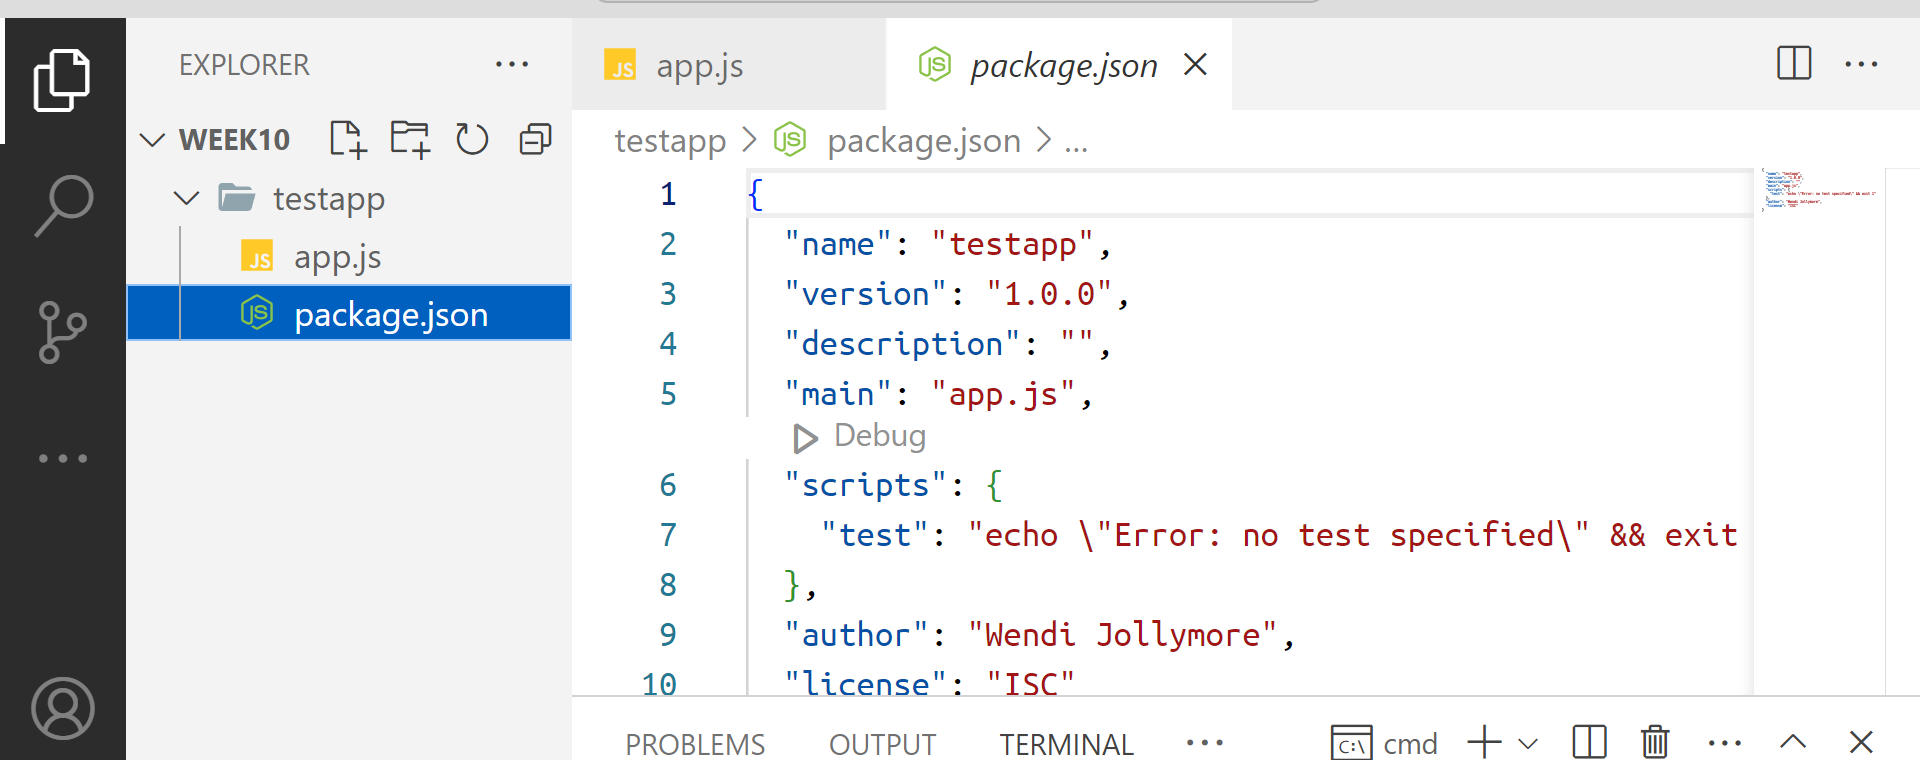
Now examine the contents of your project's directory: you'll
notice a new file called package.json.
If you open it, you'll see it contains the JSON data you saw
in the terminal after you finished initializing your application.
The package.json file: yours may not match mine exactly, and that's ok
The package.json file defines the properties of
the application and its project. This file always
lives in your project root directory. The
NPM tool needs this
file when you want to add packages to your project. You'll
learn about this in a later tutorial.
Now that your project is set up, you can run it locally by
typing: node app
Make sure "app" is the root name of your JavaScript file.
If you named your JavaScript file "main.js", then you'd
type node main. The file extension is not
necessary.
you should now see something similar to the following in
your terminal window:
Server running at http://127.0.0.1:3000/
Output after running the application in the terminal
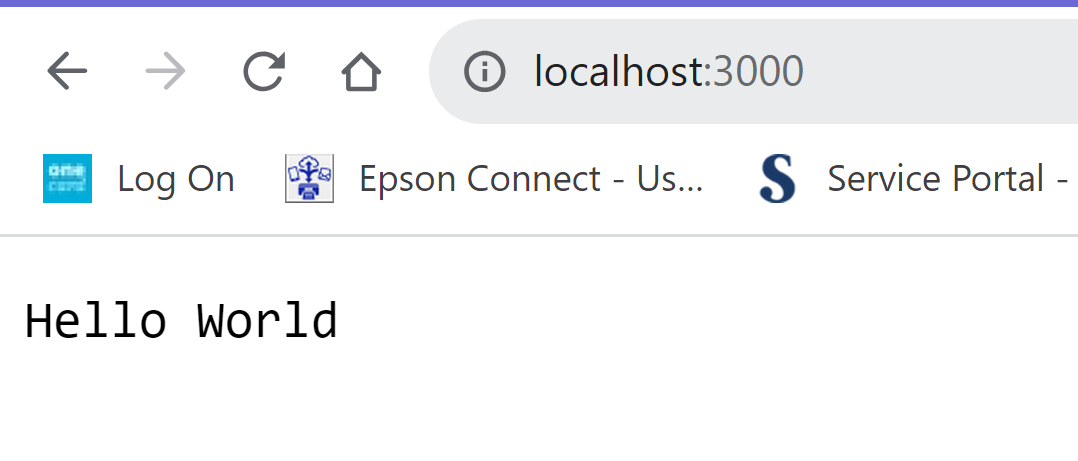
Now go to your browser, open a new tab/window, and type:
http://localhost:3000
You should see "Hello World" in your browser!
Browser output after running the application
If you reached this point without any problems, your application
is working and Node.js has been installed correctly.
You can now stop your application by pressing Ctrl-C
in your terminal window.
Running an App Using Nodemon
As you code Node.js programs, you will likely find it
annoying to repeatedly stop and restart the app after
making changes to your code. If you want, you can install the Nodemon
dependency: it will automatically save and restart your
app when you make changes.
You can install Nodemon locally (for a single application) or
globally (for all applications you write on the system).
Global Installation
Go into your directory where your projects are.
Type: npm install nodemon -g
When you want to run a program, type nodemon app.js.
Local Installation
Go into the project's root directory and type: npm install nodemon --save-dev
this installs it as a development-only dependency for
this particular project
Edit the package.json file for the project
Find the "scripts" item and modify it by adding the
"start" key with the value nodemon app.js: