In this lesson you'll learn how to set up
an application on a server that uses cPanel.
Pre-Requisites
Before doing this lesson, you need access to a server
that runs cPanel, an account on your server, and your
account's credentials. You'll also need an FTP
client (such as
FileZilla
Client) for easily uploading
files to the server (you could use the cPanel file
manager, if you don't mind its clunkiness).
Lastly, you should have a Node.js application you
can test out. I'm going to be using the test application
from the Testing your Node.js
Installation from my installation instructions.
You should have already initialized your app using
npm init and have already run and tested
it (and debugged any problems) on your local machine.
Setting Up your Application on cPanel
I'll be using FileZilla to upload my files to my
account on a cPanel server.
In order to be able to run applications on the
server, they need to be registered. This tells the
server what files the application needs in order
to run, along with several other things that are
beyond the scope of this tutorial.
Upload your App Files
First, you must upload your application files.
Note the following important points:
You should ONLY upload your source code files
and directories (html, css, javascript, etc) and
the package.json file. Do not upload
anything else.
For your first few applications in these
tutorials, you probably won't have much else,
so that's not too important.
Later, you might have projects with packages
and dependencies: in this case, your project
on your machine will also have files that are
part of those packages and their information
e.g. package-lock.json and the
/node_modules directory. DO NOT
upload these files.
Node.js apps DO NOT go in the /public_html
directory!
Anything inside /public_html is public!
You don't want your Node.js application code
to be public!
Node.js application code often contains information
about directories, server names, ports, data files,
etc. It should never be public.
Instead, you'll put your application files inside
a different directory in your main root directory
(e.g. it will be a sibling to the /public_html
directory).
Connect to your cPanel server space using your FTP
client or use the cPanel file manager.
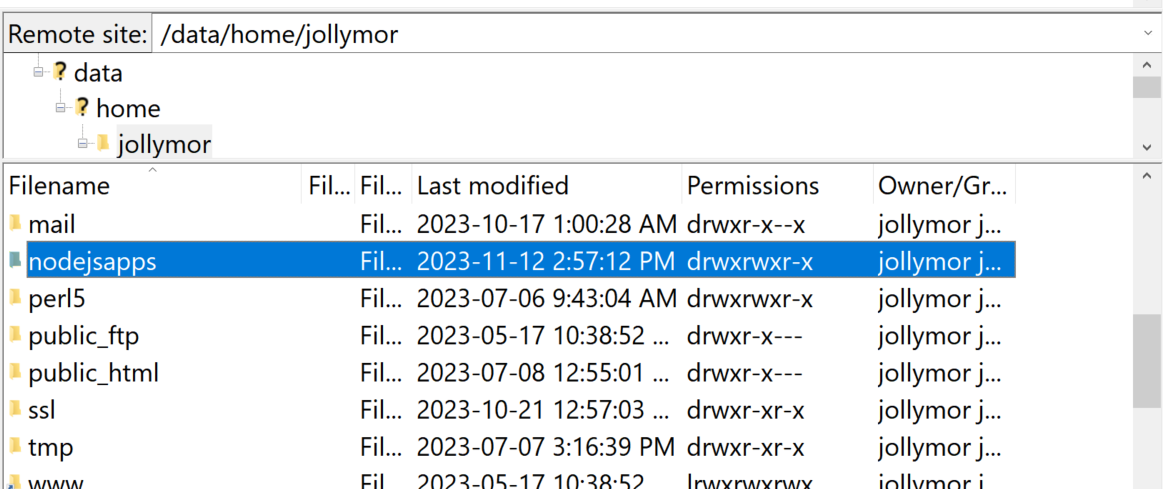
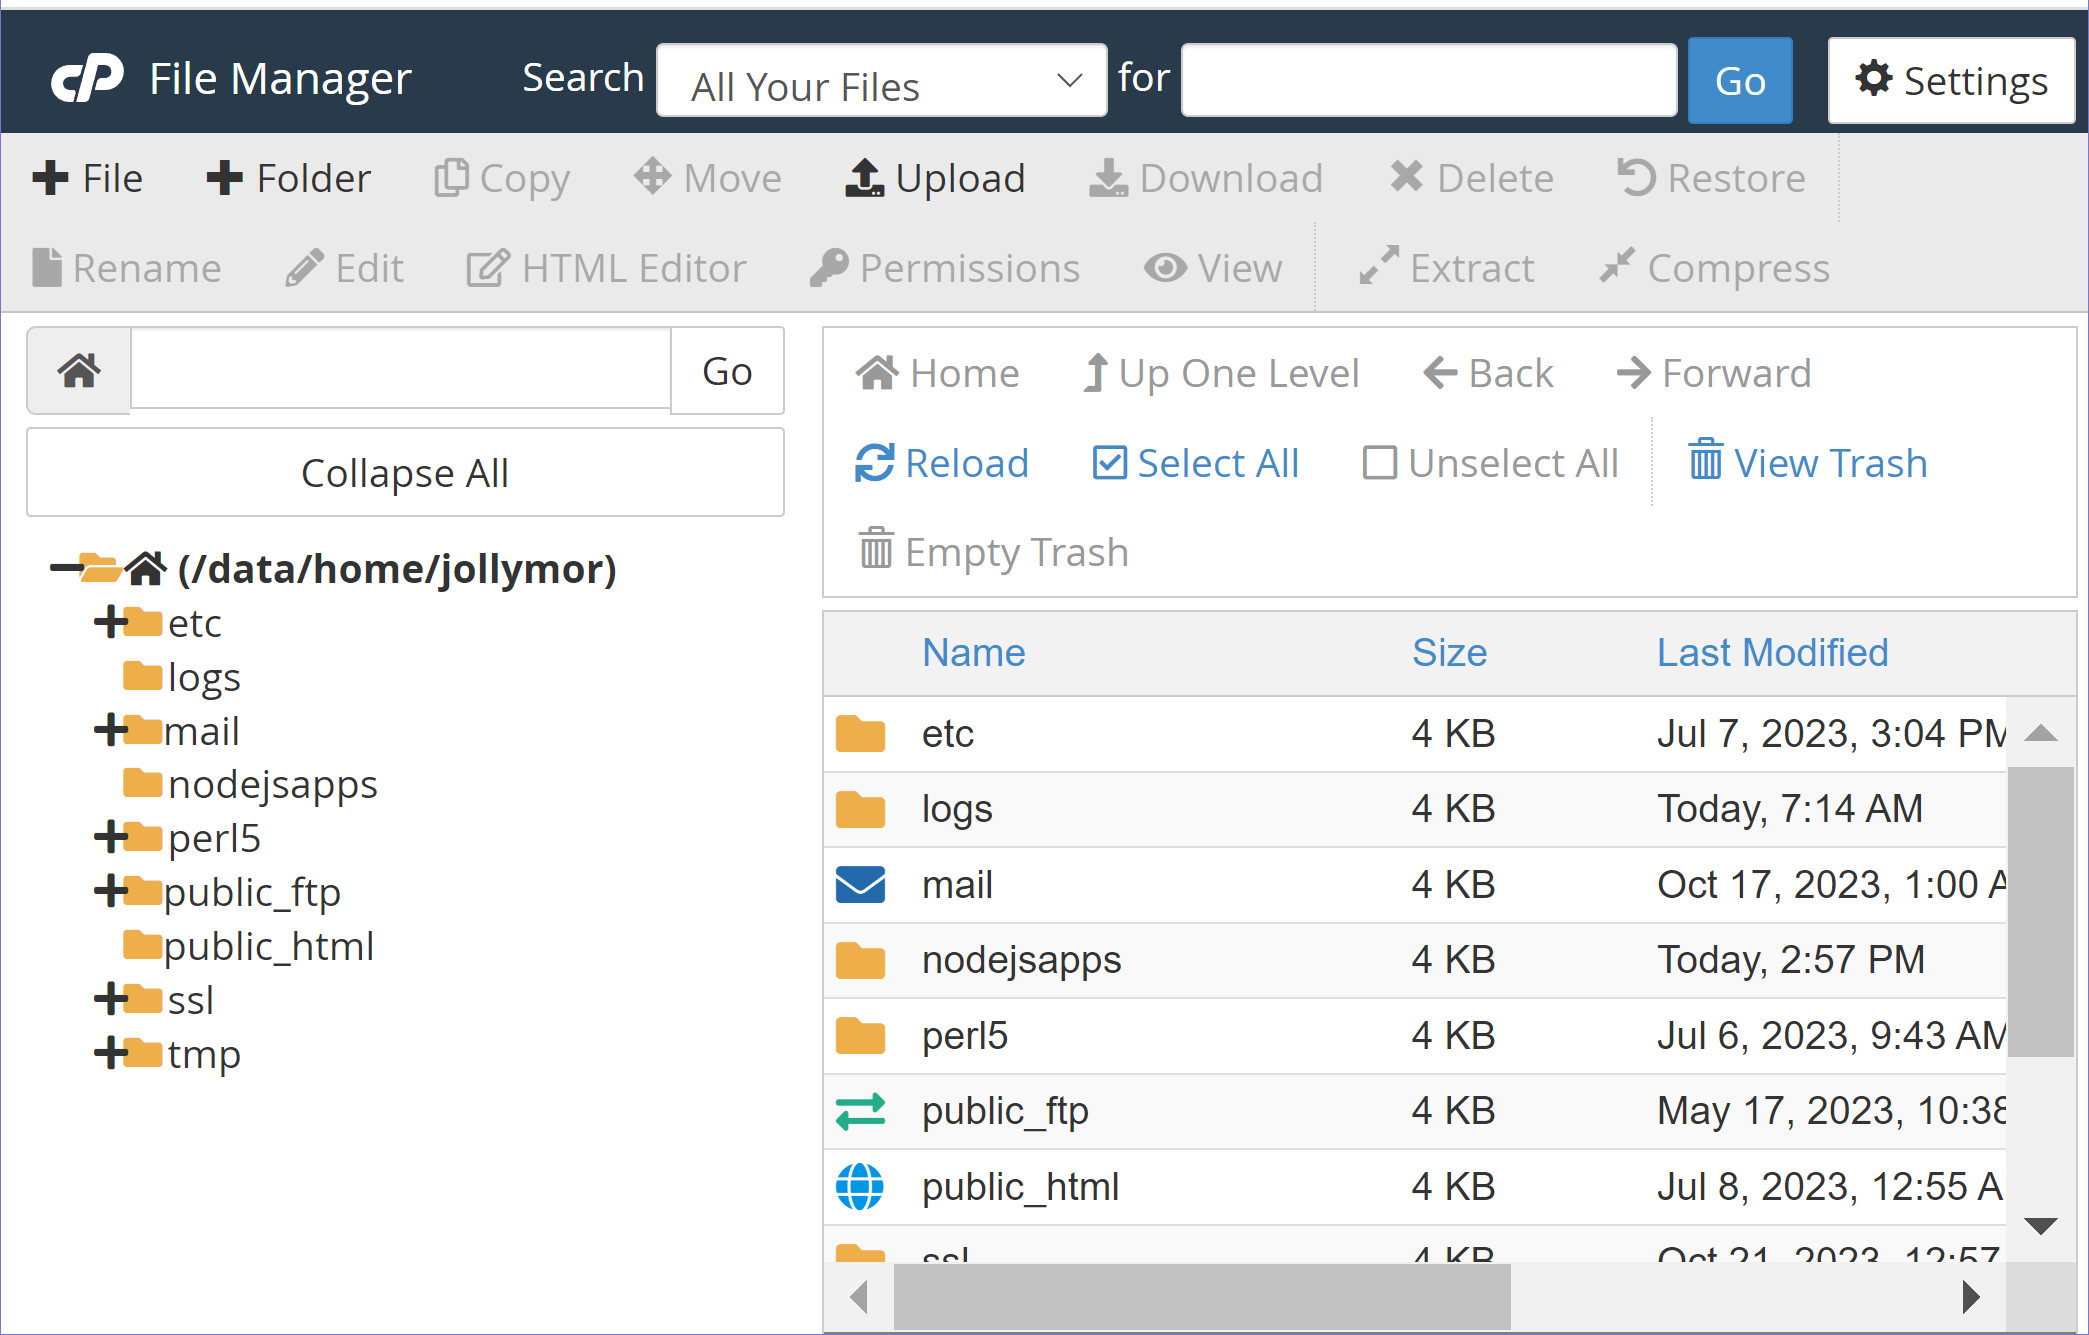
Create a sub-directory inside your web space
root called /nodejsapps
This is the directory I will use in these
tutorials, but feel free to use something
different.
Make sure this directory is NOT inside /public_html,
it should be in the same directory as the /public_html
directory.
The /nodejsapps directory in FileZilla The /nodejsapps directory in the cPanel File Manager
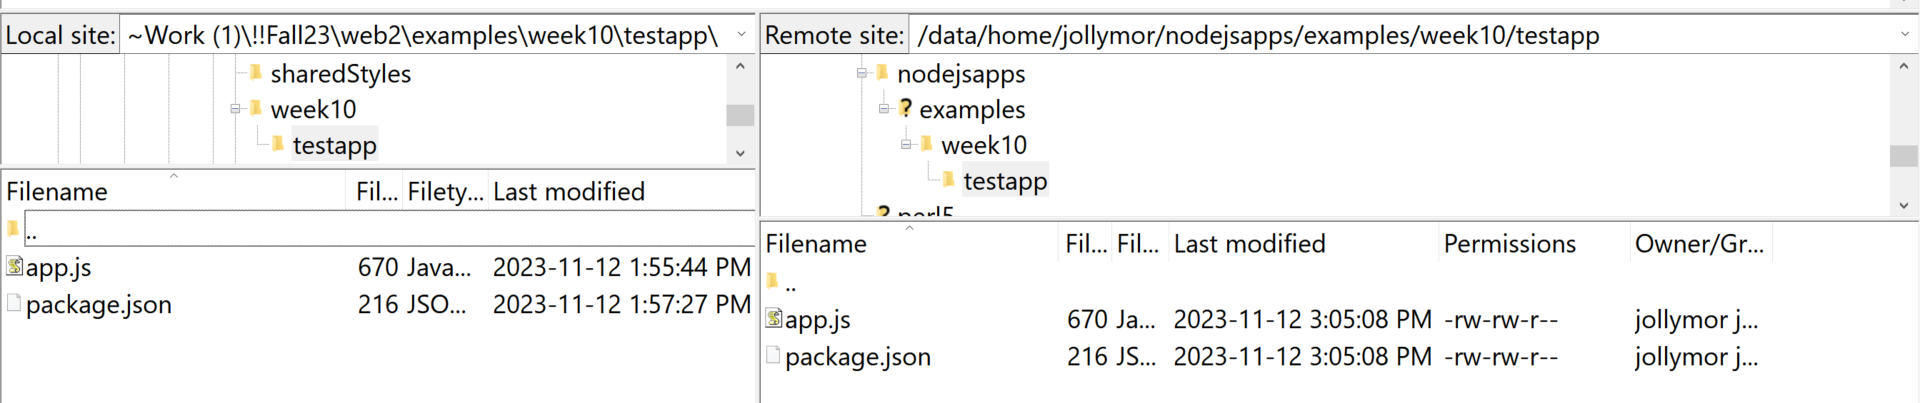
Inside /nodejsapps, add the directory/directories for your
project. For example, I am going to add /examples/week10/testapp
inside /nodejsapps for my Test Application that I'm creating
for my lesson in Week 10 of my web programming course.
Upload only the source code files and the package.json
file into the project directory. For my Test Application,
I only have an app.js file and a package.json file, so that's
everything.
I uploaded my Test Application to the server
Now you're ready to register the application.
Register the Application
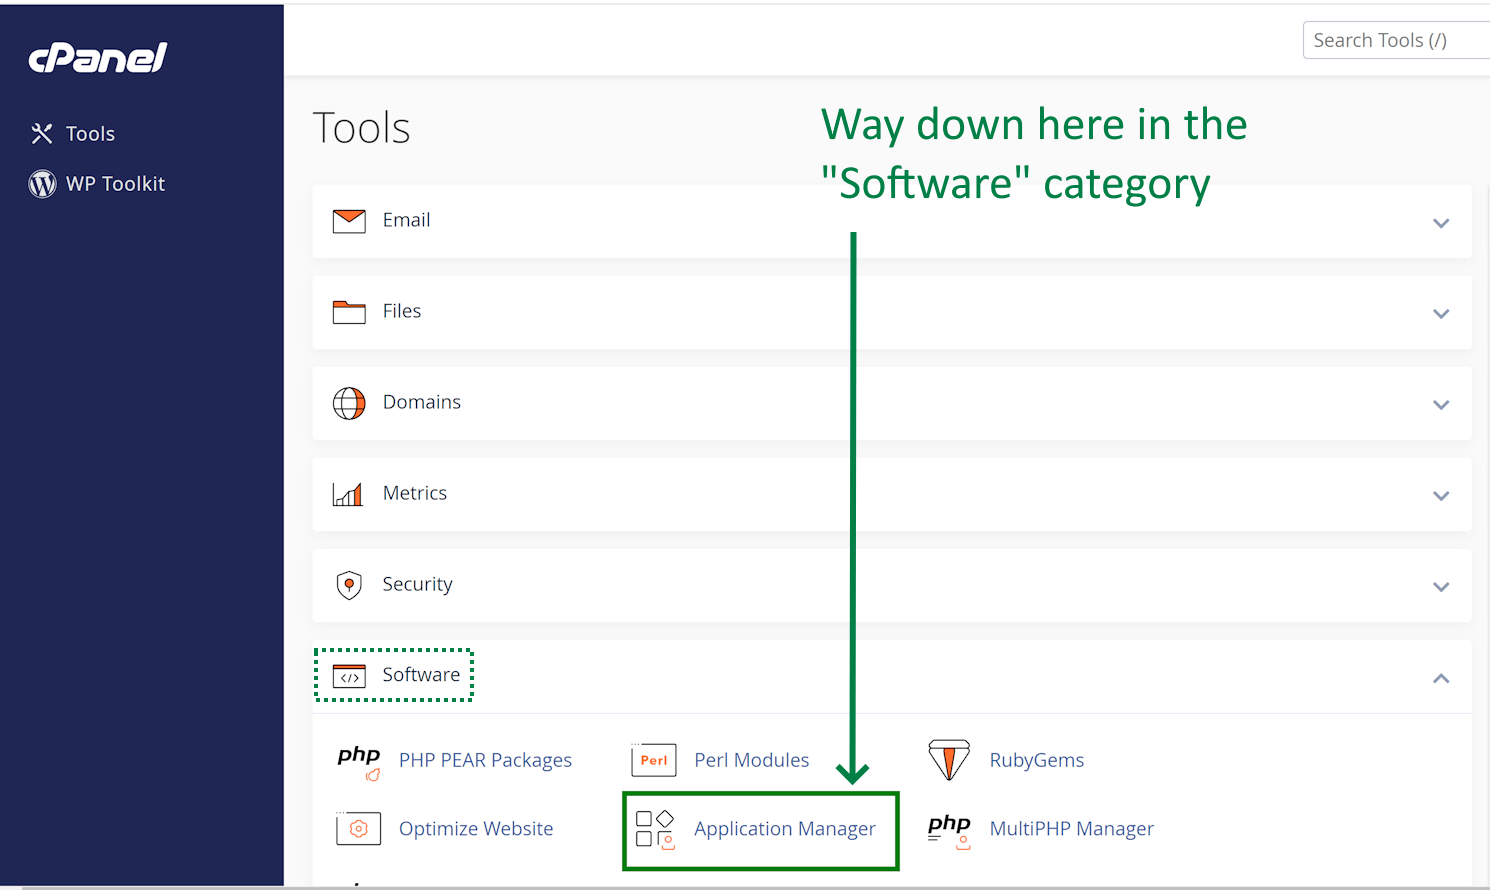
Log into your cPanel web space so that you can
see the list of tools available to you.
In the Software category, click on Application Manager
Open the Application Manager
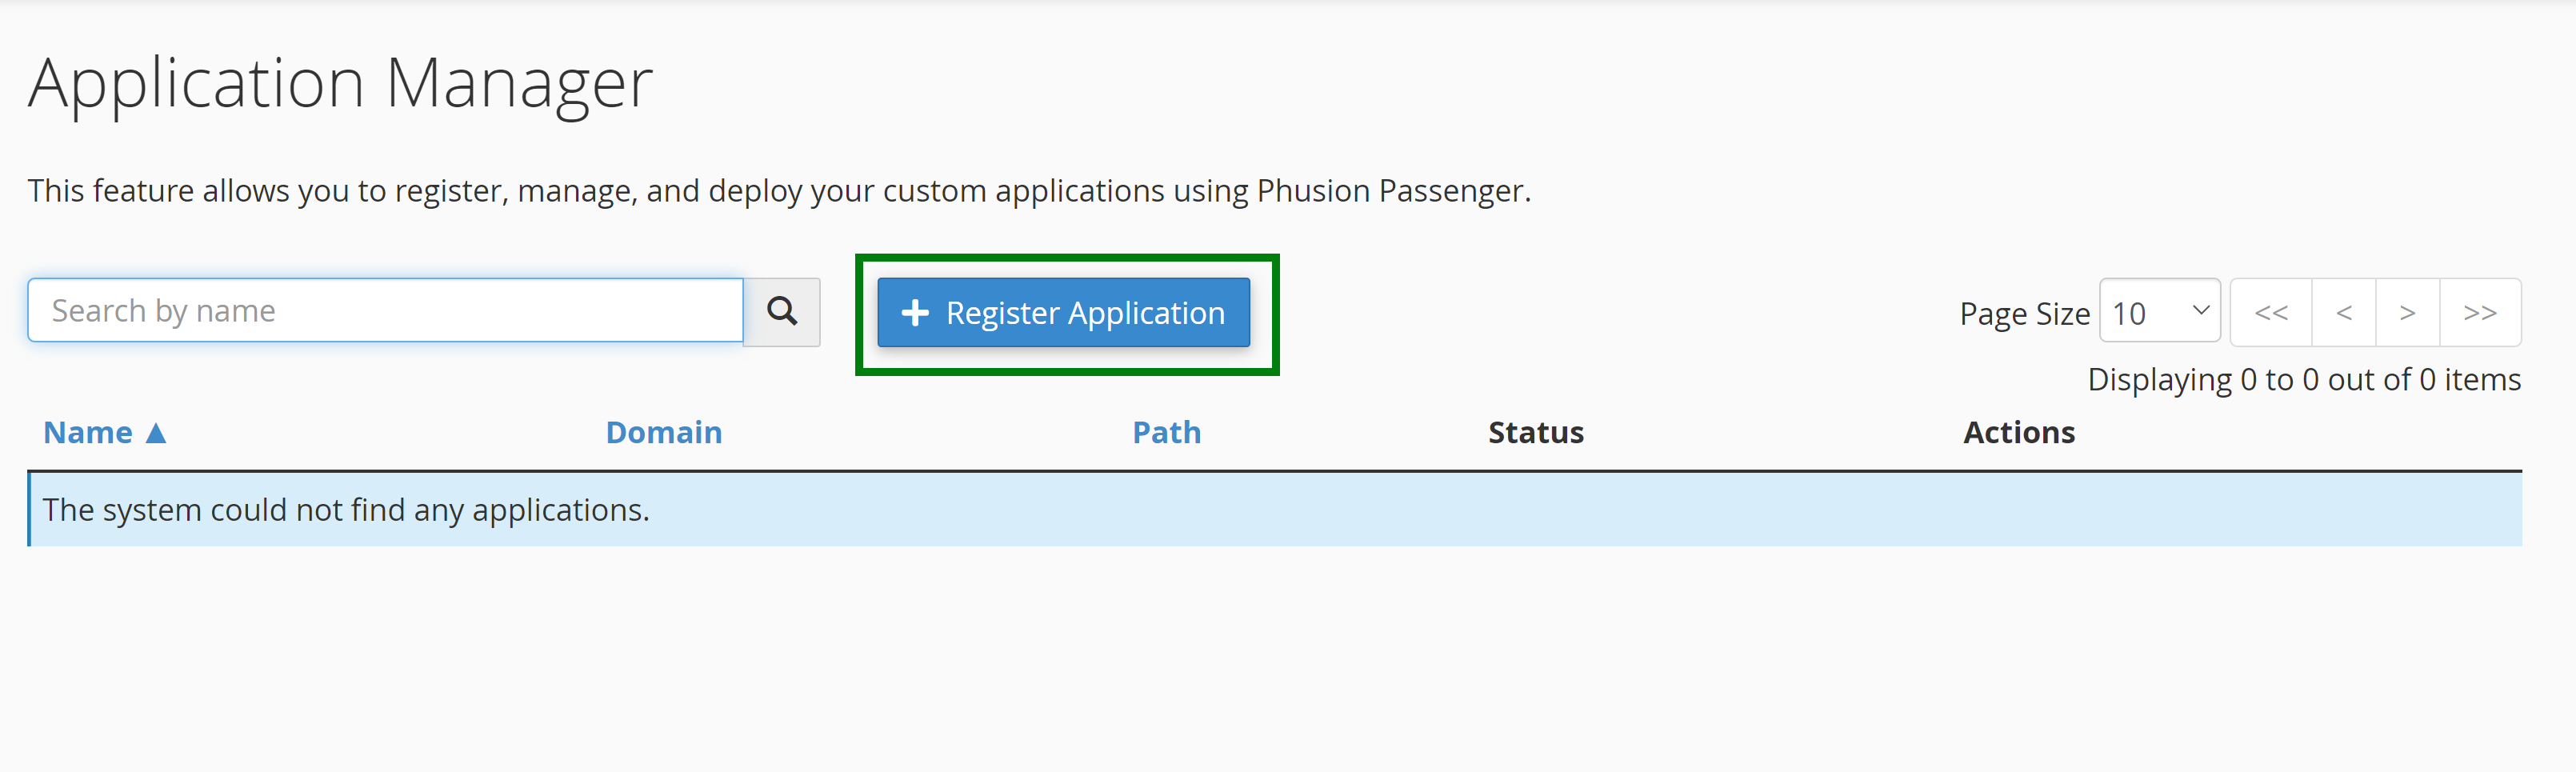
On the Application Manager screen, click on the
Register Application button.
Click on the Register Application button
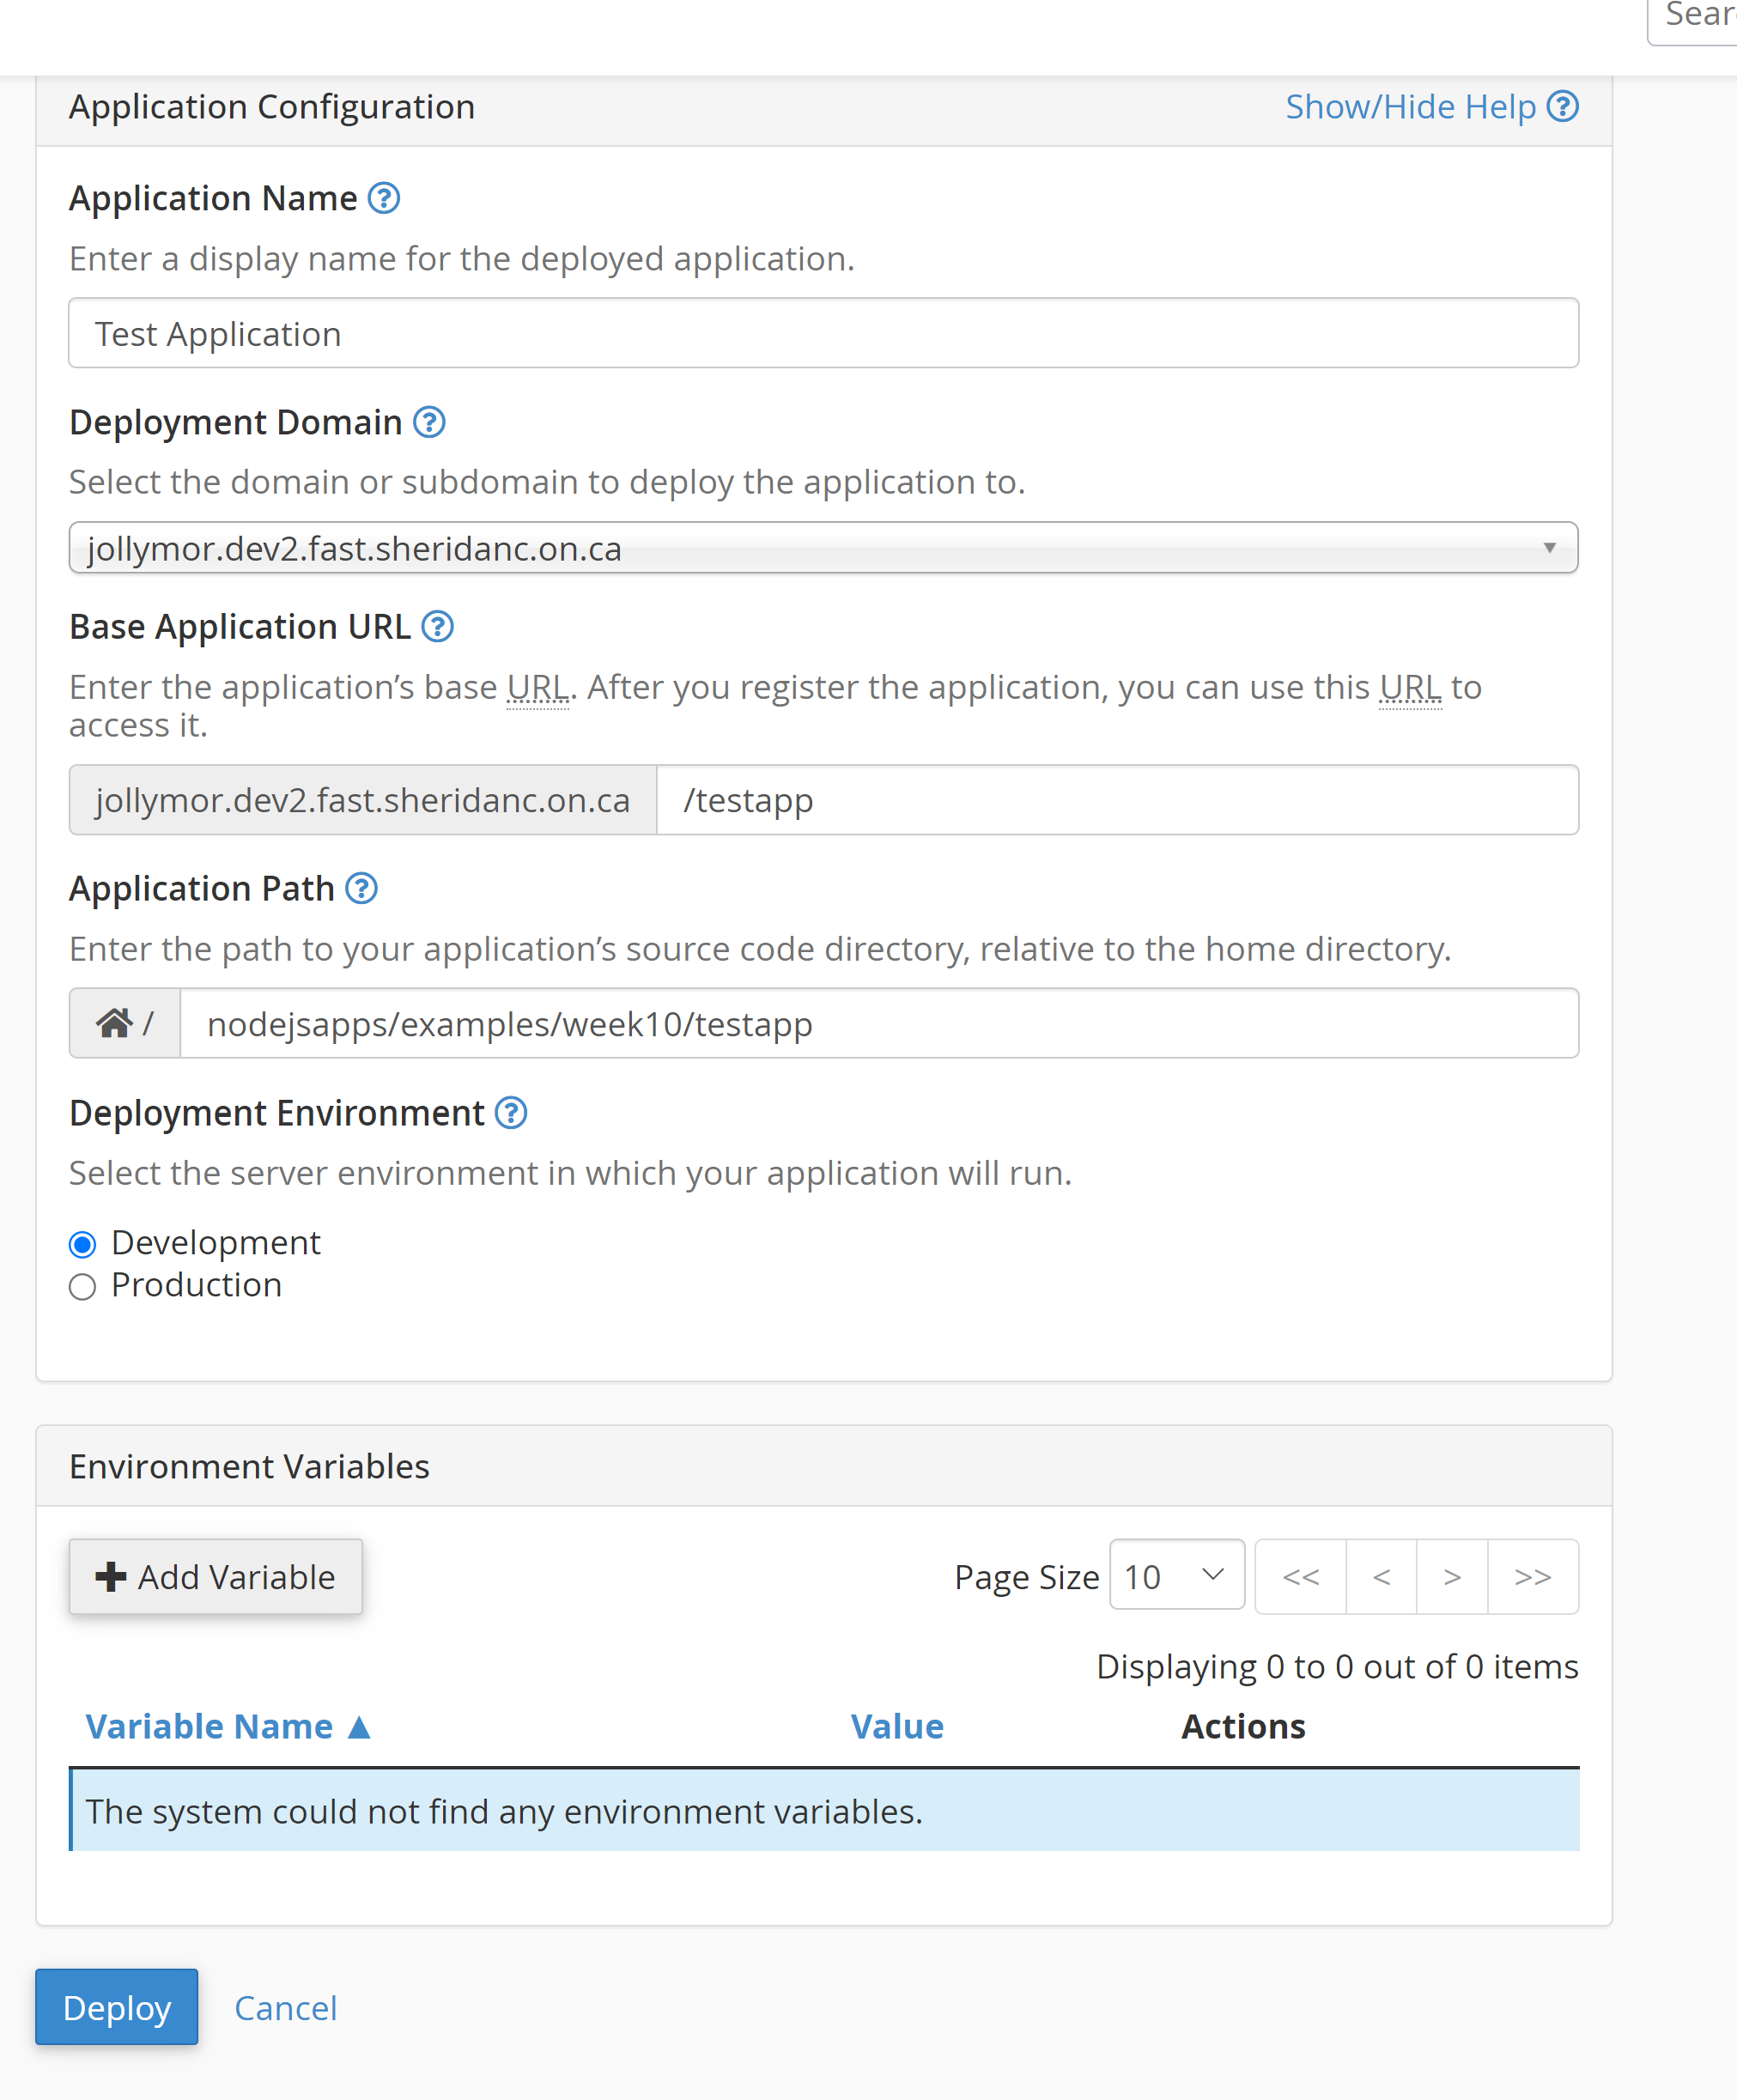
Fill in the fields for your application. These values will
depend on the name and location of your application files on
the server.
Application Name: This is just the name of
the application as it will appear in your list of
applications. You should enter something that makes
sense in order to easily recognize your application
when end up having a long list of them.
Deployment Domain: select or enter the name
of your domain for your cPanel web space. Yours might
be a drop-down list like mine is, in which case you should
select the domain name assigned to you.
Base Application URL: this is the path you want
your app to have: it will go after the domain name you
entered in the previous field. This doesn't have to have anything
to do with the physical location of your app, and it really
shouldn't, anyway. For example, if your domain is www.foo.com,
and you want your cheese application to be accessed at www.foo.com/cheese/main,
then you would type "/cheese/main" in this field.
Application Path: this is the actual physical
location of your application's main startup file (e.g.
where app.js is located), in relation to the
root of your web space. So it will start with /nodejsapps
if you've been following the same naming conventions I've
been using.
Deployment Environment: while you are testing
and debugging an application, this should be set to
"Development". When your program is ready to go to
production (everything has been tested and debugged and the app
is ready to be deployed and used by actual users),
set it to "Production". In these tutorials, we'll always use
"Development".
Here's a screen shot of what I entered for my Test
Application, which is phyiscally stored in
/nodejsapps/examples/week10/testapp on the server that
I have access to:
My Test Application on the server
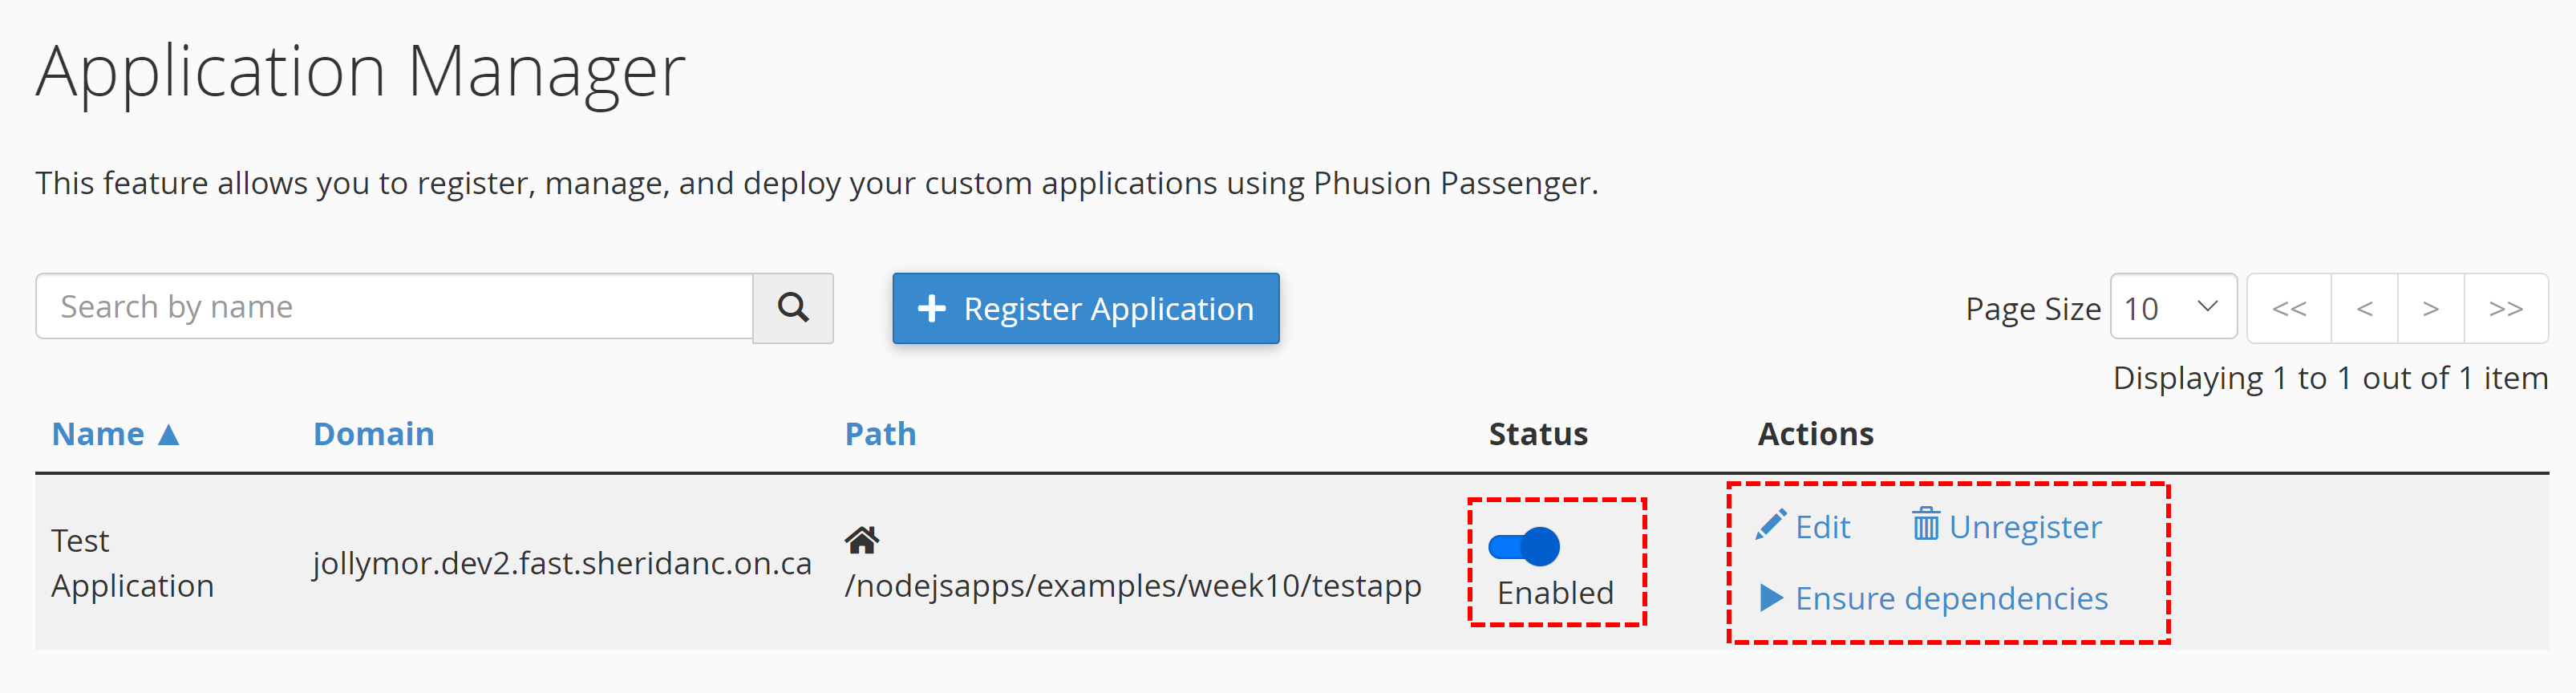
When you're done filling in the details, click on the
DEPLOY button.
Your application appears in the list of registered apps
If you ever need to go back and change any of your application's
settings, just find the app in the Application Manager screen and
click the "Edit" link for that application.
To unregister an application (e.g. to delete it), disable it
and then click the Unregister button.
If you edit an application's source code and then have to
reupload the source files, disable the app by toggling the
Status of the application to "Disabled". Then upload your
files. After your files have uploaded, toggle the Status
back to "Enabled". Toggling the status will stop and
then restart your application, so it will take some time
between disabling and enabling: your app may not work
immediately after re-enabling, it might take a minute or two.
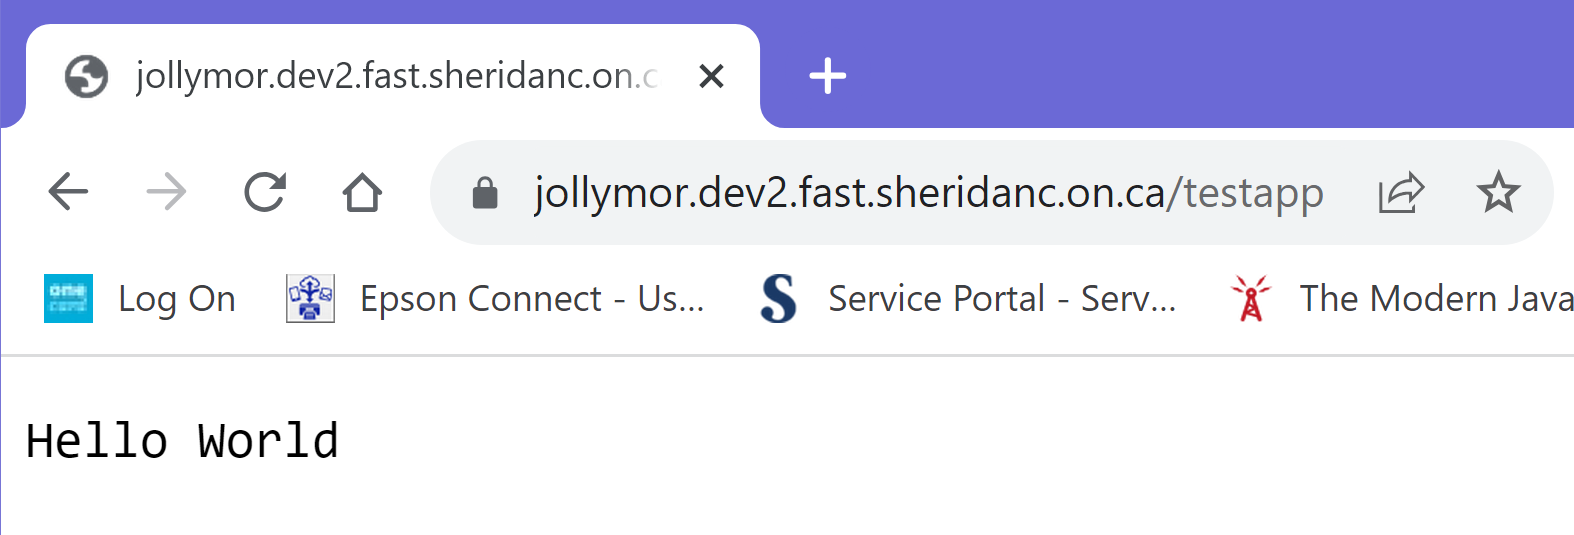
Test your Application
Using your browser, enter your domain name for your cPanel
web space followed by the Base Application URL you
entered when you registered your application. For example,
in my Test Application above I'd enter my domain followed by
/testapp.
Running my Test Application
Apps with Third-Party Packages
If your app is using packages that are not part of
vanilla Node.js (e.g. Express.js or other packages from
somewhere), there's an extra step to registering your application.
But first, it's important to note that you should not
upload any extra files: upload ONLY your application's
source files and directories, and the package.json
file. DO NOT upload package-lock.json or /node_modules
or anything else that is not one of your own source
files/directories.
In the example below, I'm registering an application
that uses a package called "chinese-year". This is a third-party
package that you can find at
NPM: Chinese Year.
After you have uploaded your source files and the package.json
file, register your application as you normally would.
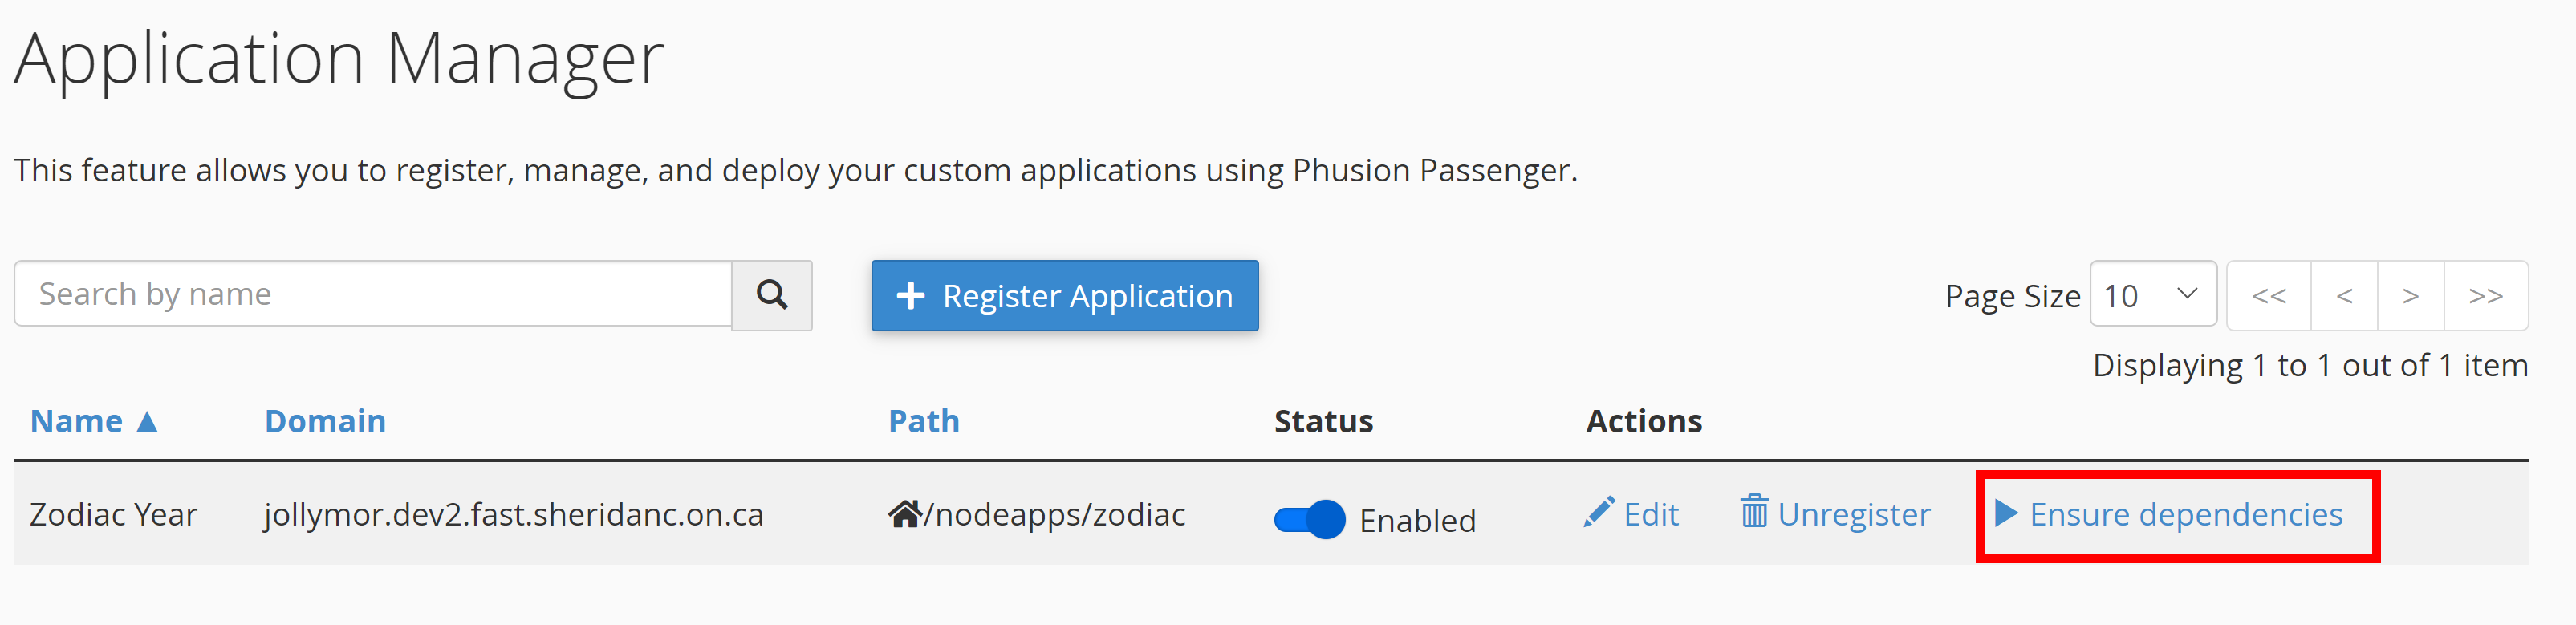
After registering your app, you'll see an extra item
in the listing for your app, "Ensure Dependencies".
Click the Ensure Dependencies link for your app
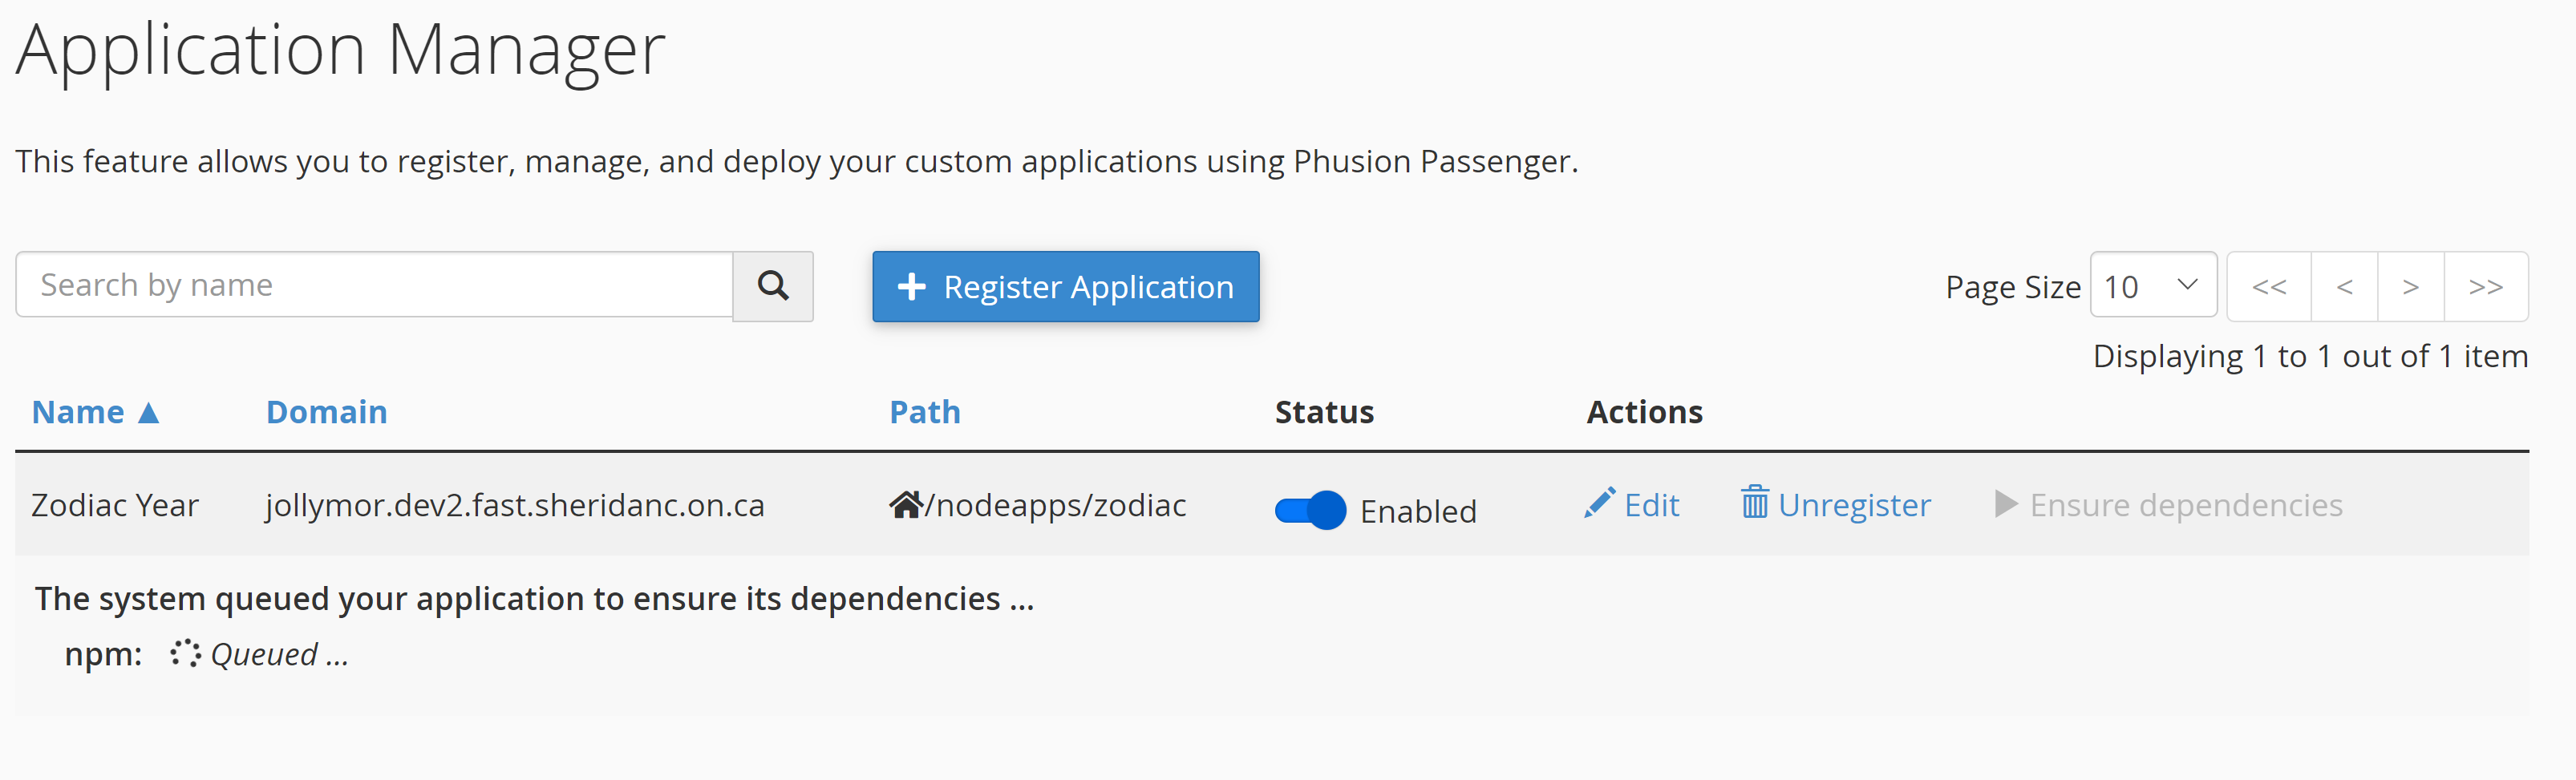
You'll see that cPanel is busy downloading and setting up the
files for any packages your project depends on.
cPanel is downloading the dependencies for your app
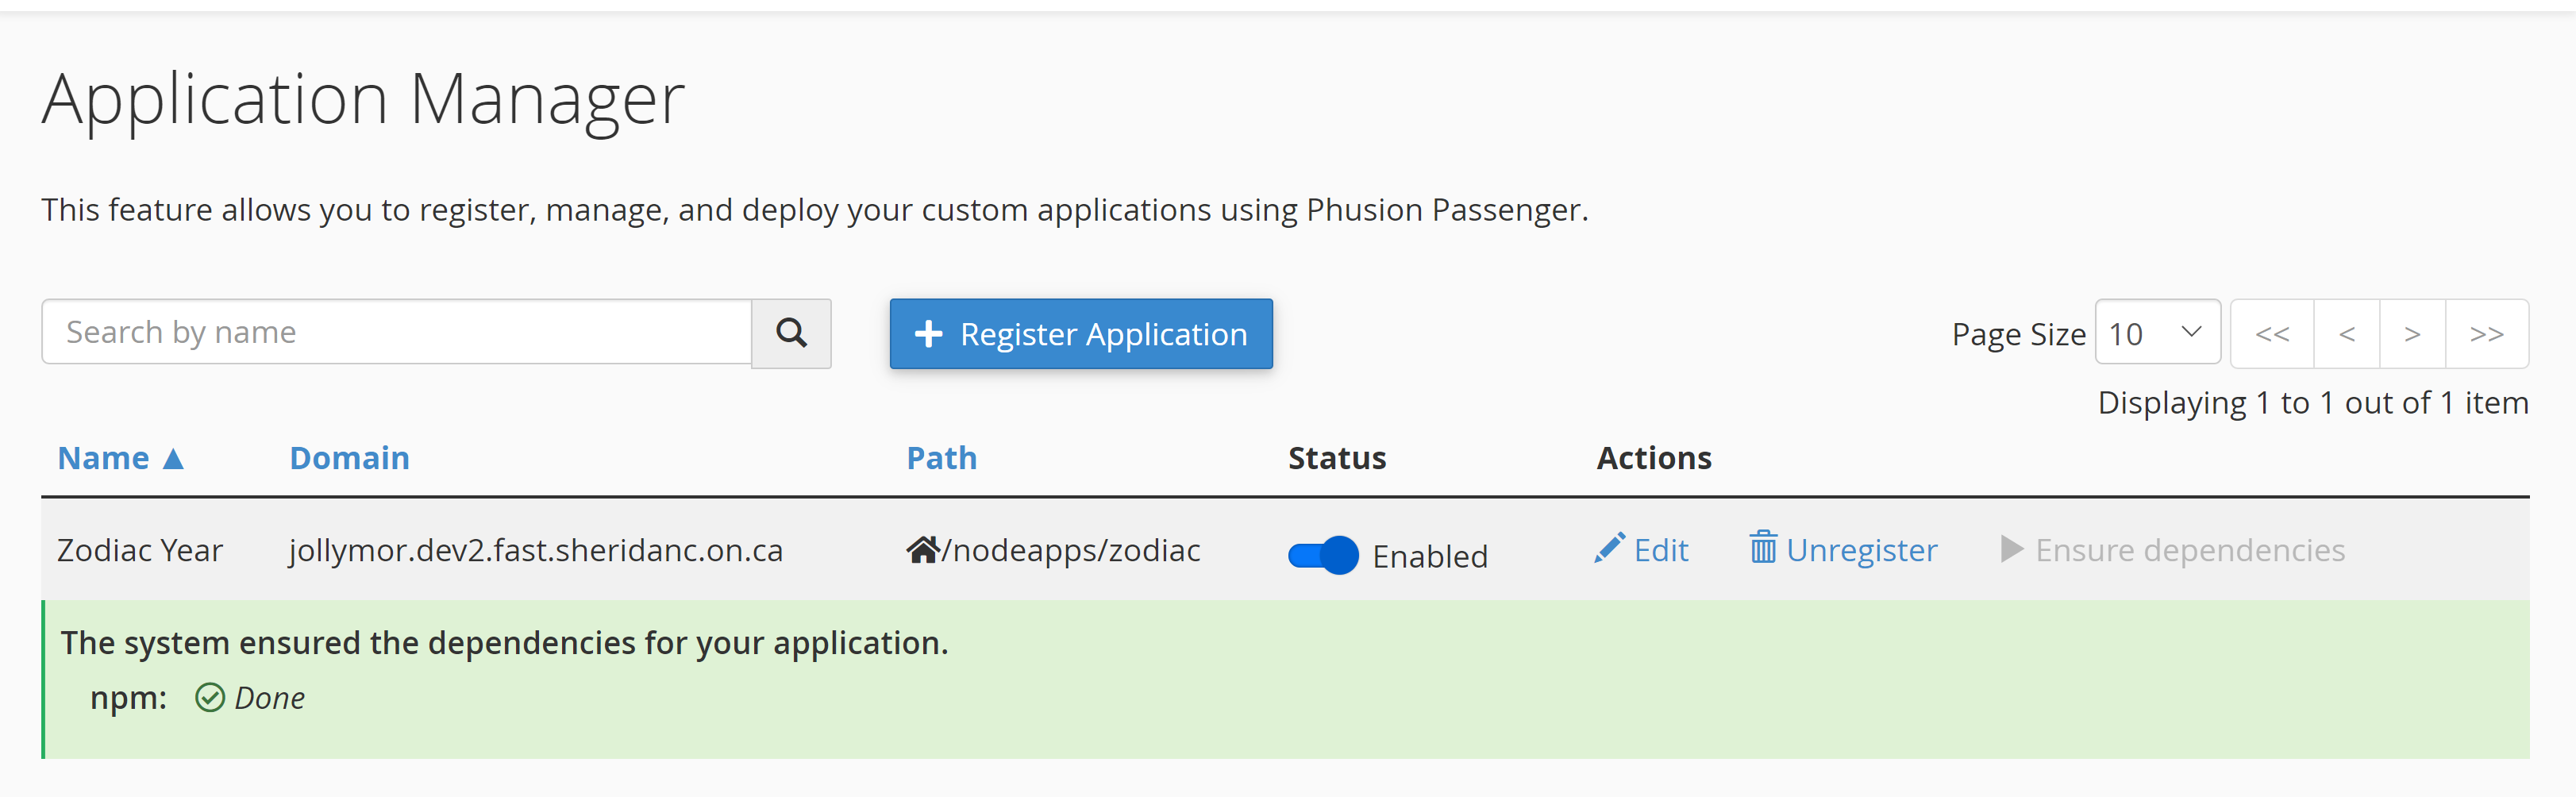
When it's finished, your application is ready.
If there were no problems, the app is ready
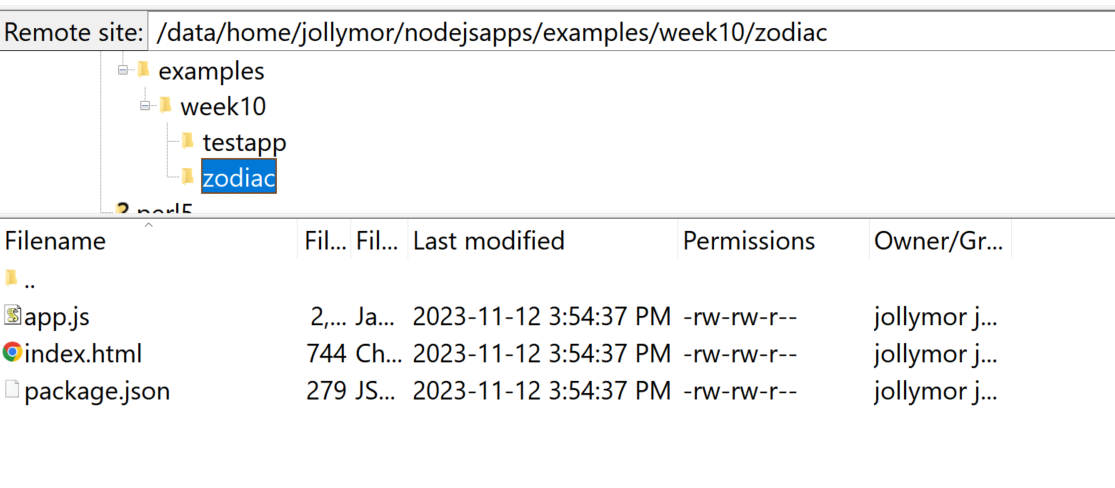
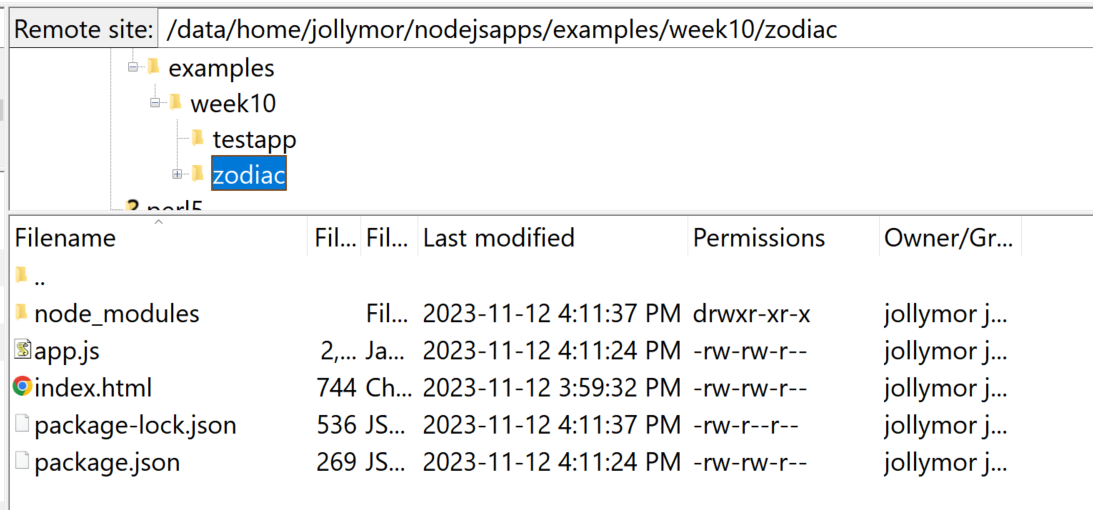
If you check your physical directory for the app, you'll
notice that files like package-lock.json and directories like
/node_modules have been created for you.
Before Ensure Dependencies was clicked After Ensure Dependencies was clicked
Debugging with console.log()
One of the problems with running apps on the server is that
you may not have access to any error logs.
You can make an effort to completely test and debug your
apps locally on your machine before you publish them,
but there might still be circumstances where things
work differently on the server, or you might need to
debug certain errors that are only occuring on the server
and not locally.
On some
servers, the admin might have set things up so that you can
see your own error logs for Node.js. In that case,
the logs will be at the location
/home/user/nodejsapp/logs
Where "user" is your username on the server and
"nodejsapp" is the directory where all your Node.js
apps are located. If you don't have any such directory,
then the server administrator isn't allowing you
access to these logs and they are likely all stored
in a central area for all users (and you will not be
able to access that directory).
In this case, you can add some code to your
main app.js file that will redirect all console.log()
output and error output to log files in your own
project's directory in your own server space.
Place this code in your app.js file, above all other
code you have:
const fs = require("fs");  // unless you already have this
const util = require("util");  // unless you already have this

// create a file output stream to a /debug.log file in your project's directory
let log_file = fs.createWriteStream(__dirname + '/debug.log', {flags : 'w'});
// standard output stream and standard error stream variables
let log_stdout = process.stdout;
let log_stderr = process.stderr;

// rewrite console.log function so that now it
// writes any console.log output to the log file
// and the standard output stream and standard error stream
console.log = function(d) { //
    log_file.write(util.format(d) + '\n');
    log_stdout.write(util.format(d) + '\n');
    log_stderr.write(util.format(d) + '\n');
  };
// create an output stream to a stdout.log file in the project directory
let access = fs.createWriteStream(__dirname +
    '/stdout.log', {flags : 'w'});
process.stdout.write = process.stderr.write = access.write.bind(access);
// when an exception occurs, write the exception and call stack
// to the console
process.on('uncaughtException', function(err) {
  console.error((err && err.stack) ? err.stack : err);
});

// rest of your code below this line
I added the comments in case you want to try and
understand the code or in case you want to edit
anything. Feel free to remove the comments.
This code basically creates output streams for a debug.log file
and stdout.log file that is saved in your project's directory
on the server. Any calls to console log will write the output
to both files instead of on the console. Also, any uncaught
exceptions are also written to the stdout.log file.
When you want to see if there are errors in your error log,
just look inside the project's directory and view the two
.log files. You can remove the .log files when you're done
debugging.
You could even leave this code in while debugging locally:
it will work the same way, creating the .log files locally.