It's very rare that you would use plain Node.js
on its own: you'll usually use frameworks that are
based on Node.js (in these lessons I'll show you
how to use Express.js). But it's a good idea to
try some vanilla Node.js programs so that you can
better understand how Node.js programs are coded
and how they work. If you're new to server-side
programming, this will be quite a learning curve so
it's best to start off easy. If you've come from
a background of server-side languages like PHP,
you'll find that Node.js is very different.
In Node.js programs, you generally start with a server
that listens for and handles incoming requests. In languages
like PHP, this is all taken care of for you, and you
simply write the logic to make your program work.
But in Node.js, a lot of the work involves writing
code that receives incoming requests, deciding
what functions should handle those requests, and then
preparing and sending off the appropriate response.
This lesson takes you through your first Node.js
application: you'll learn the basics of Node.js
and some of its built-in modules, how to import
these built-in modules and how to create a server
that listens for requests and sends responses.
Pre-Requisites
The most important pre-requisite for learning Node.js
is JavaScript: it is assumed that you already have a
grasp of JavaScript variables, functions (including
passing functions to other functions), basic control
structures, and arrays/collections. It's also helpful
if you've worked with
asynchronous operations
such as async or fetch();
if you also understand Promises, that's even better.
I find that these are two of the best resources for
learning and actually understanding JavaScript and how
things work with a JavaScript application:
MDN JavaScript
Guide - an excellent resource
with interactive tutorials and "try me" examples; I often use
a lot of their examples and tutorials in my classes
It would also be beneficial to read through the
Introduction to Node.js tutorial
so that you understand a bit about how Node.js works:
this will help you understand the code you will be
writing in this lesson.
Creating and Using the Server
The foundation of a Node.js application is the
server. Not the physical server
that your apps reside on, but the server application
that is part of Node.js. One of the modules that
comes with Node.js is the HTTP module.
The HTTP module contains many useful classes for handling
requests and responses, but first you need to create an
instance of it's Server class. Every Node.js application
contains a server: The http.Server class contains many events
and functions for handling requests. Once you create an instance
of the server class, it sits and waits for requests
to come in. When the server receives a request, it uses
your code to process the request, prepare a response,
and send the response back to the client.
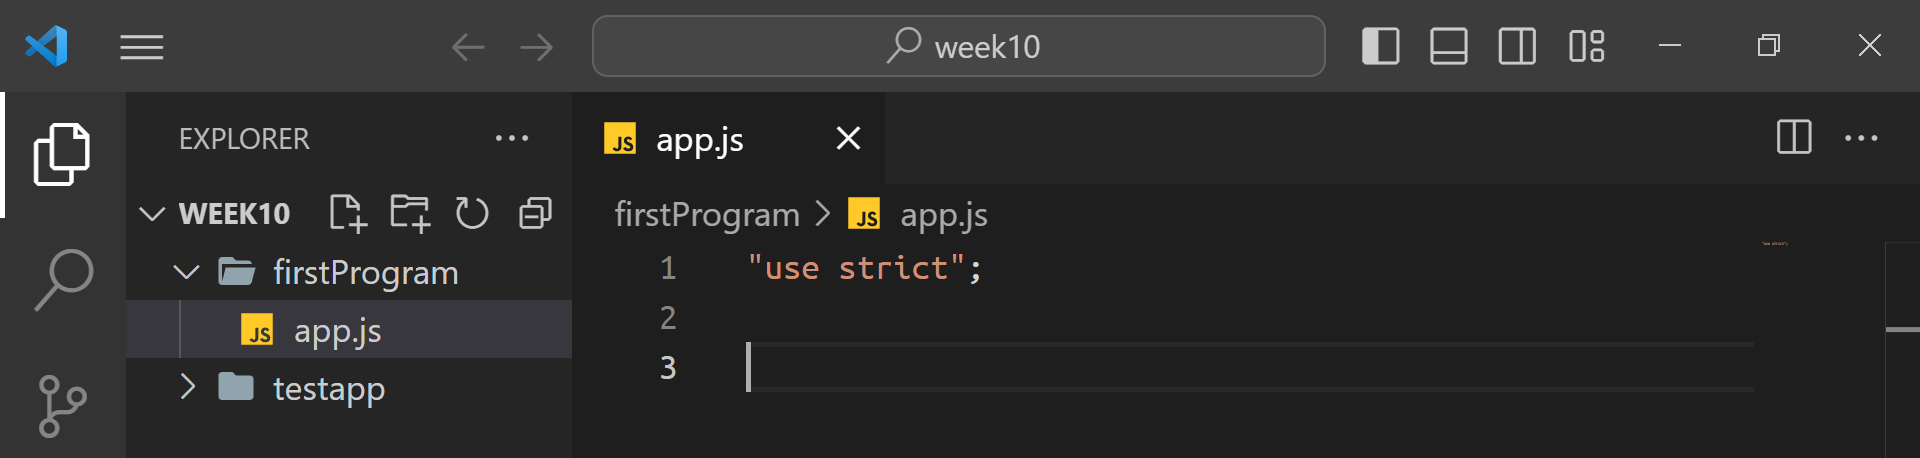
Create a new project in your editor called "/firstProgram"
and add a new JavaScript file called "app.js". Note that
we don't follow the normal directory structure in Node.js
applications that we do for regular web pages, so you don't
need a /scripts directory at this time.
Don't forget to put your script in Strict Mode.
A new Node.js Project with a starting JS file
To use the http module's Server, class, we have to
first import the http module by using the require()
function (I'm using CommonJS module syntax).
"use strict";

const http = require("http");
This code imports the http module and references it with
the http variable. Now we can use the
http variable to invoke functions.
To create a server and configure it, we use the createServer()
function. This function can take an optional set of options
as a JSON object, and a callback function. I won't be covering
the options at this time but you can read about them in
the API
documentation for http.createServer().
The createServer() function returns an instance of http.Server.
The callback function is your request listener:
it's a function that will wait to execute until your server
receives a new request. When a new request is received, your
callback function will execute. The callback can take parameters
for the request object and the response object. You can use these
parameters to get/set request/response headers, read data from the
request body, add output to the response, etc.
"use strict";

const http = require("http");

const server = createServer(function(req, res) {
    // code to execute when a request comes in
});
Once you've set up your server to do what you want
with incoming requests, you "start it up". We do
this by calling the server object's listen()
method. We pass the listen() function a
port number to listen on, and a callback function.
The callback function will execute only once when the
server starts to listen.
"use strict";

const http = require("http");
const port = 3000;

const server = createServer(function(req, res) {
    // code to execute when a request comes in
});

server.listen(port, function() {
    // code to execute when server starts up
});
I used a variable for the port number: this makes it
easier to refer to. In later programs, you could store this
as an application's environment variable.
The port number for our development programs will be 3000:
it's common to use port numbers in the 3000's for testing,
although sometimes people will also use 8080. A real web
application would communicate on port 80 (for http) or 443
(for https) but we can't use those for testing. If you are
unable to use 3000, you can try 8080, or just try 3001, 3002,
etc until you find one that works. Don't use any port
number <= 1024, as those are reserved; the maximum is 65535.
Let's do some very basic tasks for an incoming
request: nothing fancy, we'll just display some
information on the console and then add some information
to the response object.
"use strict";

const http = require("http");
const port = 3000,
    hostname = "localhost";

const server = createServer(function(req, res) {
    // code to execute when a request comes in

    console.log("Received an incoming request.");
    console.log(req.url);

    res.statusCode = 200;
    res.setHeader("Content-Type", "text/html");
    res.end("<h1>Hello World!</h1>\n");

});

server.listen(port, function() {
    // code to execute when server starts up
    console.log(`Server running at http://${hostname}:${port}/`);
});
Let's look at the lines I added:
lines 4,5 I simply added a constant for the host name to make
display easier. When you use Express.js, you can get this information
from other objects/properties instead of setting it.
lines 10,11 I'm printing the request URL to the console.
This is a property of the Request object (an instance of
http.ClientRequest). The
callback you
pass to createServer() automatically populates the req
parameter with the incoming Request object and the res
parameter with the outgoing Response object (an instance of
http.ServerResponse).
line 13 is setting the response object's
statusCode property. You're probably already
familiar with status codes: a response code of 200 sent back
to the client means that everything is "OK" and the request
was successful. Eventually, you can write code that includes
handling errors like 404 (File Not Found) and show your own
custom error pages.
line 14 uses the Response.setHeader() method to
set a response header.
The setHeader() function accepts an HTTP header
name as a string, and then the value you want to assign that
header as a string. In this case, the header being set is
called "Content-Type". This header is used to tell the receiver
(in this case, the client) the what kind of content is in the response
body (the MIME Type) (it can also be included in a request to
tell the server what kind of data is in the response body).
Here we state that it's plain text/html. This lets the client
(browser) know that it can just render this response right in the
browser as regular html. If instead you set the content type to "text/plain",
the the response body would be treated like plain text. This
means that your browser wouldn't render it as HTML: it would
instead display the raw HTML as text. You can try this later, if you
want! Just change the "text/html" to "text/plain" and see how
the output in the browser changes.
line 15 uses the Response.end() function to send
the response back to the client and then close this
particular connection. HTTP is stateless: the connection between
client and server is not maintained or left open; the connection
is closed immediately. The end() function can accept
a string: this value will be added to the response body.
In lines 13 to 15 we sent back a response of 200 (OK) and included
some plain text/html in the response body. The client will receive
the response and as a result, render the output in the browser.
line 20 is executed once when the server starts up:
it simply displays a message that the server is ready and listening
on the host name and port number we defined.
To run your program locally, open a terminal window
or command prompt window
and run npm init and then node app.
If you need a reminder on how to run Node.js programs,
see Writing and Running a Test Application
from the installation instructions.
If you like, you can also upload and register your app
on cPanel. For instructions to do this, see
Running a Node.js App on cPanel.
Adding a Third-Party Module
Modules are JavaScript files that perform a specific task,
contain a certain functionality, or are libraries
(e.g. a collection of related functions/constants/objects/etc)
When you had require("http") you were
"importing" or "using" a module that contains objects/functions
related to http requests and responses.
There are lots of modules that come with Node.js:
these are core modules.
Many frameworks such as Express.js have additional modules
that you can use. Some people create modules for others to use:
third-party modules.
You can view some of these third-party modules at the
Node Package
Manager repository.
Use the SEARCH bar to search for a topic e.g. "cities"
or "currency" and see what comes up.
In my example, I'm going to use this
module chinese-year by Song Wang that
gets the
zodiac animal of a specific year.
You an see on the page that it has a function called
getAnimal() that takes a year as a number
and returns a string containing the zodiac animal for
that year.
This application will use a form to get a year from
the user. When the user clicks SUBMIT, we will use the
chinese-year module to retrieve the zodiac animal.
Then will will display the result.
The application will involve handing a request for the
main index page, and also a request triggered by the form
submit. We'll handle these together: in a real program,
you would route each
of the two requests to different functions. We'll
do this in another lesson.
Create a new project directory: I'm calling mine
/zodiac.
Add an app.js file and add Strict Mode.
We also would like a constant for the port number (use whatever
port number you were able to use in the first example).
We also need to import the "http" module.
We also need to import a module called "fs" - fs stands
for File System. The "fs" module contains classes
and functions
you can use to interact with the file system.
Lastly, we need to import the "chinese-year" module
we want to use.
Now we can add the statements to create our server object
and also listen on our selected port. I'm going to use a different
technique from the one I used before:
http.createServer( (req, res) => {

}).listen(port, () => {
  console.log(`Server running on port ${port}`);
});
In the earlier program, we wrote this as two statements:
const server = http.createServer(...);
server.listen(...);
The createServer() function returns an instance
of the Server class, so you can chain the .listen() function
to the createServer() function. This is exactly the same
as the two statements above. It doesn't matter which way you
do it in this program. You'll develop a preference, or you'll
find when you get more advanced, you'll see that one technique
might be more useful than another.
The callback for our createServer() function is going to
handle both the request for index.html and the request
for ./getyear (the action in the form submission) in the same
function. Typically, you would handle these separately, but
we'll learn to do that in a later tutorial.
Regardless of which URL the user is requesting, our response
will be in plain text/html, so let's get that out of the way:
"use strict";

const port = 3000,
    http = require("http"),
    fs = require("fs"),
    chineseYear = require("chinese-year");

http.createServer((req, res) => {

    // response will be in text/html
    res.setHeader("Content-Type", "text/html");


}).listen(port, () => {
    console.log(`Server running on port ${port}`);
});
When a request comes in, we need to know if it was
triggered by the form submission or not. We can test
the request URL: if it contains "getyear", then it must
have been triggered by the form submission. Otherwise,
it's for the index.html file (or some other URL we
aren't dealing with: for those, we'll just send the user
to the index.html page).
// if the request URL contains "getyear", it was triggered
// by form submission
if (req.url.indexOf("getyear") >= 0) {

} else {  // all other requests will load index.html

}
As discussed earlier, the callback to createServer() has two
paramters: req, which is the request object,
and res, which is the response object. The
expression req.url is accessing the url
property of the request object. There are many useful
properties in the request object! We'll display some of the
other ones in this program, later.
The req.url property doesn't actually contain
the full URL: it only contains the path (the part you type after
you enter localhost:3000 or your server name). If you want to
see, add a console.log(req.url); above your
if statement!
The indexOf() function is one that you should
already be familiar with in JavaScript: it returns the index of
the location of the specified string (and returns -1 if the string
does not exist). We use this to find out if the URL contains the
string "getyear".
Now let's write the code to get the input from the form:
Form inputs are stored in a query string in
either the request URL (for GET requests) or in the request body
(for POST requests). In my form, there is no method
attribute: therefore the method defaults to a GET request.
This means that the form input is in the request URL.
Regardless of where the query string is located, it is sent
to the server as a series of key-value pairs.
The key, or index, of each pair is the value of the
name="" attribute of a form's input field
(or select, or textarea, etc). In my form, the year input
field has name="year". The value part of the
key-value pair is the inputted value. So if you typed "2023"
in your input field, then this is sent to the server as
year=2023.
In plain Node.js, we can only grab the query string
from the URL if we construct a URL object so
that we can
use a function to obtain the query string values. Once you learn
Express.js, you won't need to do this: there will be an easier
way. But for now, we will do it this way.
let urlObj = new URL(`https://${req.headers.host}${req.url}`);

// get the parameter for the year input
let year = urlObj.searchParams.get("year");

// if we have a valid year, use it, otherwise use current year
year = (year) ? year : new Date().getFullYear();
First, we construct a new URL object using the
host name and
the request object's url property.
Recall that req.url
doesn't actually contain the entire URL, so we concatenate it
to the hostname, which we can retrieve from the
req.headers.host property.
The req.headers
property contains an object of key-value pairs for each of the
request headers that was sent in the Request object.
If you wanted to see all the headers just out of interest, feel free
to add a console.log(req.headers); to your code
so you can have a look! You can access an individual header by
it's key name (which is the header name, e.g. req.headers["content-type"]
or req.headers.cookie) although some header values are arrays
and comma-delimited lists. See message.headers in the API for more details.
Also, I added "https://" to my URL because I also test my
programs on a cPanel server where I'm using https. If you're
not doing this, you don't need to include it (although it works
in your browser locally anyway). If your server doesn't support
https and your browser is being annoying about it, just change it
to http:// or leave it out.
The next statement
let year = urlObj.searchParams.get("year");
uses the URL object's searchParams property.
The searchParams property contains
a
URLSearchParams object that
contains the query
string's key-value pairs (these pairs are sometimes referred to as
"parameters"). The URLSearchParams object has properties for
each key, and the value of each property is the value associated
with that key. For example, since our query string had one
key-value pair (or one parameter) as year=2023
(or whatever year was entered), then the URLSearchParams object
should have only the one parameter called "year".
I then invoke the get() method on the URLSearchParams
object to retrieve the value of the parameter (or key-value pair)
"year". This should return the year that was actually input,
and that value is stored in the year variable.
The last statement
year = (year) ? year : new Date().getFullYear();
uses a normal JavaScript conditional with the JavaScript Date
object to get the full, 4-digit year if the year in the
query string doesn't exist or is empty. This ensures that
we have a valid year, even if the user didn't type anything.
Now let's use the chinese-year module to get the zodiac
animal for the user-entered year:
const animal = chineseYear.getAnimal(year);
In the documentation page for the chinese-year module,
you might recall seeing that there is one endpoint
for this module: the getAnimal() method.
An endpoint is one end of a communcation
between two parts: in this case, getAnimal() is the end point
you use for your program to communicate with the chinese-year
module. Some modules might have many endpoints.
The getAnimal() method requires a year as an argument,
and it returns the zodiac animal as a string (you also saw this
in the documentation page for the module). We are passing in
the user-entered year (or the current year, if no year was found
or the input was empty) and storing the result in the animal
variable.
I'm also going to add some stuff to the console for
debugging and for your own interest:
Feel free to skip anything you're not interested in.
Lastly, I'm going to send a 200 OK status code and
write the zodiac animal to the response body:
res.statusCode = 200; // 200 = OK
res.write(`<h1>Chinese Year</h1><p>${year} is year of the ${animal}</p>`);
res.end();
That's the If-Block of our code (if the URL contained "getyear").
Now let's do the else block (all other requests). We want to
read in the index.html file and add that file to the response
body with a 200 OK status code. If for some reason the index.html
file can't be found, we'll send a 404 NOT FOUND status code
along with an error message:
fs.readFile("index.html", (error, data) => {
if (error) { // error finding/reading file
res.statusCode = 404;
res.write("<h1>File Not Found</h1>");
console.log(error); // for debugging
} else { // no errors, get the file
res.statusCode = 200;
// data contains the file contents
// write the file's contents to the response body
res.write(data);
}
// all done either way, send the response
res.end();
});
invokes the readFile method from the "fs"
(file system) module. The readFile() method accepts the name of the
file you want to read, and a callback function that will
automatically execute after the file has finished reading.
This function is a non-blocking
operation, so it won't block the event
loop.
The callback to the readFile() function
accepts two parameters: error is any
exception object that might have occured when trying to
read the file or its data. data is the data
that was read in from the file if the read was successful.
In the callback function up above, I'm using an if-statement
to see if there was an error or not. If there was an error,
I send the response back with a status code of 404 (NOT FOUND)
and I write the "File Not Found" error message to the response
body. Earlier in the createServer() callback, we set the
content-type header to plain text/html, so this will be
rendered in the browser.
In the else block, I set the status code to 200 OK and then
wrote all the file's data to the response body. Again, since I set
the content-type to plain text/html earlier, the browser
will render the response body as HTML in the browser.
Here's my version of the finished app.js file, for reference:
"use strict";
const port = 3000,
http = require("http"),
fs = require("fs"),
// a third party module https://www.npmjs.com/package/chinese-year
chineseYear = require("chinese-year");
http.createServer((req, res) => {
// response will be in text/html
res.setHeader("Content-Type", "text/html");
// if the request URL contains "getyear", it was triggered
// by form submission
if (req.url.indexOf("getyear") >= 0) {
let urlObj = new URL(`https://${req.headers.host}${req.url}`);
// get the parameter for the year input
let year = urlObj.searchParams.get("year");
// if we have a valid year, use it, otherwise use current year
year = (year) ? year : new Date().getFullYear();
const animal = chineseYear.getAnimal(year);
// for debugging
console.log(`request URL: ${req.url}`);
console.log(`URL object: ${urlObj}`);
console.log(`params: ${urlObj.searchParams}`);
console.log(`year: ${year}`);
res.statusCode = 200;
res.write(`<h1>Chinese Year<h1><p>${year} is year of the ${animal}</p>`);
res.end();
} else { // all other requests will load index.html
fs.readFile("index.html", (error, data) => {
if (error) { // error finding/reading file
res.statusCode = 404; // 404 = NOT FOUND
res.write("<h1>File Not Found</h1>");
console.log(error); // for debugging
} else { // no errors, get the file
res.statusCode = 200; // 200 = OK
// data contains the file contents
// write the file's contents to the response body
res.write(data);
}
// all done either way, send the response
res.end();
});
}
}).listen(port, () => {
console.log(`Server running on port ${port}`);
});
Try your program and see if it works! To run the program, you
have to install the chinese-year module using the npm
command.
Initialize your application: npm init
Enter all the relevant values.
After the initialization has finished, install the chinese-year
module: npm install chinese-year -s
npm install means that you're about to add
one or more modules to your app
chinese-year is the name of the module to install
-s (or you can use --save) means
that you want to save this module as a dependency to your project
(it's part of your project, your project needs this module in order
to work properly)
In future you might install more than one module: just
separate with a space, e.g. npm install module-one module-two -s
When you add the chinese-year module as a dependency,
this will create some extra files/directories in your
project: go have a look!
In your project directory, you should see two additional things:
package-lock.json: this file is used by
Node Package Manager to keep track of your package installations
and project dependencies
/node_modules: this directory contains the code
for any packages you installed. In this case, the chinese-year
package is installed here.
Do not touch or change any of these files/directories.
Run your program: node app
What the console as you test out your app.
Now go to your browser and go to localhost:3000/zodiac
- the index page should load
Enter a year (not the current year because we want to make
sure the user-entered year is accepted) and press the button.
You should see the output in the browser with the year
you entered and the correct zodiac animal.
If you want to run your project on a server that has cPanel,
you only need to upload the source files/directories (e.g. the
index.html and the app.js) and the package.json file. Do not
upload package-lock.json or /node_modules. You should have
cPanel install these dependencies for you (see the
Node.js on cPanel Tutorial for more
information).
Adding Your Own Module
You can also add your own module that you wrote yourself.
To create a module, you put the functions and variables/objects
in a separate .js file in your project, and then you
import it.
When coding a module, you have to expose the functions/variables
you want available in other programs. We do this by adding
variables and functions to the exports object.
If you'd like to try an example, start a new project
(I'll call mine /mymodule).
Add a sub-directory called /modules and then add
chat.js to it. Copy the raw code from this
file on GitHub into your chat.js module:
chat.js module.
Now let's use our module. Add the app.js file to the
root of your project and add the code to create a variable
for the port number and the http module.
We'll also add our chat module. You can import it using
the same require() function: just pass require()
the location of your chat.js module:
const port = 3000,
    http = require("http"),
    // import the chat.js module and refer to it with
    // the variable "chat"
    chat = require("./modules/chat.js");
Now add the code to create the server and then listen
on your selected port number, just as we did in the previous
two examples.
Inside your createServer() callback, we'll test out
some of our module's variables and functions:
const port = 3000,
  http = require("http"),
  // import the chat.js module and refer to it with
  // the variable "chat"
  chat = require("./modules/chat.js");

  http.createServer((req, res) => {
      res.setHeader("Content-Type", "text/html");

      if (req.url.indexOf("chat") >= 0) {

          res.statusCode = 200;

          res.write(`<p>${chat.hi}</p>
            <p>${chat.conversation.greet("Kitty")}<br>
            ${chat.conversation.give(2)}</p>
            <p>${chat.bye()}`);

          res.end();
      } else {
          res.write("<h1>Not Found</h1>");
          res.status = 404;
          res.end();
      }
  })
.listen(port, () => {
    console.log(`Server running on port ${port}`);
});
Notice how we reference the exposed variables/functions
in our chat module: since I stored the reference to the
module in the variable chat, that's how
I can use or invoke each item: chat.hi
will reference the hi variable in the chat.js
module, chat.conversation refers to the entire
conversation object I defined inside chat.js,
so therefore chat.conversation.greet() is used
to invoke that object's greet() method.
Initialize the program and run it - you don't have to install
your module since it's already part of your project's files:
npm init (press enter and fill in the details) node app
Then go to your browser and visit localhost:3000/chat to see the
output.
You can also test it on your server if you want, just add
/chat to the end of your URL (assuming you registered the app
with /chat as the end point).
Practice Exercises
For each exercise, set up a new project directory.
Run and test each project locally and on your server,
if you have access to one.
Write a very simple Node.js application that displays your
name in the browser window as a level-1 heading when the request
is for /myname.
e.g. localhost:3000/myname and your.domain.com/myname
All other requests should show a level-1 heading with "Sorry, not
found." with a status code of 404
Make sure you display a message in the console when your
server starts listening, so you know it's working.
Make a copy of the previous exercise and modify it so that your
circle.js file contains a constructor function or a class
that models a circle. Your Circle objects should have a
radius value. When the Circle is constructed with no
radius, the radius gets a default value of 1. The Circle
object has two additional accessor properties:
circumference and area. Lastly,
give your circle a toString() function
that displays the circle and its radius.
Update your app.js code so that a new circle object
is created with the user-entered radius and the
circumference/area are read via get-properties of your
circle object.
TIP: assign your constructor/class to
module.exports to expose it to your app.